Creating NAT Gateway Connections to Latitude.sh
Latitude.sh is a Megaport-owned bare metal and cloud infrastructure provider. You can create a VXC from a NAT Gateway to Latitude.sh to route traffic between Latitude.sh and other cloud environments on the Megaport network without requiring physical infrastructure.
BGP is required for all Latitude.sh connections. To create a connection, specify an ASN, BGP password, and the prefixes to advertise. The connection becomes live after Latitude.sh approves the request.
Prerequisites
Before you create a connection to Latitude.sh, make sure you have:
-
A Megaport account – If you don’t have an account, see Setting Up a Megaport Account.
-
A Latitude.sh account – A Latitude.sh company account is automatically created the first time a user from your Megaport organization signs in to the Latitude.sh Portal with their Megaport account.
For more information, see Connecting to Latitude.sh. -
A NAT Gateway – If you don’t have a NAT Gateway, see Creating a NAT Gateway.
Creating a connection to Latitude.sh
To set up a connection to Latitude.sh with Megaport, you need to create a VXC from your NAT Gateway in the Megaport Portal to the Latitude.sh location where you have provisioned your Latitude.sh services.
To create a connection to Latitude.sh
-
In the Megaport Portal, go to the Services page.
-
Select the NAT Gateway you want to use.
If you haven’t created a NAT Gateway, see Creating a NAT Gateway. -
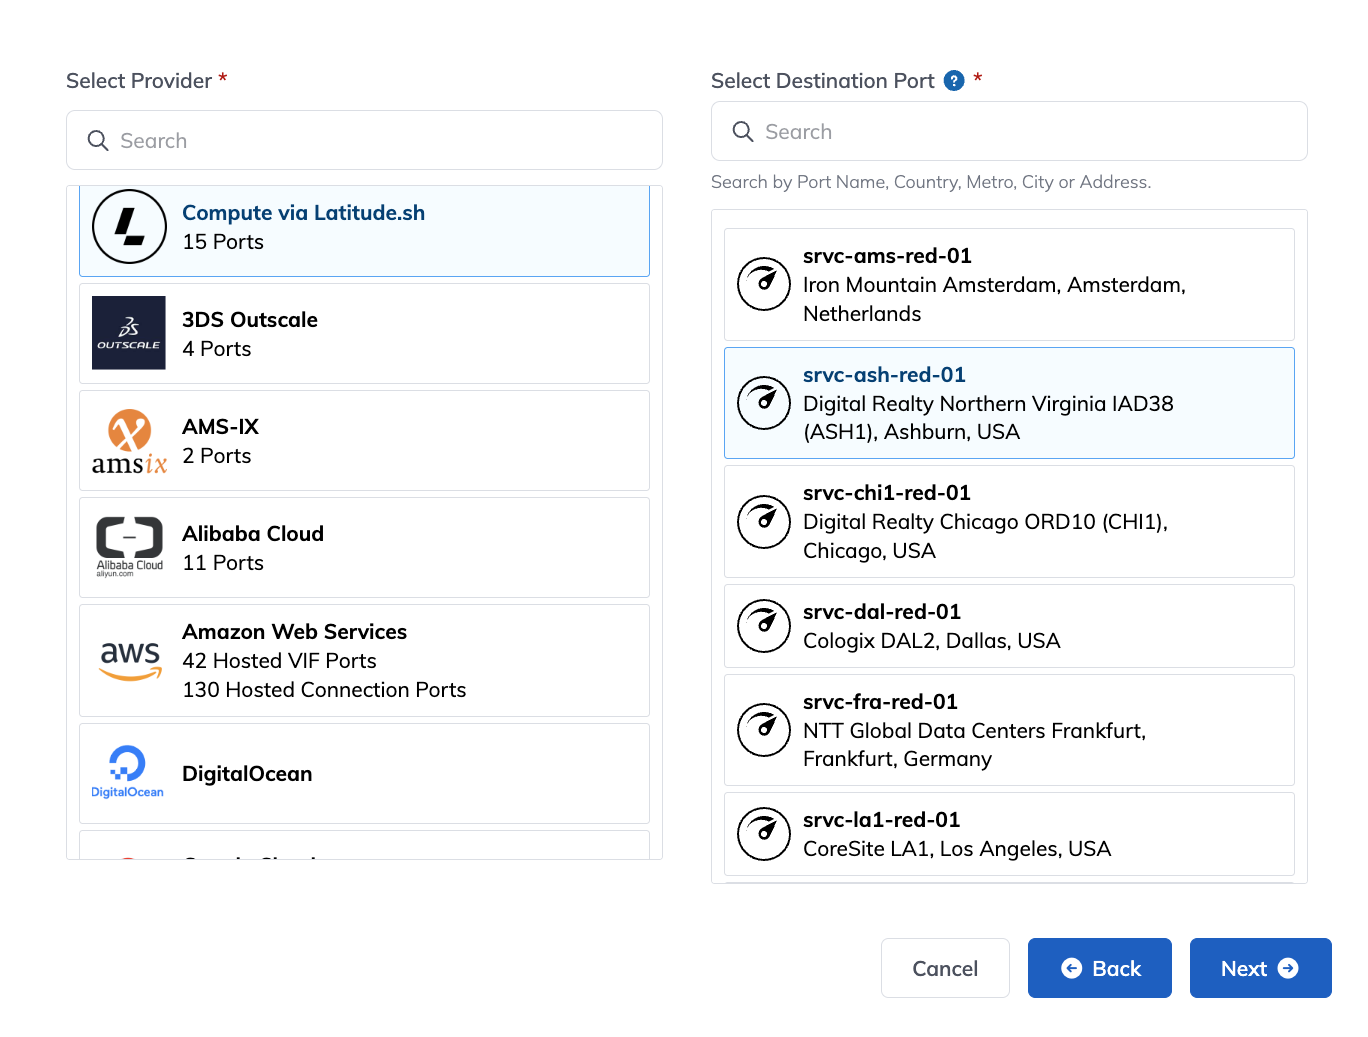
Click +Connection, click Cloud, then click Compute via Latitude.sh.
-
Select the target location for your connection then click Next.
-
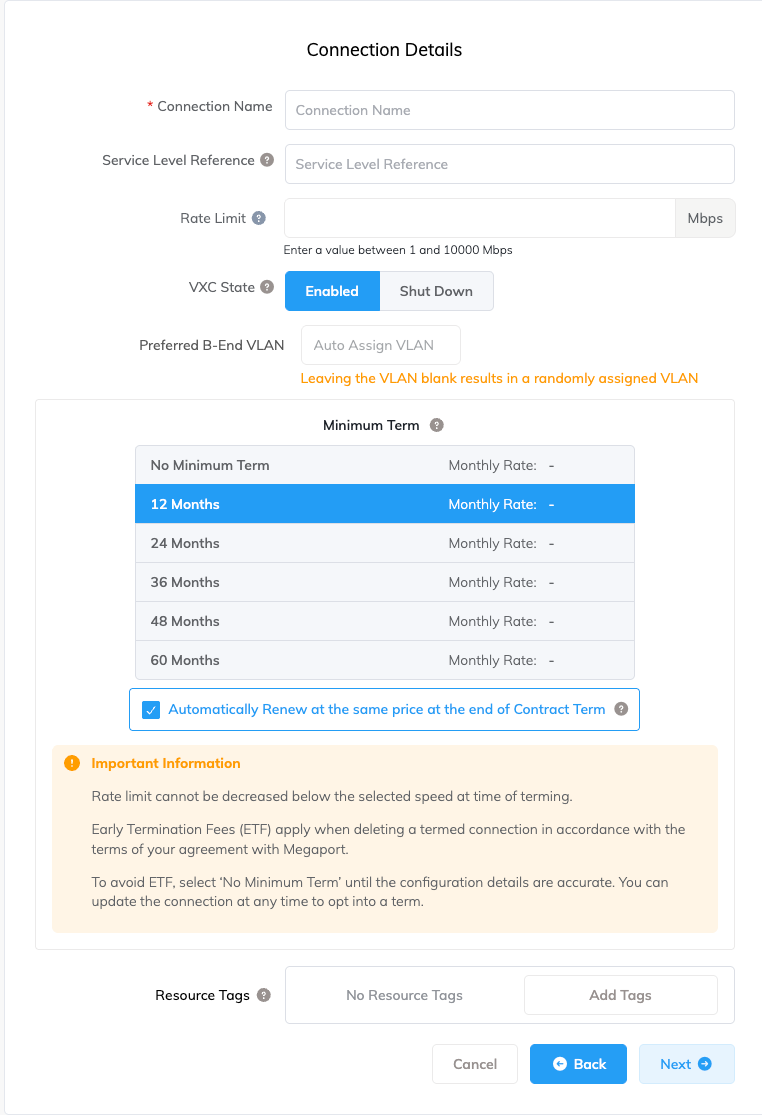
Specify the connection details:
-
Connection Name – The name of your VXC to be shown in the Megaport Portal.
-
Service Level Reference (optional) – Specify a unique identifying number for your Megaport service to be used for billing purposes, such as a cost center number, unique customer ID, or purchase order number. The service level reference number appears for each service under the Product section of the invoice. You can also edit this field for an existing service.
-
Rate Limit – The speed of your connection in Mbps.
-
VXC State – Select Enabled or Shut Down to define the initial state of the connection. For more information, see Shutting Down a VXC for Failover Testing.
Note
If you select Shut Down, traffic will not flow through this service and it will behave as if it was down on the Megaport network. Billing for this service will remain active.
-
Minimum Term – Select No Minimum Term, 12 Months, 24 Months, 36 Months, 48 Months, or 60 Months. Longer terms result in a lower monthly rate. 12 Months is selected by default. Take note of the information on the screen to avoid early termination fees (ETF).
Enable the Minimum Term Renewal option for services with a 12, 24, 36, 48 or 60-month term to automatically renew the contract at the same discounted price and term length at the end of the contract. If you don’t renew the contract, at the end of the term, the contract will automatically roll over to month-to-month contract for the following billing period, at the same price, without term discounts.
-
Resource Tags – You can use resource tags to add your own reference metadata to a Megaport service.
To add a tag:- Click Add Tags.
- Click Add New Tag.
- Enter details into the fields:
- Key – string maximum length 128. Valid values are a-z 0-9 _ : . / \ -
- Value – string maximum length 256. Valid values are a-z A-Z 0-9 _ : . @ / + \ - (space)
- Click Save.
If you already have resource tags for that service, you can manage them by clicking Manage Tags.
Warning
Never include sensitive information in a resource tag. Sensitive information includes commands that return existing tag definitions and information that will identify a person or company.
-
-
Click Next.
-
Review the NAT Gateway A-End connection details.
For more information, see Configuring a NAT Gateway VXC. -
Click Next.
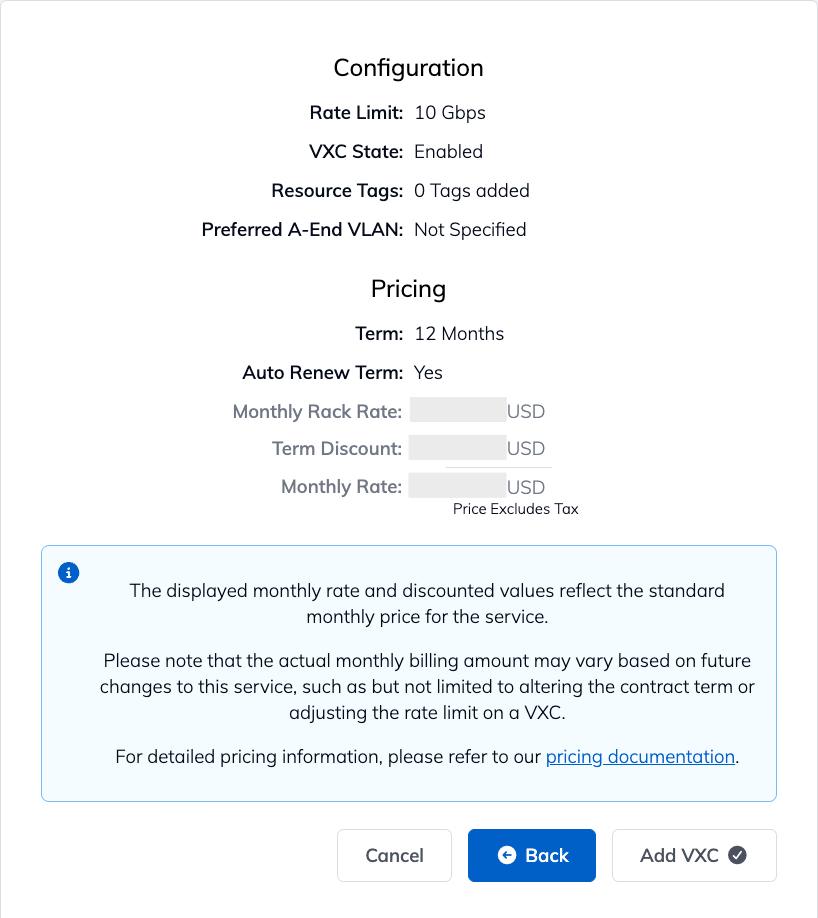
A summary page appears that includes the monthly cost.
-
Click Back to make changes, or click Add VXC.
-
Click Review Order to proceed through the checkout process, or click Save to save the configured services before placing the order.
-
Review the Important Information section and confirm agreement with the Service Agreements.
If you do not have a promotion code, skip to the Order Now step. If you do have a promotion code, enter it into the Enter discount code field then click Apply. Alternatively, if a code already appears in the Discounts field, verify it is correct and click Apply.
The promotional discount appears below the Standard Term discount. This discount is not reflected in the Monthly Rate shown here, it is applied at the time of billing. If an invalid or expired code causes an error with your order, contact your Megaport Account Manager for a replacement code.
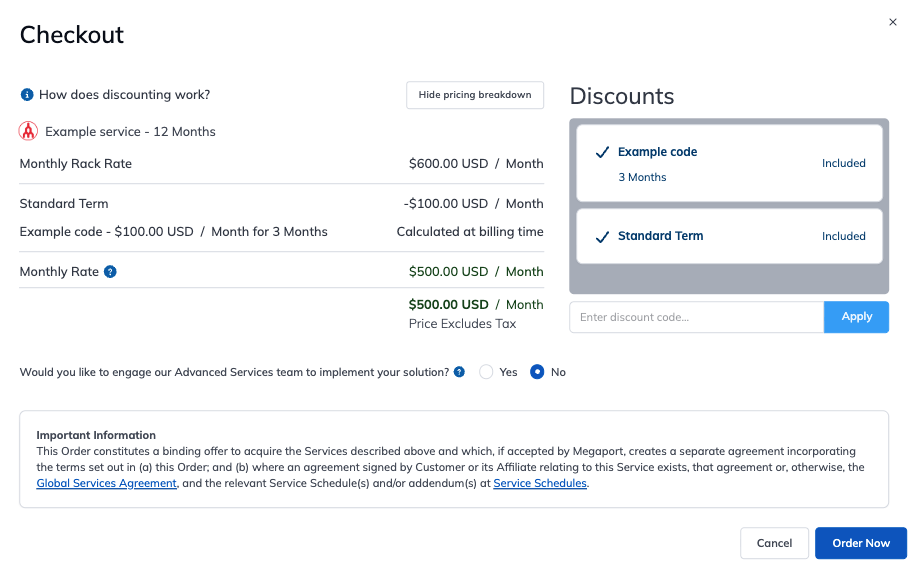
If you entered an incorrect promotion code, you can remove it by clicking Remove.
-
Click Order Now.
The connection becomes live after Latitude.sh approves the request.
Note
After ordering, the connection status shows Deployable until it is provisioned. When Latitude.sh approves the connection and provisioning is complete, the status updates to Configured.