Creating MVE Connections to AWS Direct Connect with Cisco SD-WAN
You can create a network connection from an MVE (a Cisco interconnect gateway) to AWS with Virtual Cross Connects (VXCs) and AWS Direct Connect. You can create either a Hosted Connection or a Hosted VIF. You create the connection through vManage.
Note
Although you can create the AWS connection from the MVE in the Portal, Megaport strongly recommends creating this connection in vManage for seamless integration with your Cisco SD-WAN environment.
Cisco provides documentation for their SD-WAN product integration with Megaport, including cloud connections, in the Cisco SD-WAN Cloud OnRamp Configuration Guide.
Before you begin
Before you can create a connection to AWS, you need to satisfy these requirements:
-
Create an MVE (Cisco interconnect gateway) in vManage. For more information, see Creating an MVE.
-
Register your AWS Account number with vManage. You can add your AWS account to vManage in Configuration > Cloud OnRamp For Multi-Cloud and in the Setup tile click Associate Cloud Account or from Navigation > Cloud > Add | Account.
-
In AWS, ensure that you have configured the Direct Connect gateway, AWS gateway, VPCs, and related attachments and associations. With your AWS account linked, these values populate in vManage in the Cloud OnRamp for Multi-Cloud > Host Private Networks page.
-
For the VPC, you need a VPC tag and ensure the VPC is Interconnect Enabled. (You will provide the VPC tag when you configure your virtual interface.)
On the Host Private Networks page, select the VPCs to be tagged for interconnection with the SD-WAN and choose Add Tag from the Tag Actions drop-down menu. Enter a tag name and select the box for Enable for InterConnect and click Add.
Creating a connection to AWS
With your AWS account linked and the VPC details, you can create the connection.
To create an AWS connection
-
In vManage, go to Configuration > Cloud OnRamp for Multi-Cloud.
-
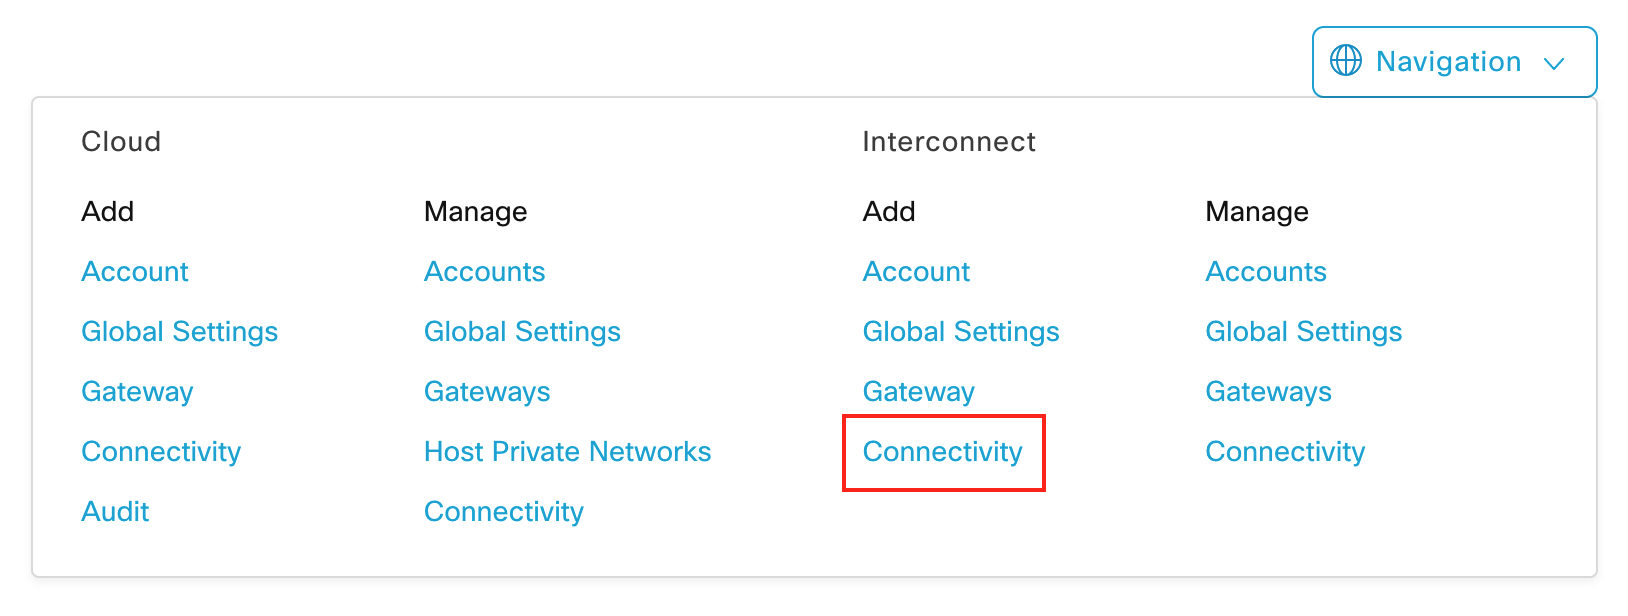
From the vManage Navigation menu in the upper-right, go to Interconnect > Add | Connectivity.
-
Choose Megaport as your Interconnect Provider.
-
Choose your Interconnect Account.
This is the Megaport account that is associated with your vManage platform.
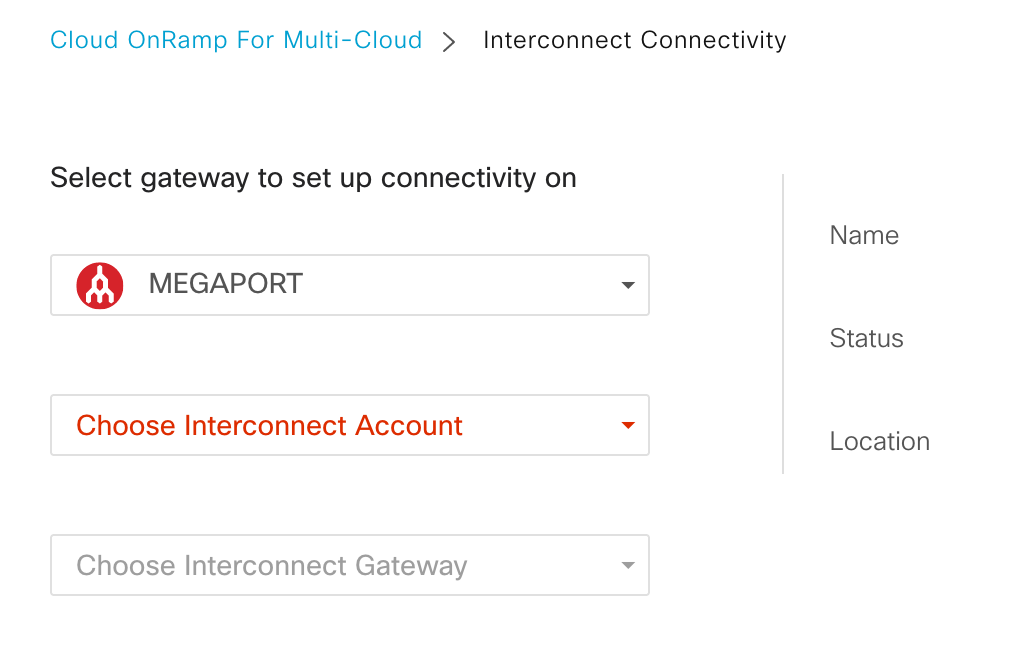
-
Choose your Interconnect Gateway.
Configured interconnect gateways appear in the drop-down menu. The status for the selected gateway appears in the pane to the right. A fully operational gateway displays a checkmark in a green circle. -
Click +Add Connection and enter details for the connection destination.
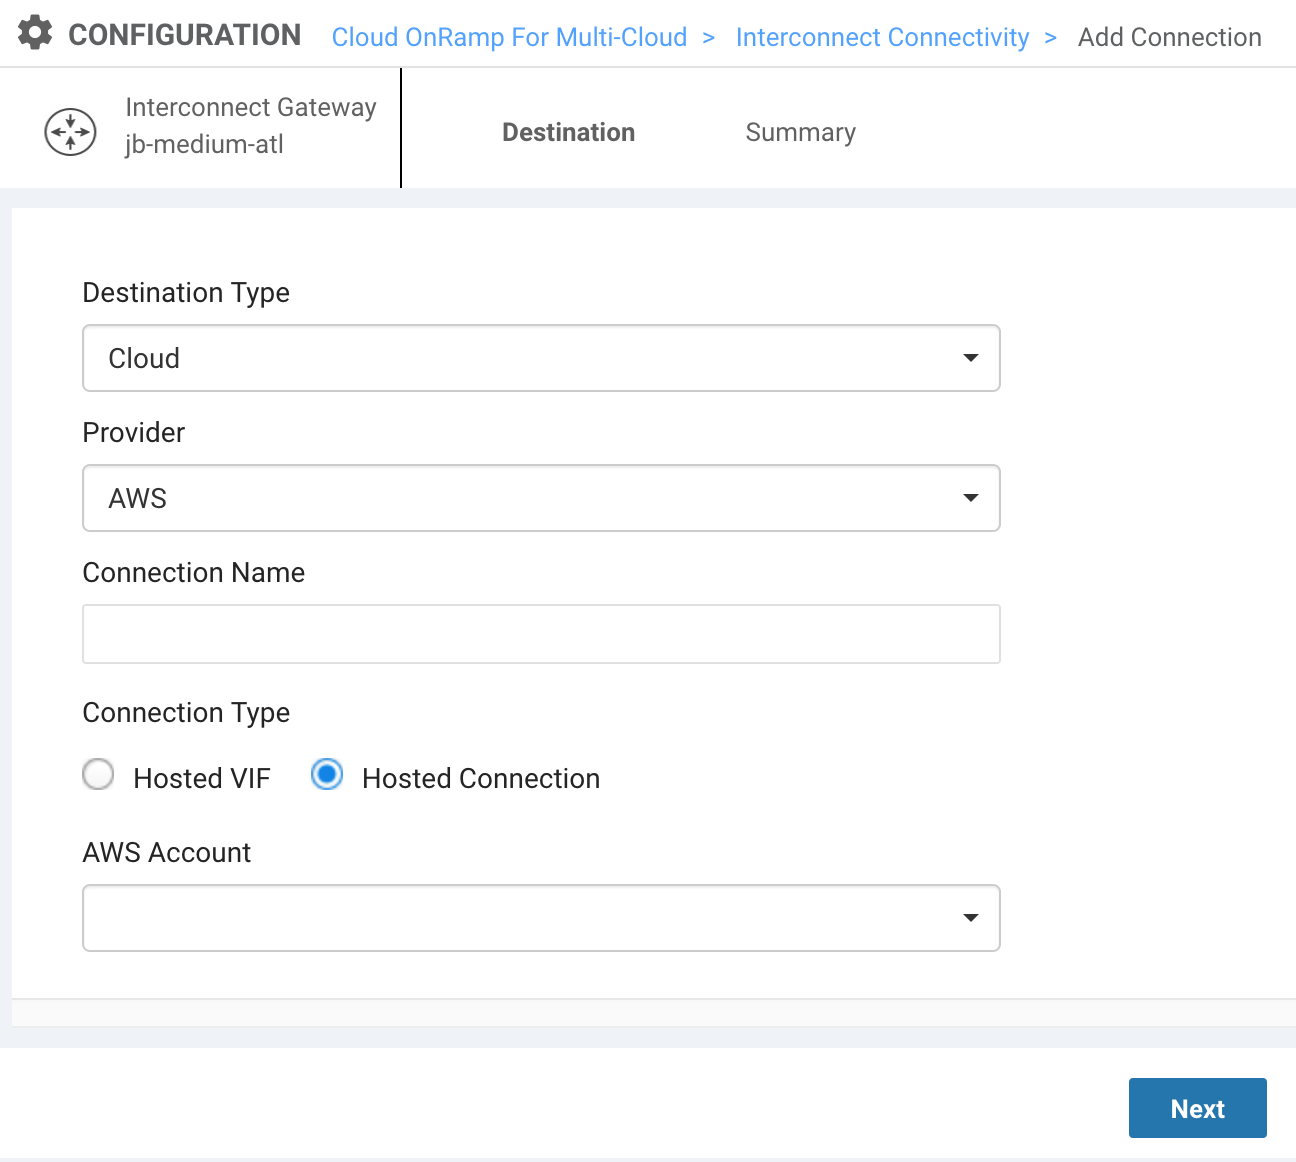
Provide these details:- Destination Type – Choose Cloud.
- Provider – Choose AWS.
- Connection Name - Specify a name for the AWS connection that is easily identifiable.
- Connection Type - Select one of these options:
- Hosted Virtual Interfaces (Hosted VIFs) – a connection that shares bandwidth and can connect to public or private AWS cloud services.
- Hosted Connections – a dedicated connection that can support transit gateways. (Recommended for production environments.)
- AWS Account – Select your AWS Account. The menu populates the accounts registered with vManage.
-
Click Next.
-
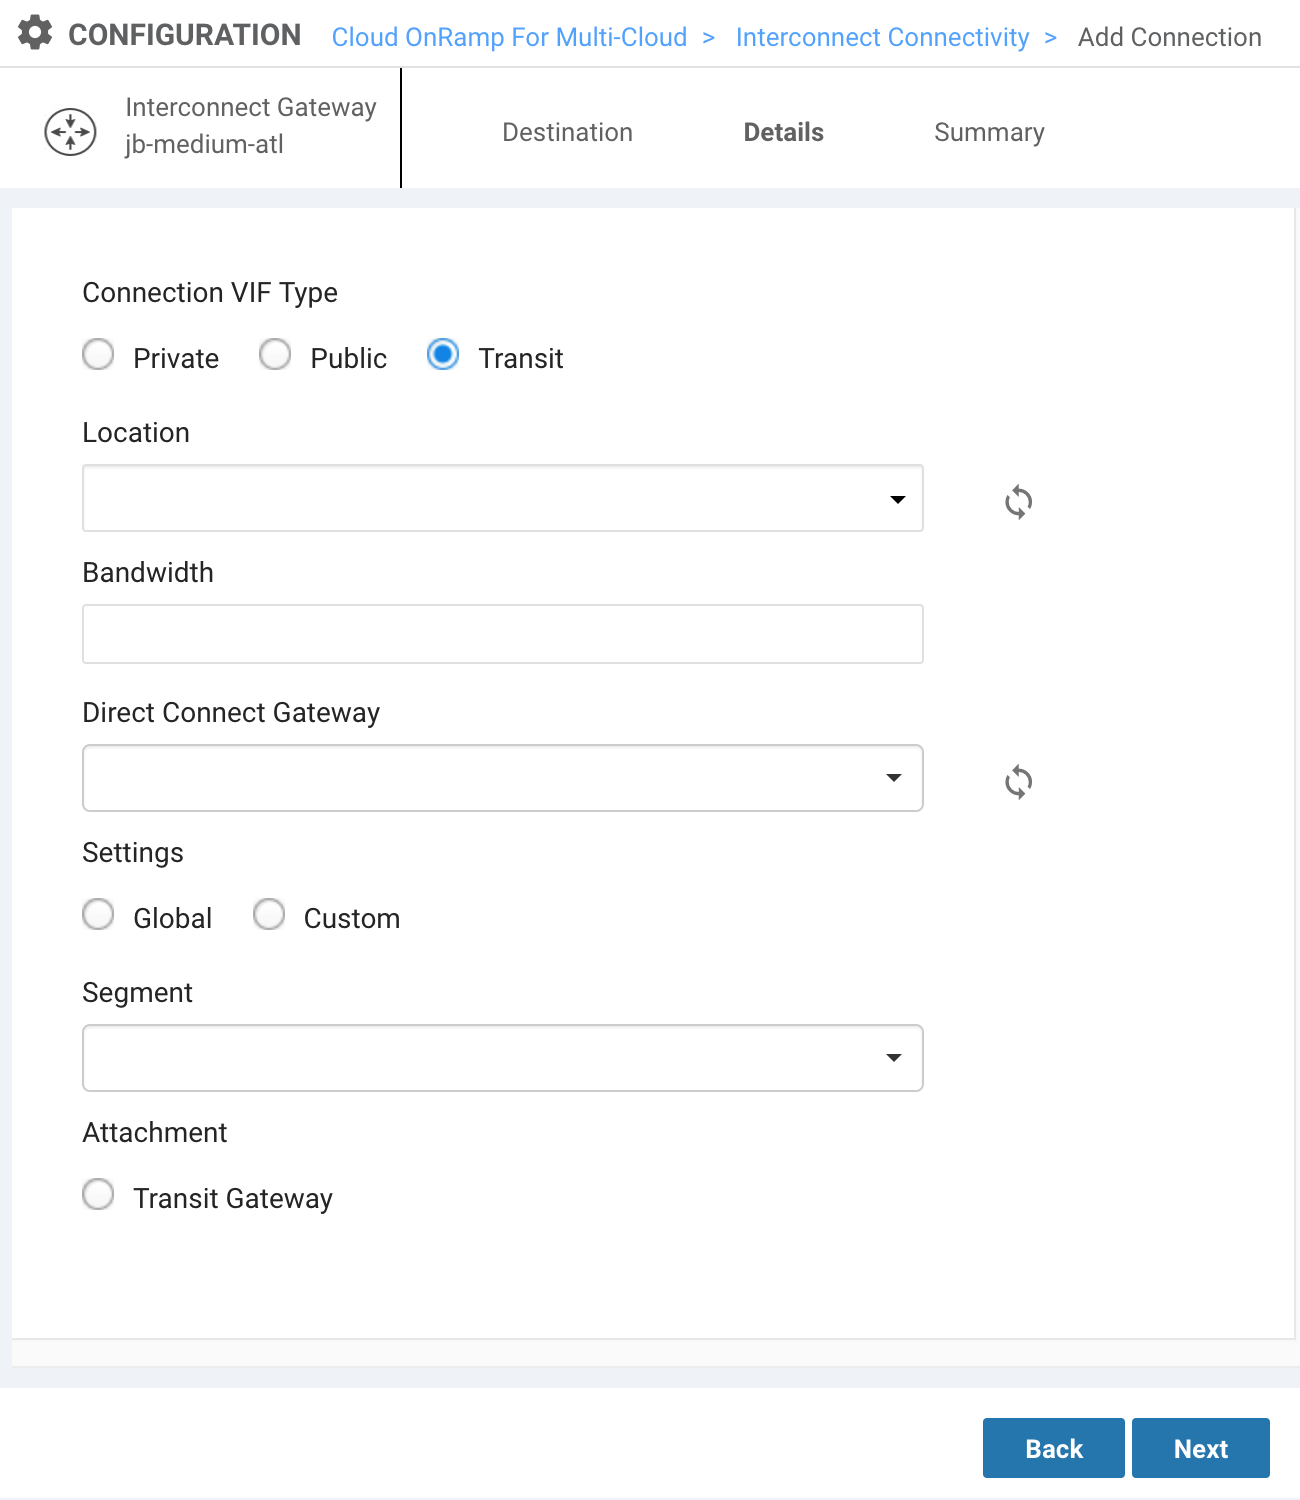
Select your Connection VIF Type.
- Private – Access private AWS services such as a VPC, EC2 instances, load balancers, RDS DB instances, on private IP address space.
- Public – Access public AWS services such as Amazon Simple Storage Service (S3), DynamoDB, CloudFront, and Glacier.
- Transit – (for Hosted Connections only) connect to direct connect gateways and multiple VPCs.
When you select the Connection VIF Type, more options appear.
-
Enter a location.
This is the AWS on-ramp identified by region. Select a location close to your MVE (Interconnect Gateway) and the AWS region with your data. -
Specify your bandwidth (in Mbps).
Hosted VIFs support speeds up to several Gbps. Hosted Connections support speeds up to several Gbps. -
For Private and Transit VIFs, select your Direct Connect Gateway.
Available gateways from your registered AWS account appear in the menu. You can also build a new gateway. -
For Private and Transit VIFs, choose your Settings.
- Global – Use the default template values and an automated process to determine the IP addresses for BGP peers for this connection.
- Custom – Use your own /30 values to assign IP addresses for BGP peering on the interconnect gateway and on the Direct Connect Gateway. You can also specify your source BGP ASN. When you specify an ASN, the value overrides the MVE ASN and the connection uses the specified value for this connection.
-
For Public VIFs, specify these settings.
- Interconnect IP Address – The IP Address space (in CIDR format) you will use on your MVE for peering.
- Amazon IP Address – The IP address space in CIDR format assigned in the AWS VPC network for peering.
- Prefixes – IP Prefixes to announce to AWS. RIR-assigned IPv4 addresses only.
-
Choose a Segment.
The drop-down menu shows the configured and available VPN segments for this connection. For more information, see the Cisco Segmentation Configuration Guide. -
Specify an attachment.
- Hosted VIF (Private) and Hosted Connection (Private): Select VPC and enter your VPC tag. You can enter up to ten VPG tags for each Direct Connect Gateway.
- Hosted Connection (Transit): Select Transit Gateway. Choose a gateway populated from your AWS account (or create a new gateway) and enter your VPC tag. Add prefixes to advertise from your gateway. Click Save.
- Public connections do not have attachments.
-
Click Next.
A summary page appears. -
Review the details of the configuration.
-
Click Save.
vManage switches to TaskView and creates the connection. You can monitor the status in this view.
Creating the connection takes up to 5 minutes. When complete, the message “Successfully Created Interconnect Connectivity” appears.
Note
The AWS connection is fully configured from vManage.
You can edit or delete the AWS connection from vManage. If you delete the MVE, the associated connections are also deleted.
Validating your AWS connection
You can review connection details, including the connection state, from the Interconnect Connectivity page (available from the Intent Management tile or the Navigation menu).
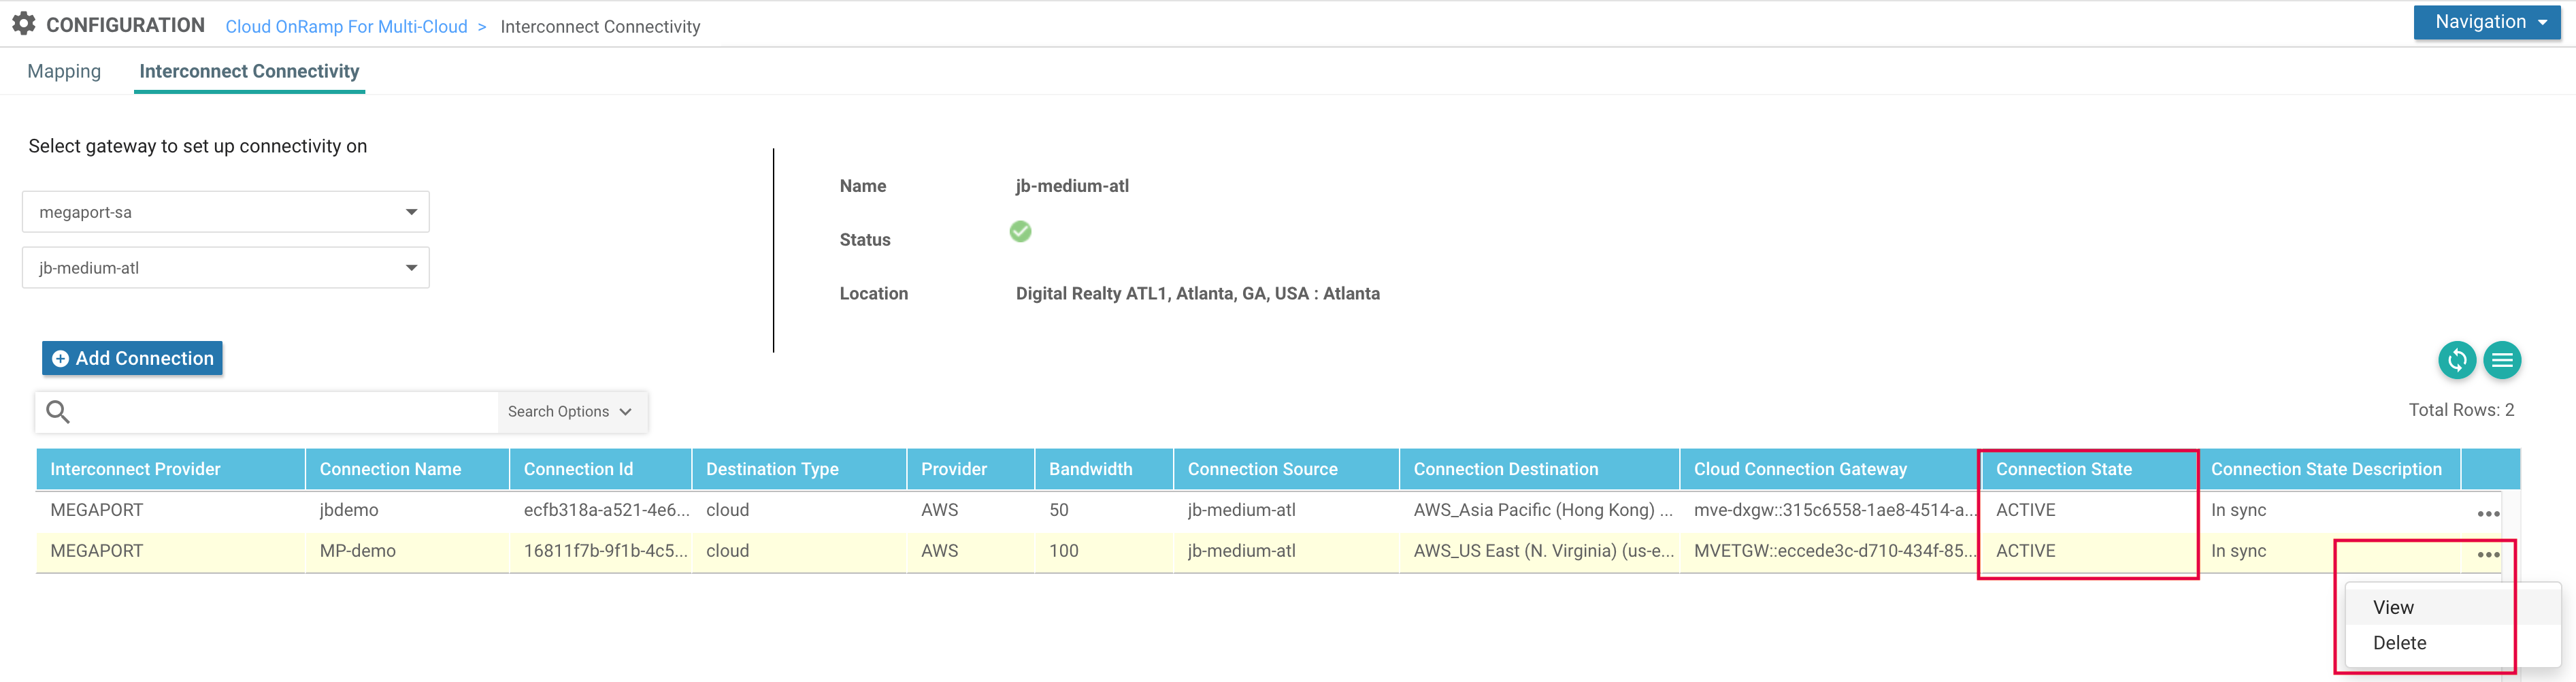
By clicking the ellipsis (…) at the end of the connection row, you can view more detailed information for the connection. (This is also where you can delete the connection.)
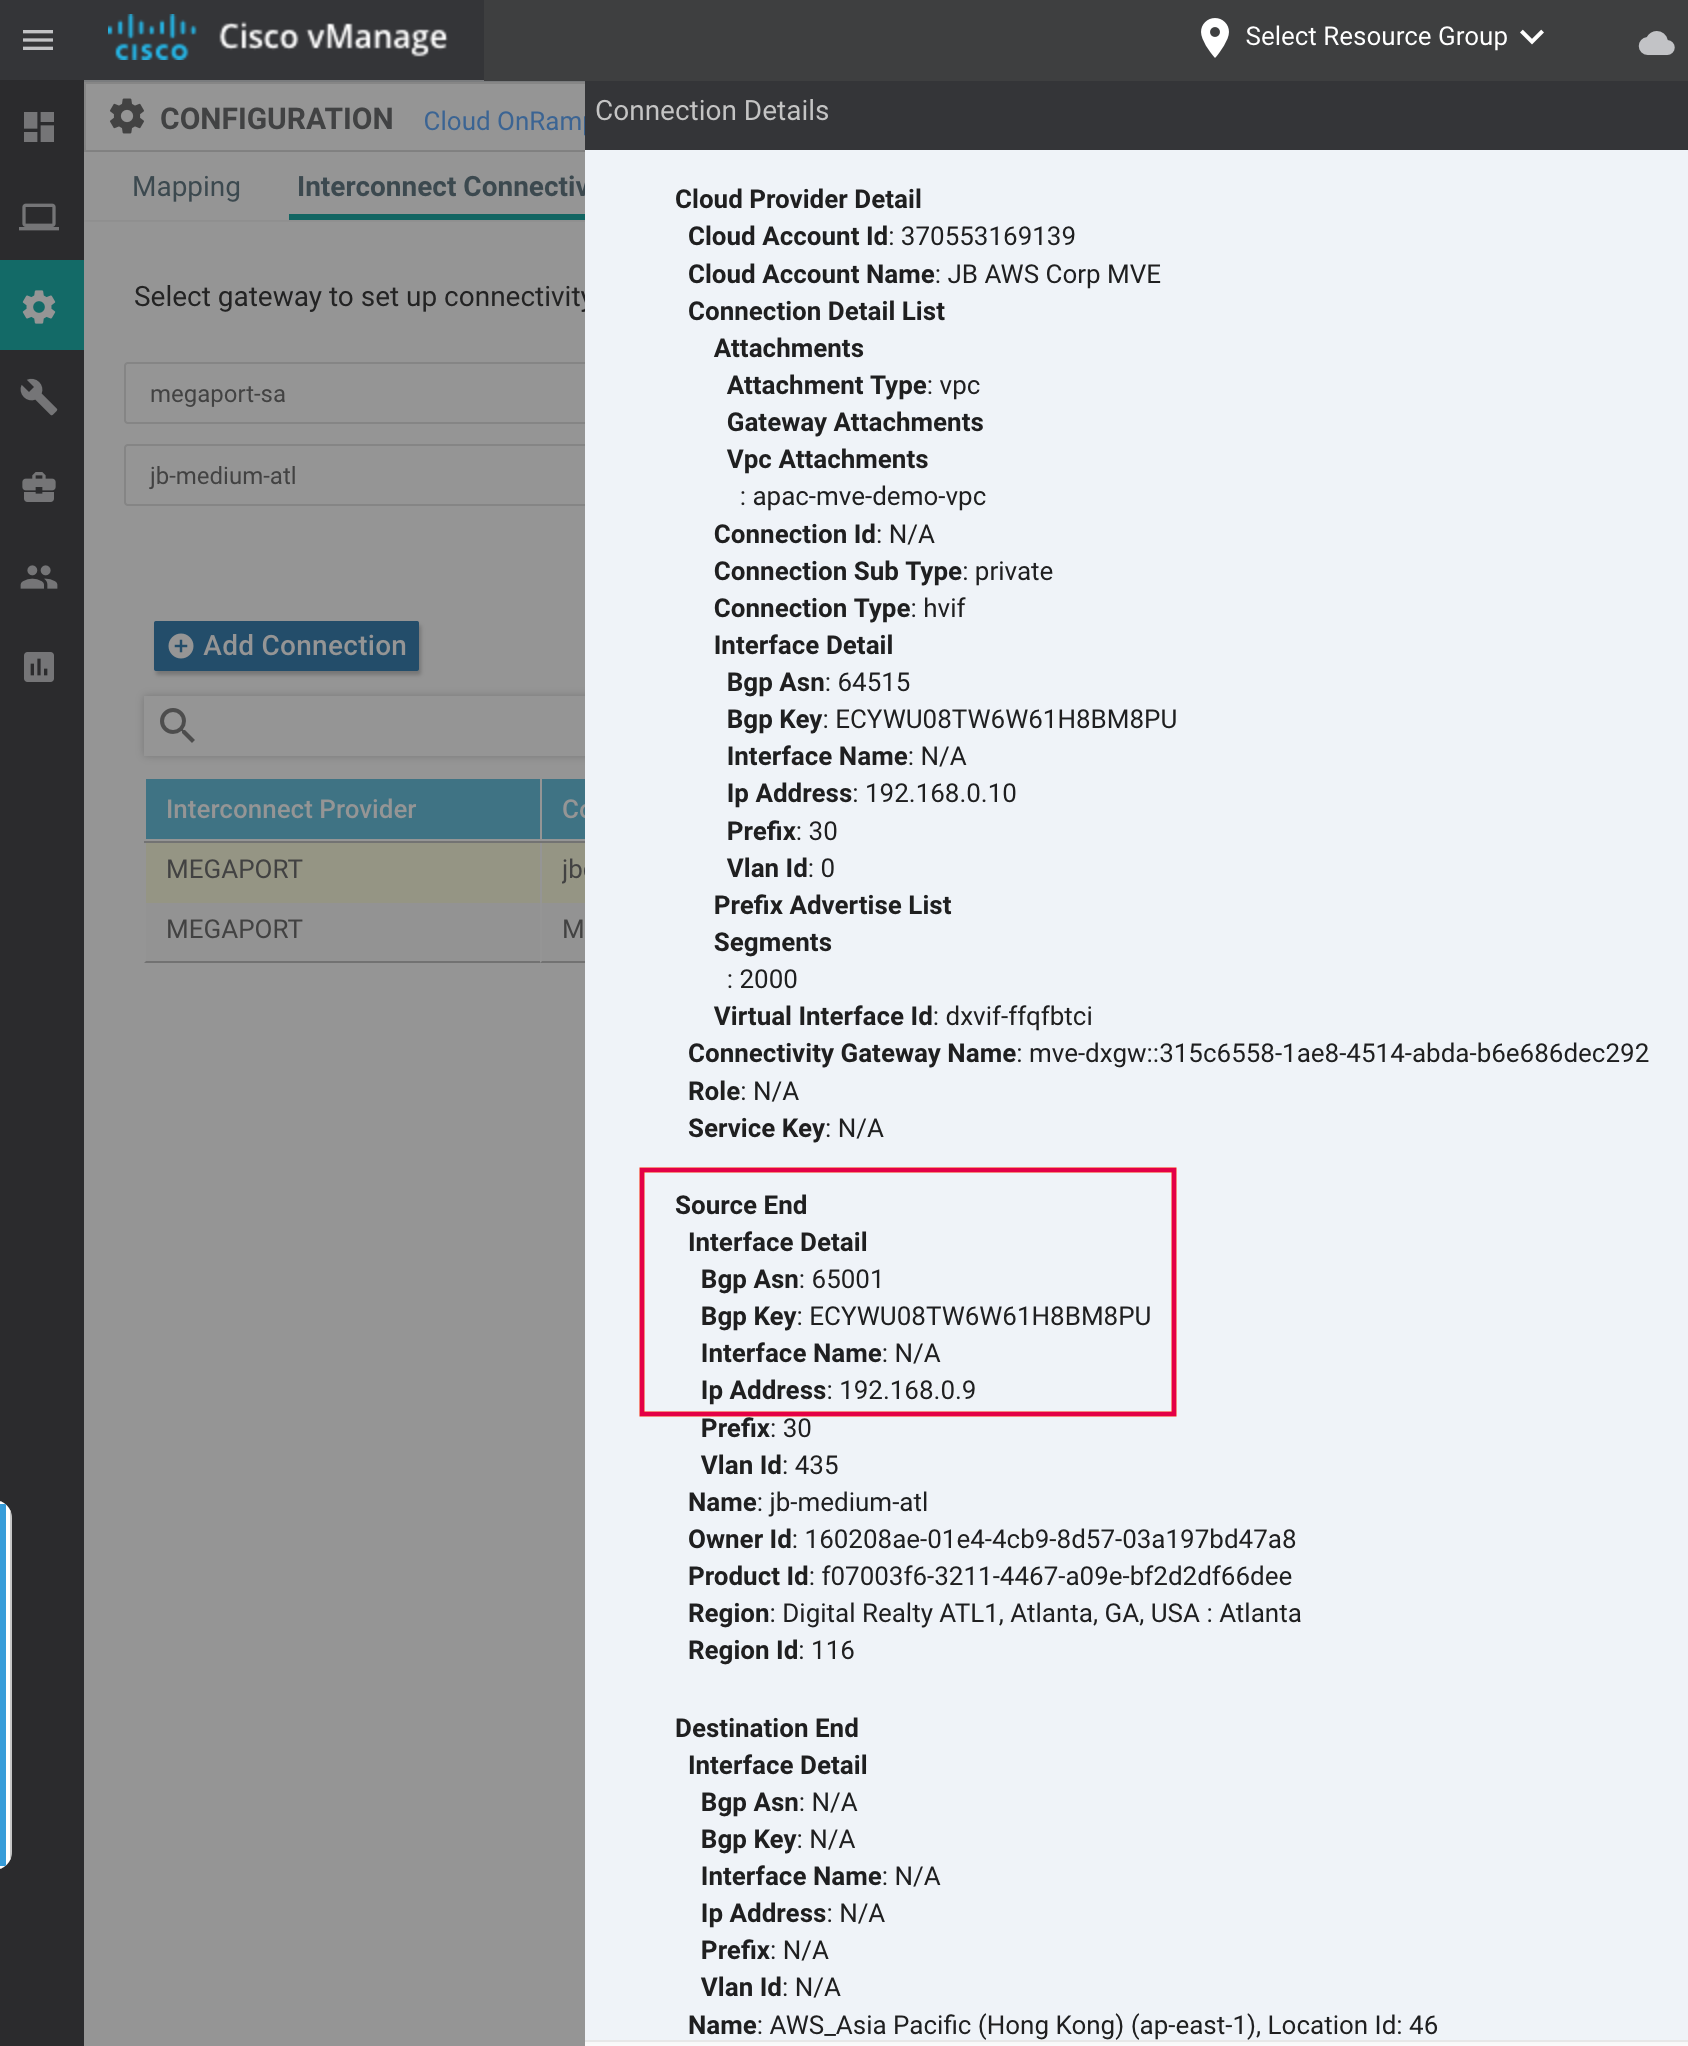
You can validate the connection details (the link /30 IP address and BGP ASN) on the AWS side by selecting Virtual Interface and examining the Peerings section.
Note
The VLAN ID in AWS will not match the VLAN ID in vManage as Megaport will map different VLANs on the NNI interconnections.
You can also review the connection details from the Megaport Portal for the AWS connection attached to the MVE.