Creating MVE Connections to Any Endpoint with Fortinet SD-WAN
This topic describes the general steps to configure and deploy a Megaport VXC connection in the Megaport Portal and integrate it with an MVE in Fortinet SD-WAN. The VXC can connect to a Cloud Service Provider, a Port, or an MCR.
Step 1 – Create an MVE
- Create an MVE in the Megaport Portal.
For more information, see Creating an MVE. The MVE needs to be in the active state.
Step 2 – Create a VXC from the MVE
- In the Megaport Portal, select the MVE created in Step 1.
- Create a VXC to another MVE, a Port, or Cloud Service Provider.
For more information, see Creating a VXC. Ensure both ends of the connection are active and have BGP configured. - In the connection details, note the A-End VLAN.
Step 3 – Collect these values for the connection
- MVE IP address
- MVE VLAN (A-End)
- MVE ASN
- Cloud/B-End IP address
- B-End ASN
- MD5 Password
Step 4 – Create an interface in FortiManager
-
Log in to the FortiManager.
Note
You can also log in on your MVE instance: https://<mve-ip-address>
-
From your managed device, go to the System menu and choose Interface.
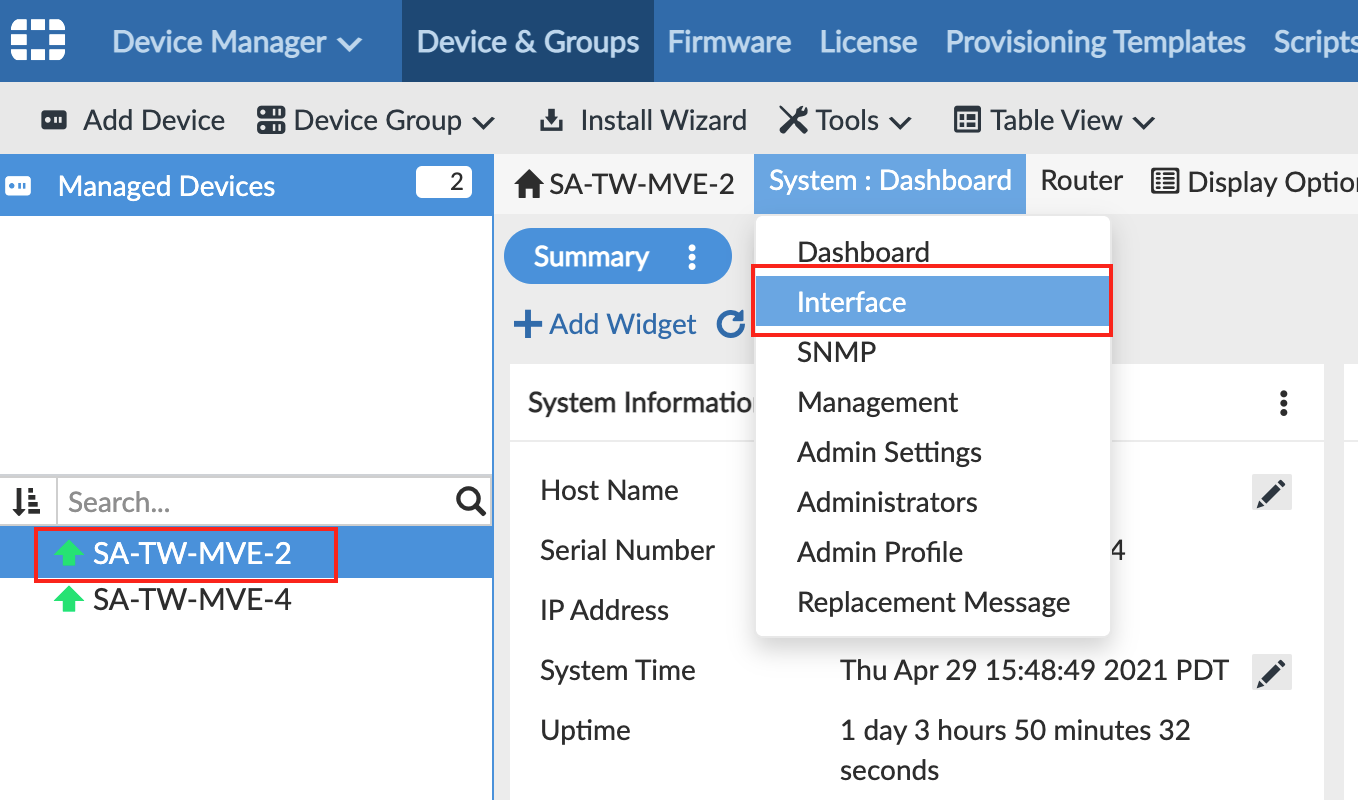
The page displays port1 as your physical interface. -
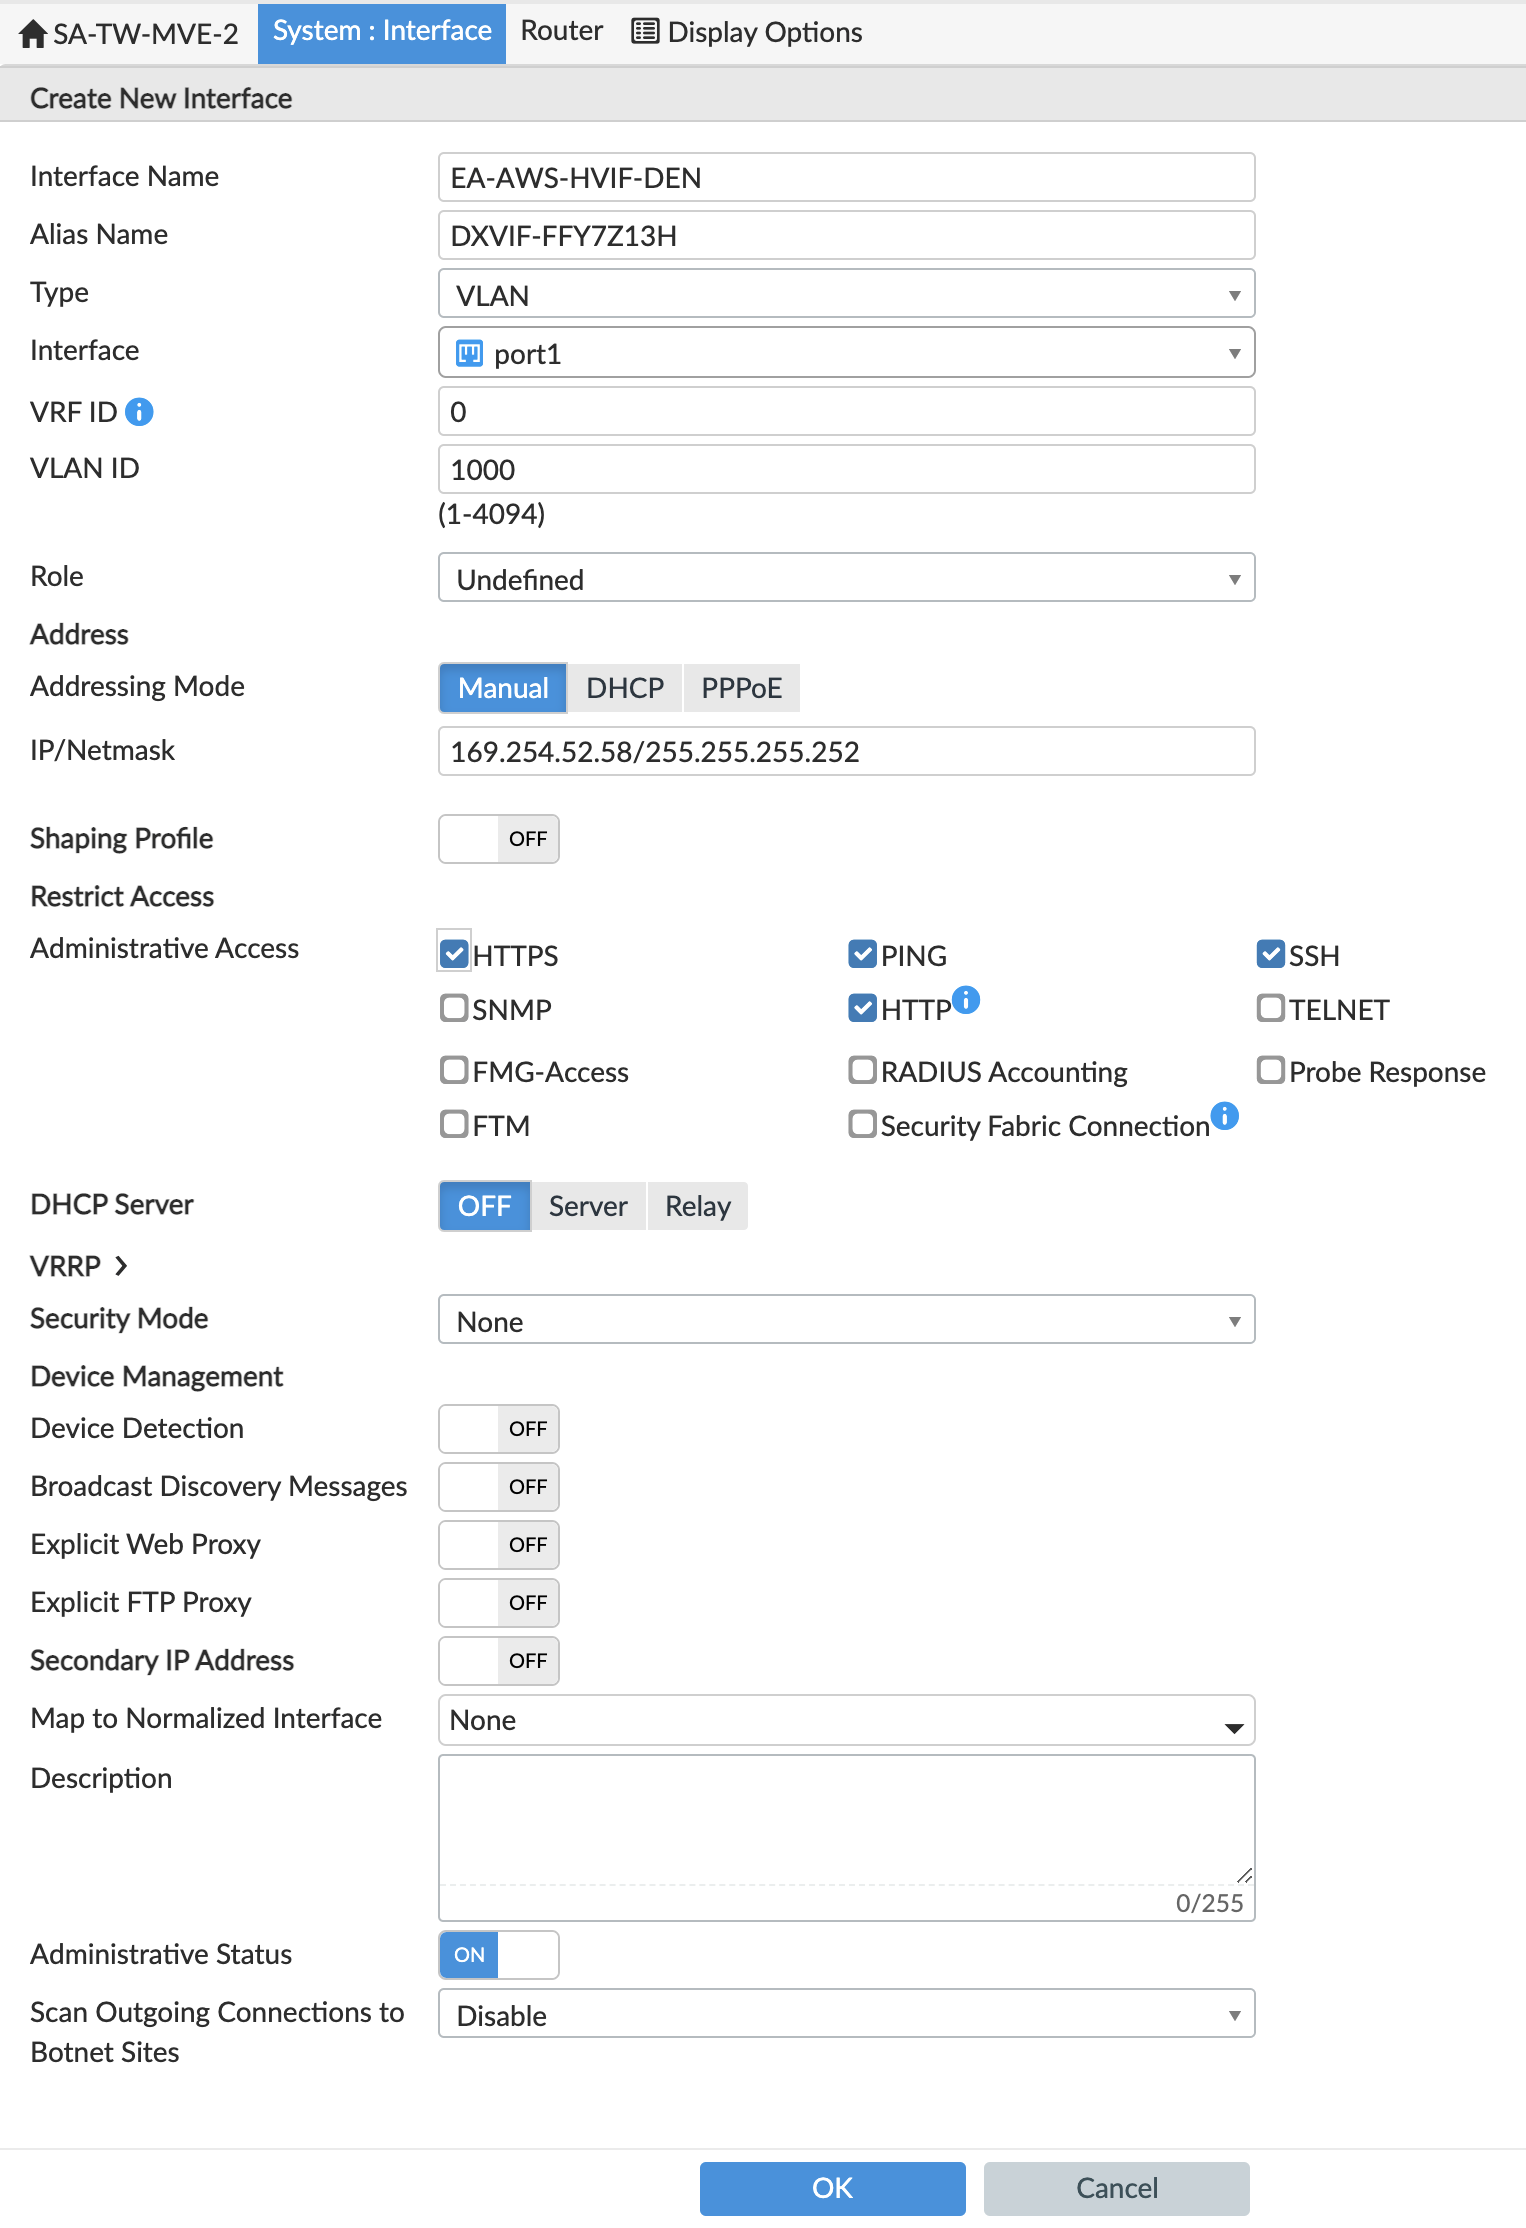
Click +Create New > Interface and provide this information:
- Interface Name – Specify a meaningful name for the interface.
- Alias Name (optional) – Enter an alternate name.
- Type – Choose VLAN.
- Interface – Choose the parent interface:
port1. - VLAN ID – Specify the A-End VLAN for the connection.
- Role – Choose Undefined.
- Addressing Mode – Select Manual.
- IP/Netmask – The IP address/netmask for the MVE.
- Administrative Access - Specify how you want to access this interface, such as HTTPS, PING, and SSH.
- DHCP Server - Click OFF.
-
Click OK.
The new VLAN interface appears with yourport1physical interface.
You can run an execute ping command from FortiOS to verify the connection.
Step 5 – Configure BGP
At this point, we have created the interface and next we need to create the BGP session.
-
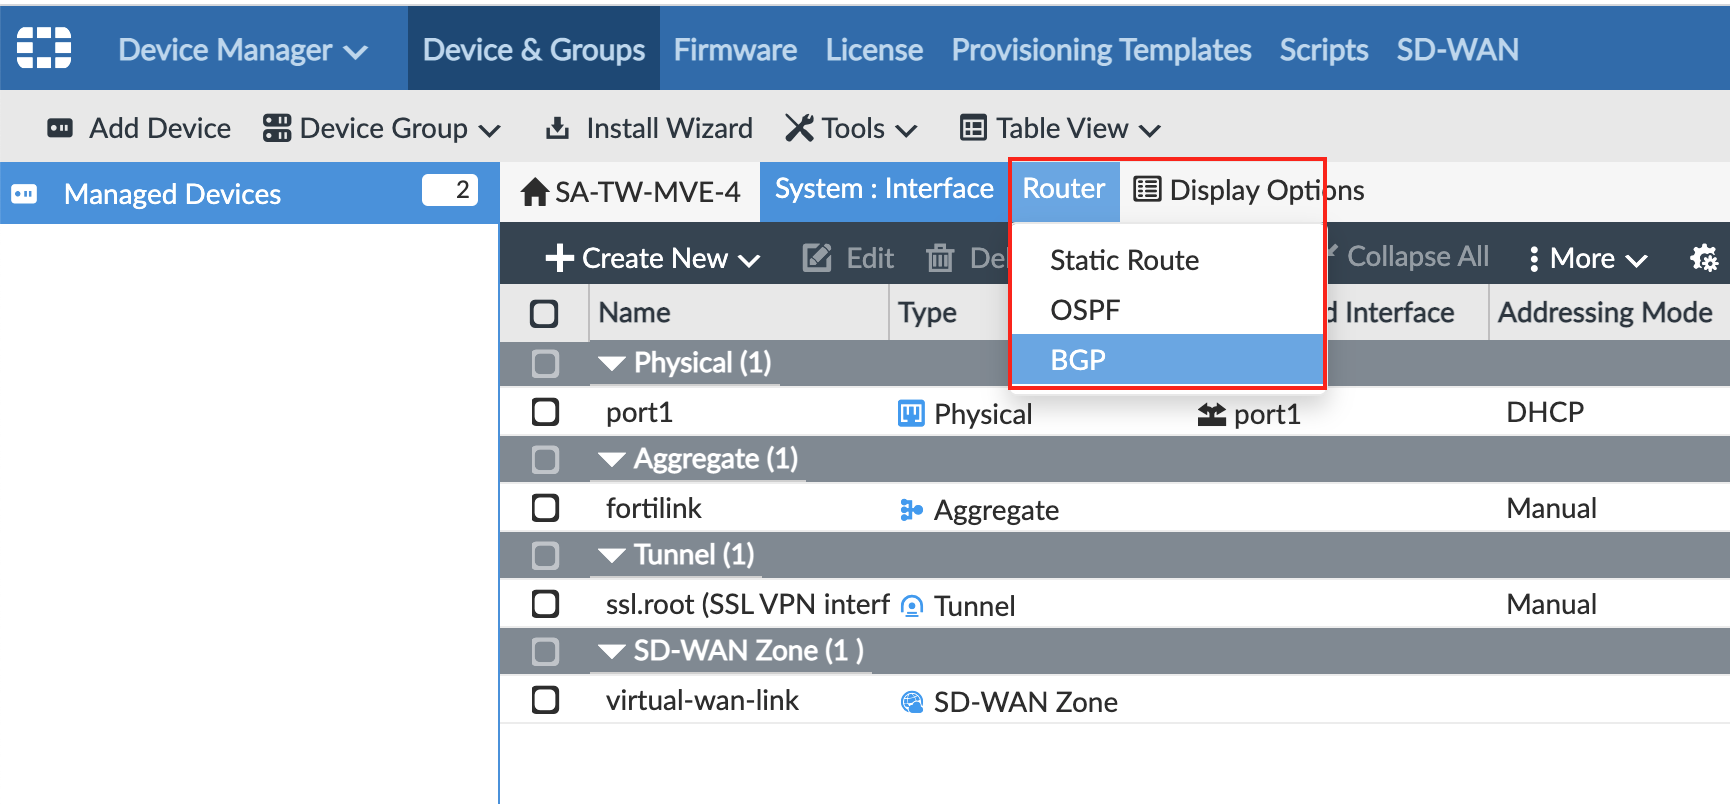
In FortiManager, go to Router > BGP.
-
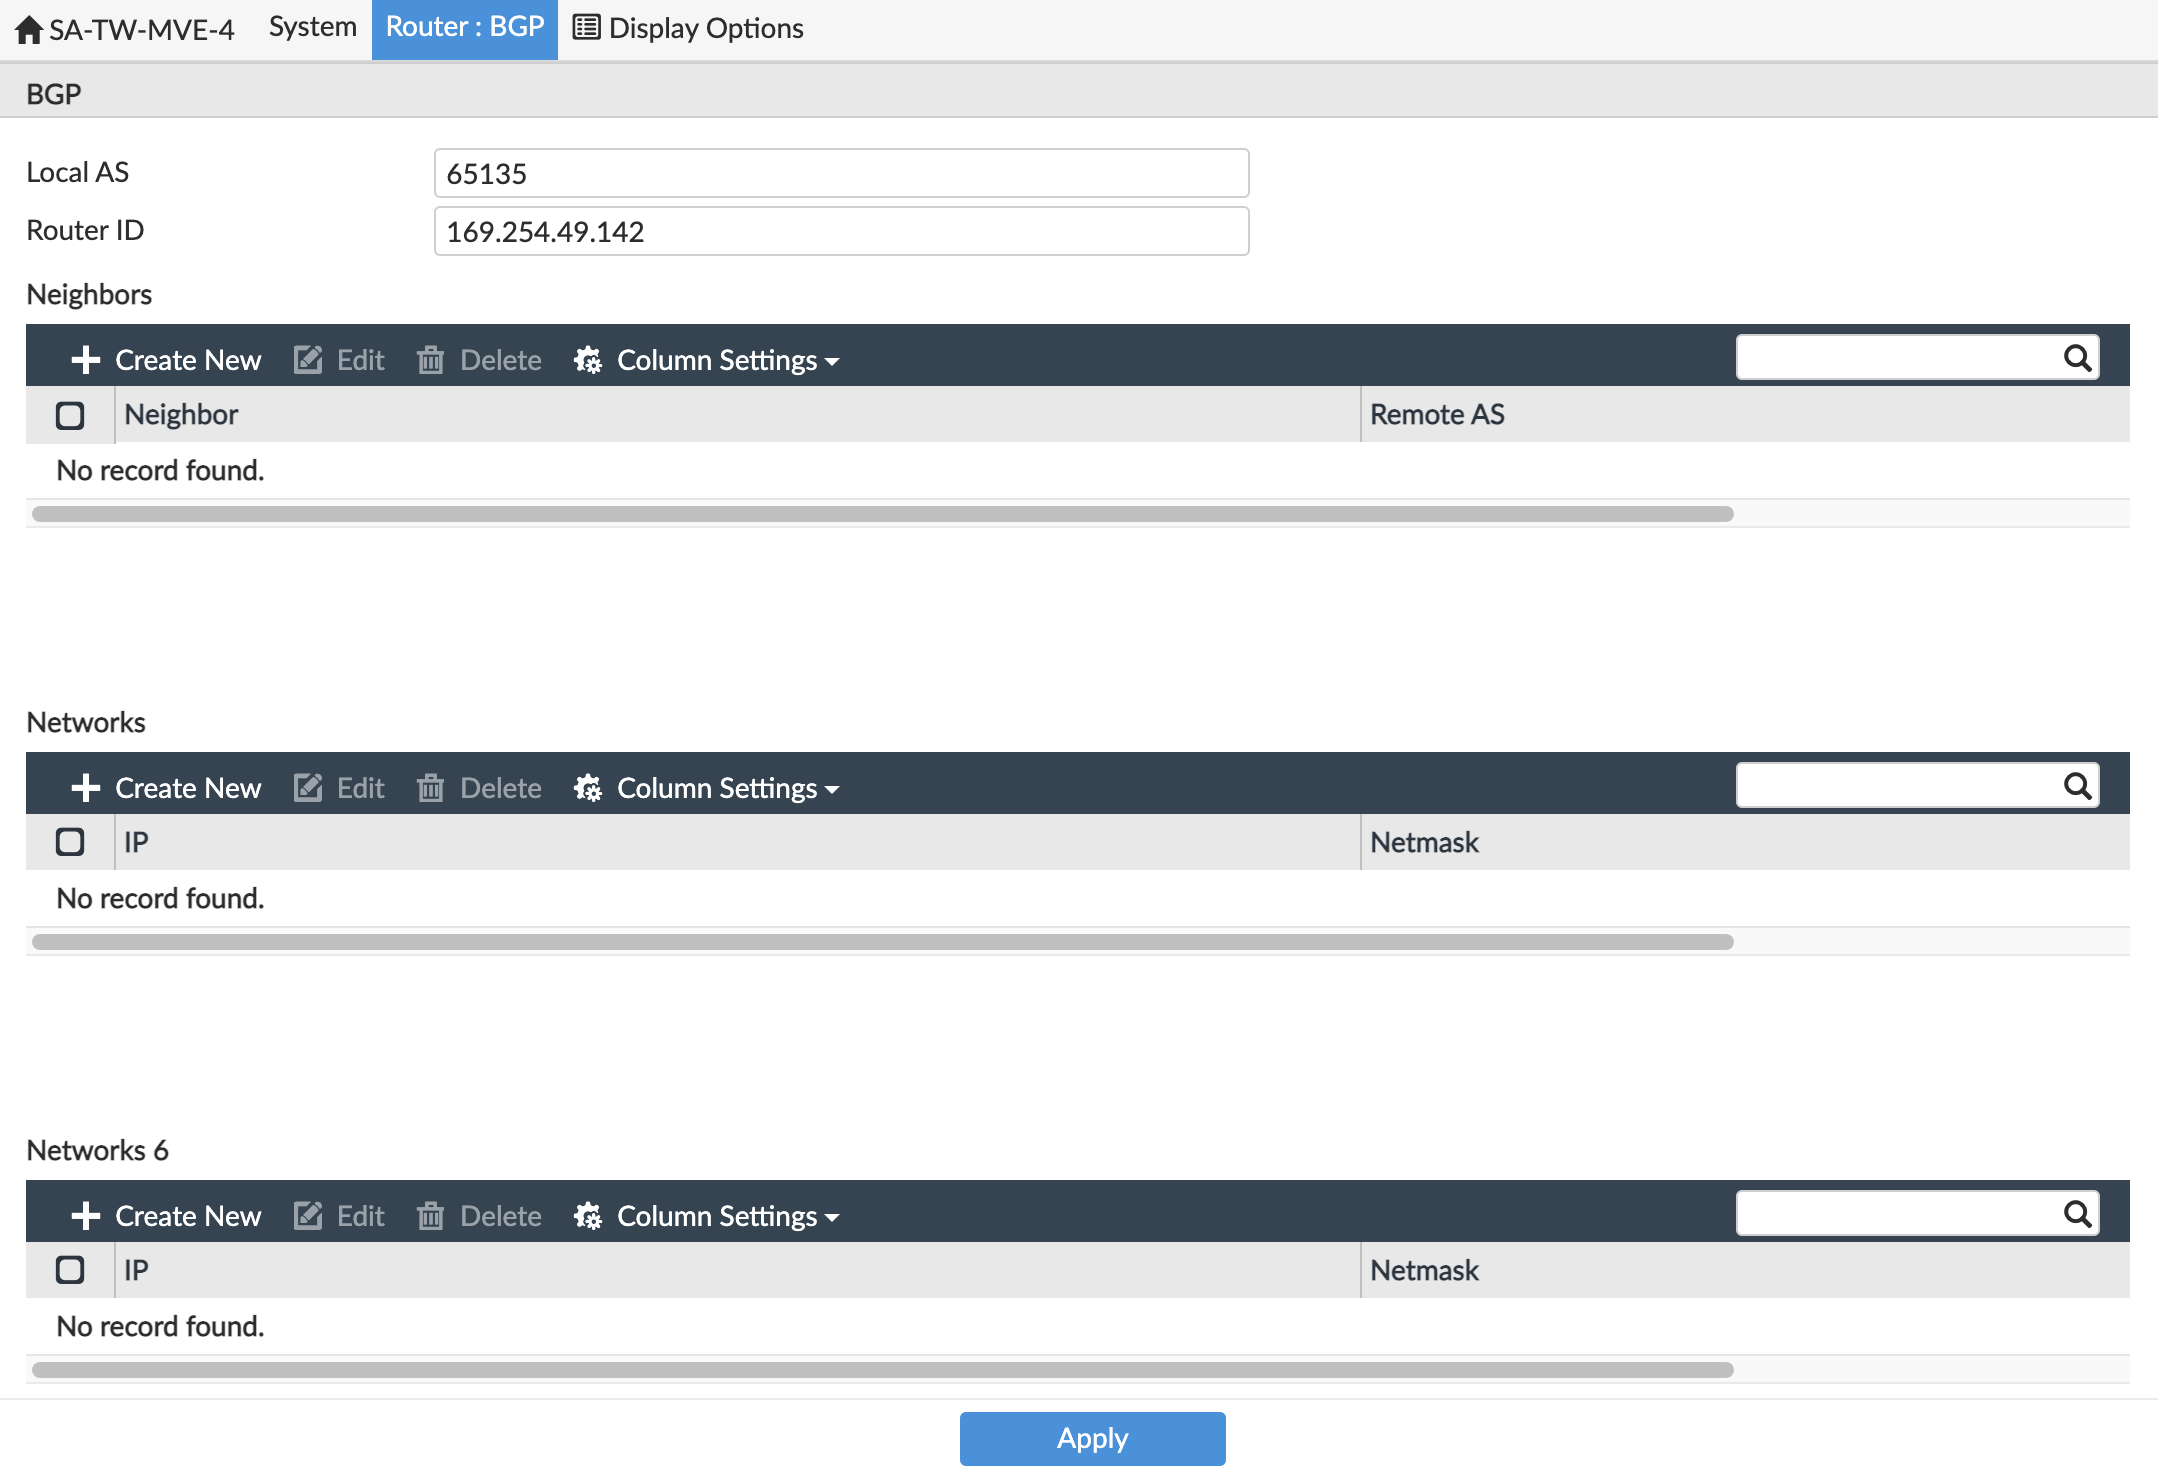
Provide this information:
- Local AS – Provide the ASN for the MVE connection.
- Router ID – Enter the B-End IP address (cloud provider, port, or other MVE).
-
In Neighbors, click +Create New.
- For the neighbor IP, add the B-End IP address (cloud provider, Port, or other MVE).
- For Remote ASN, enter the ASN of the B-End.
- Click OK.
-
Click Apply.
The neighbor is configured but we need to add the BGP Auth information. The web interface does not let you define this and you need to use the command line to add the BGP details. -
SSH to the MVE instance using your private key file.
For example
ssh -i ~/.ssh/megaport-mve-instance-1-2048 admin@162.43.143.XX -
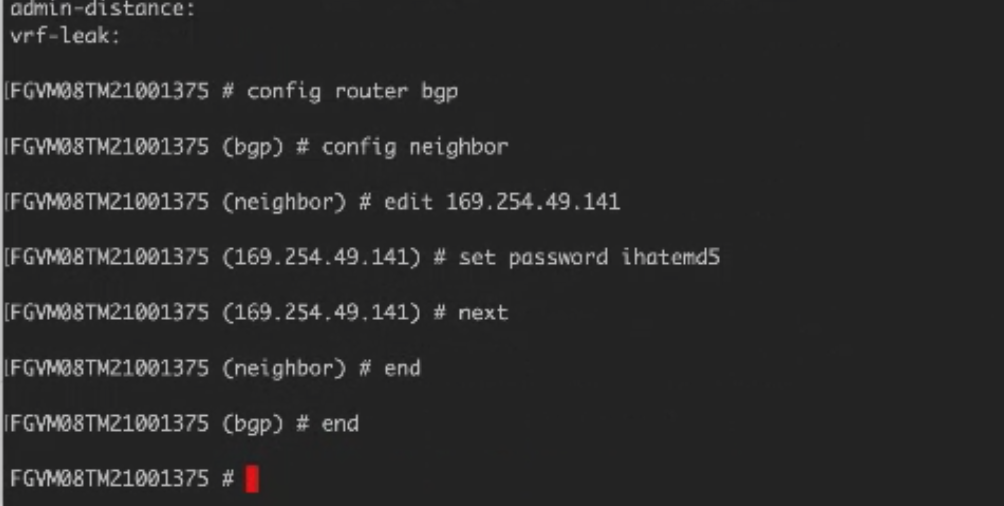
Use these commands to add a password for the BGP neighbor.
Step 6 – Validating your connection
You can review connection details, including the connection state, from the CLI with these commands:
get system interface– Displays configuration details and current status for the device interfaces.get router info bgp neighbor <ip-address>– Displays configuration details and current status for the BGP neighbors.