Configuring and Maintaining AWS Hosted Connections
A Hosted Connection is an AWS Direct Connect service that provisions connectivity on demand over pre-provisioned network circuits. A Hosted Connection can support one private, public, or transit VIF.
Each Hosted Connection supports a single VIF and you can obtain multiple VIFs by configuring multiple hosted connections.

![]() Watch a 10-minute video for Hosted Connections.
Watch a 10-minute video for Hosted Connections.
Diverse connections
Hosted Connections support diverse connections. Diverse connections improve the robustness of your network by using different physical infrastructure to build in redundancy and eliminate single points of failure. You can achieve diversity by connecting to AWS ports in different diversity zones. Each destination port has either an orange or blue icon to indicate the diversity zone.
![]()
To create diverse connections, you need to create two connections: one connection for each diversity zone.
Before you begin
To deploy an AWS Hosted Connection, you need your AWS Account number and the details of the VPC environment. Ensure that you have already configured the Direct Connect gateway, AWS gateway, VPCs, and related attachments and associations. The AWS documentation provides detailed steps for VPC configuration as well as how to create and deploy each type of gateway.
Creating a Hosted Connection
Unlike configuring a Hosted VIF, where the virtual interface and associated Layer 3 details are automatically provisioned, when you configure a Hosted Connection you must provision the virtual interface.
To create a Hosted Connection
- In the Megaport Portal, go to the
Services page and select the Port you want to use.
If you haven’t already created a Port, see Creating a Port. -
Add an AWS connection for the Port.
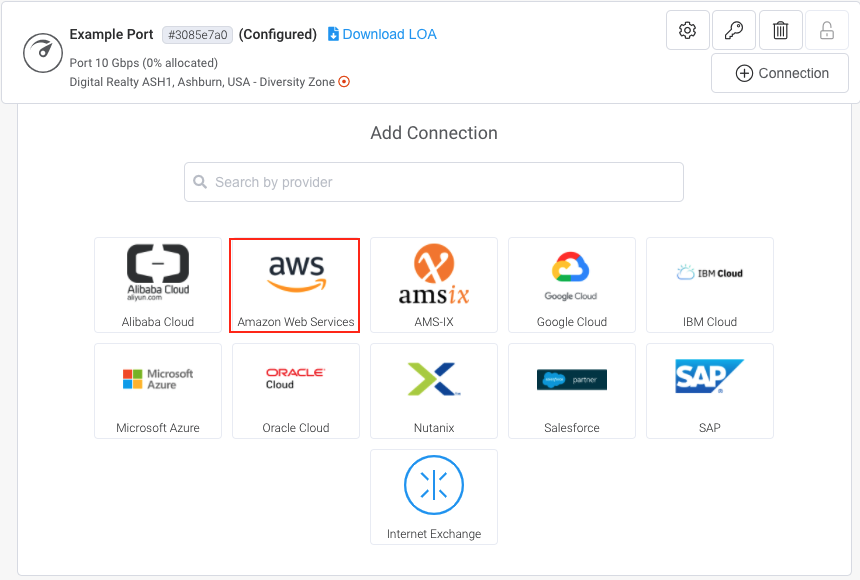
If this is the first connection for the Port, click the AWS tile. The tile is a shortcut to the configuration page. Alternatively, click +Connection, click Cloud, and click AWS.
-
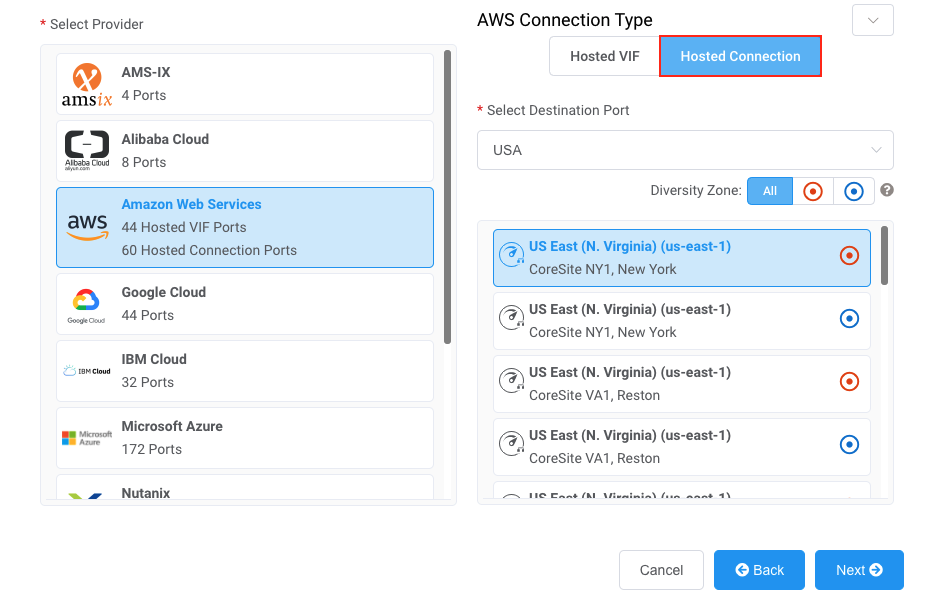
For AWS Connection Type, click Hosted Connection.
-
In the Select Destination Port list, select the AWS region and the interconnection point for your connection and click Next.
Each destination port has either a blue or an orange icon to indicate its diversity zone. To achieve diversity, you need to create two connections with each one in a different zone.
You can use the Search field to find the Port name, Country, Metro City, or address of your destination Port. You can also filter by diversity zone.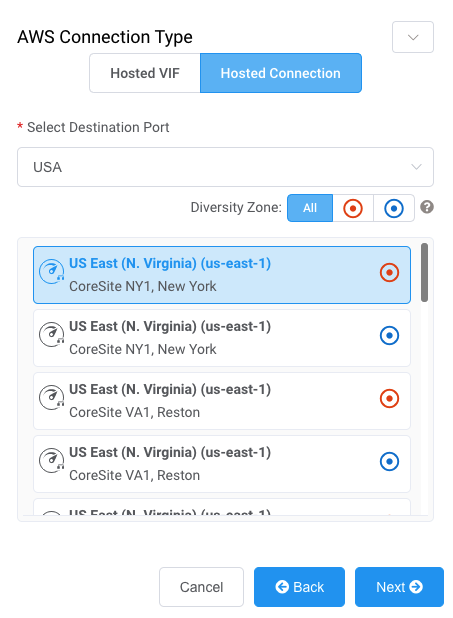
-
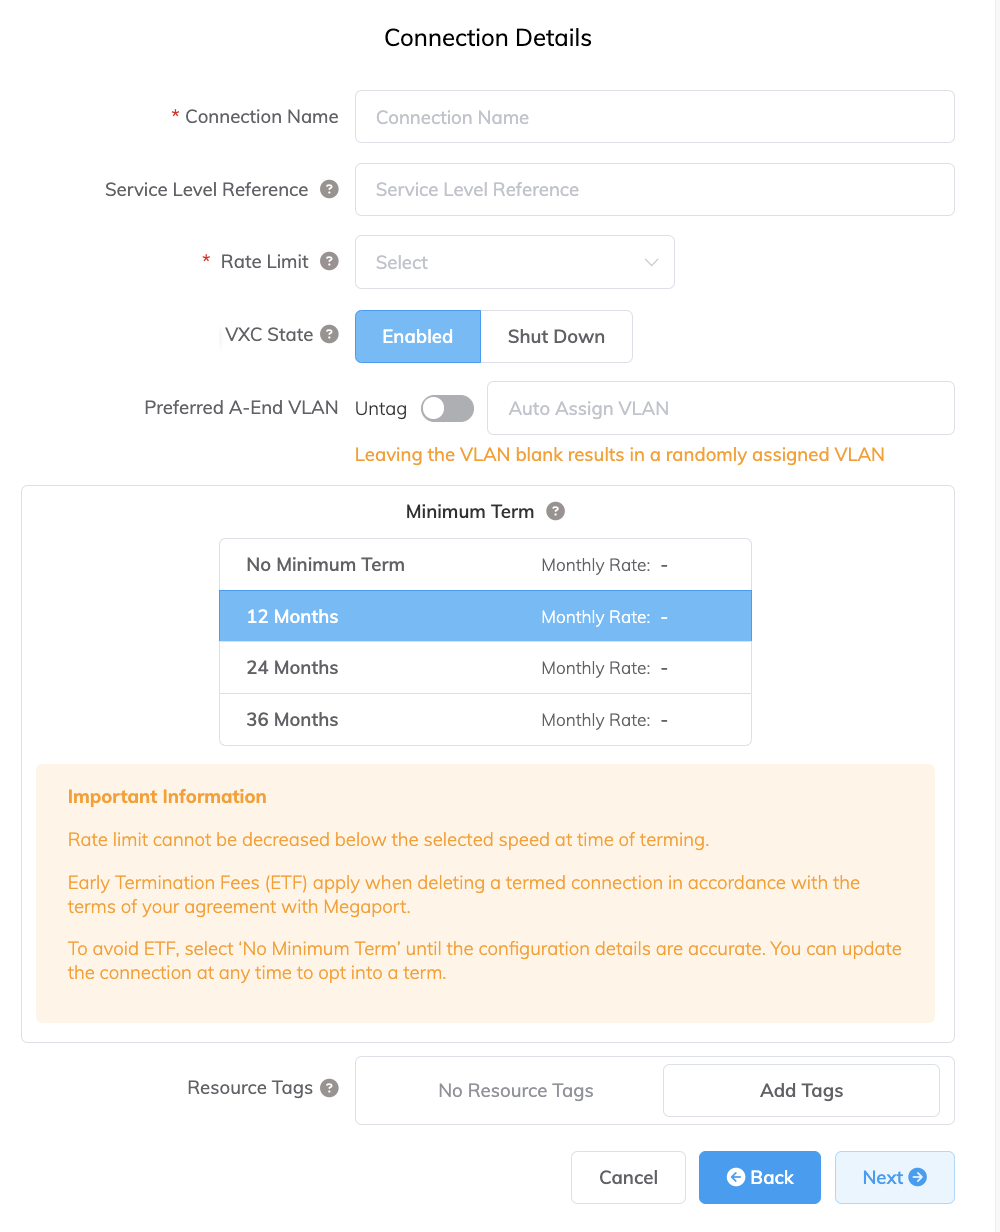
Specify the connection details:
-
Connection Name – The name of your VXC to be shown in the Megaport Portal.
-
Service Level Reference (optional) – Specify a unique identifying number for the VXC to be used for billing purposes, such as a cost center number or a unique customer ID. The service level reference number appears for each service under the Product section of the invoice. You can also edit this field for an existing service.
-
Rate Limit – The speed of your connection. The speed cannot be changed once deployed. The drop-down list shows predefined rate limits available for your Port, up to 25 Gbps.
-
VXC State – Select Enabled or Shut Down to define the initial state of the connection. For more information, see Shutting Down a VXC for Failover Testing.
Note
If you select Shut Down, traffic will not flow through this service and it will behave as if it was down on the Megaport network. Billing for this service will remain active and you will still be charged for this connection.
-
Preferred A-End VLAN (optional) – Specify an unused VLAN ID for this connection.
This must be a unique VLAN ID on this Port and can range from 2 to 4093. If you specify a VLAN ID that is already in use, the system displays the next available VLAN number. The VLAN ID must be unique to proceed with the order. If you don’t specify a value, Megaport will assign one.Alternatively, you can click Untag to remove the VLAN tagging for this connection. The untagged option limits you to only one VXC deployed on this Port. (The VLAN for the AWS side termination will be automatically allocated and will not impact your Port details.) You must use untagged VLANs if you are creating a MACsec connection.
-
Minimum Term – Select No Minimum Term, 12 Months, 24 Months, or 36 Months. Longer terms result in a lower monthly rate. 12 Months is selected by default.
Take note of the information on the screen to avoid early termination fees (ETF). For more information, see VXC Pricing and Contract Terms and VXC, Megaport Internet, and IX Billing. -
Resource Tags – You can use resource tags to add your own reference metadata to a Megaport service.
To add a tag:- Click Add Tags.
- Click Add New Tag.
- Enter details into the fields:
- Key - string maximum length 128. Valid values are a-z 0-9 _ : . / \ -
- Value - string maximum length 256. Valid values are a-z A-Z 0-9 _ : . @ / + \ - (space)
- Click Save.
If you already have resource tags for that service, you can manage them by clicking Manage Tags.
Warning
Never include sensitive information in a resource tag. Sensitive information includes commands that return existing tag definitions and information that will identify a person or company.
-
-
Click Next.
-
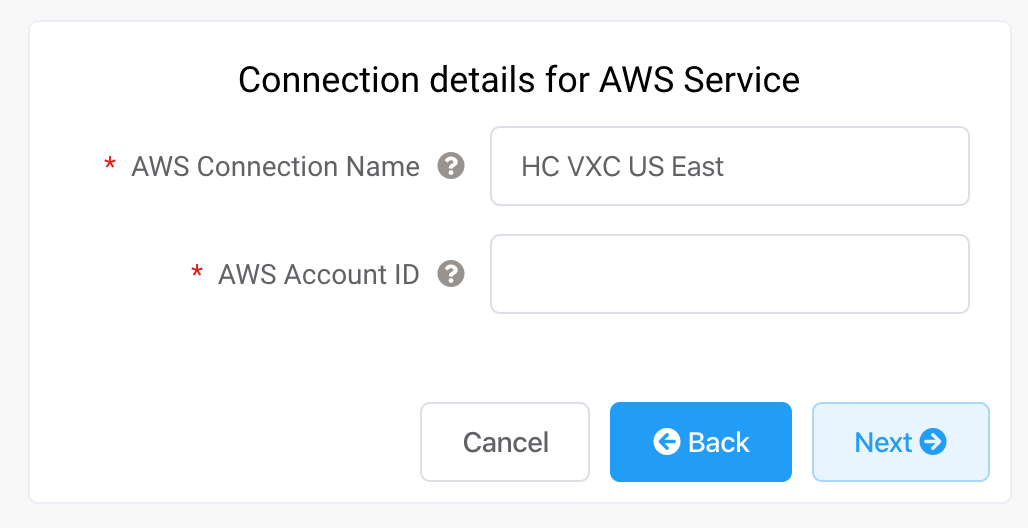
Specify the cloud details.
-
AWS Connection Name – This is a text field and will be the name of your virtual interface that appears in the AWS console. For easy mapping, the field defaults to the same name you specified for the VXC name on the previous screen.
-
AWS Account ID – This is the ID of the account you want to connect. You can find this value in the management section of your AWS console.
-
-
Click Next.
A summary page appears that includes the monthly cost. -
Click Back to make changes or click Add VXC to move this configuration to your cart.
Once you have finished this configuration, you can configure additional VXCs or proceed through the checkout process. -
Click Order and complete the ordering process to deploy the VXC.
Megaport will deploy the connection. The deployment can take several minutes.
After creating a Hosted Connection, you need to accept it in the AWS console to activate it.
-
In AWS, go to Services > AWS Direct Connect > Connections and click the connection name.

-
Click Accept at the top right of the window.
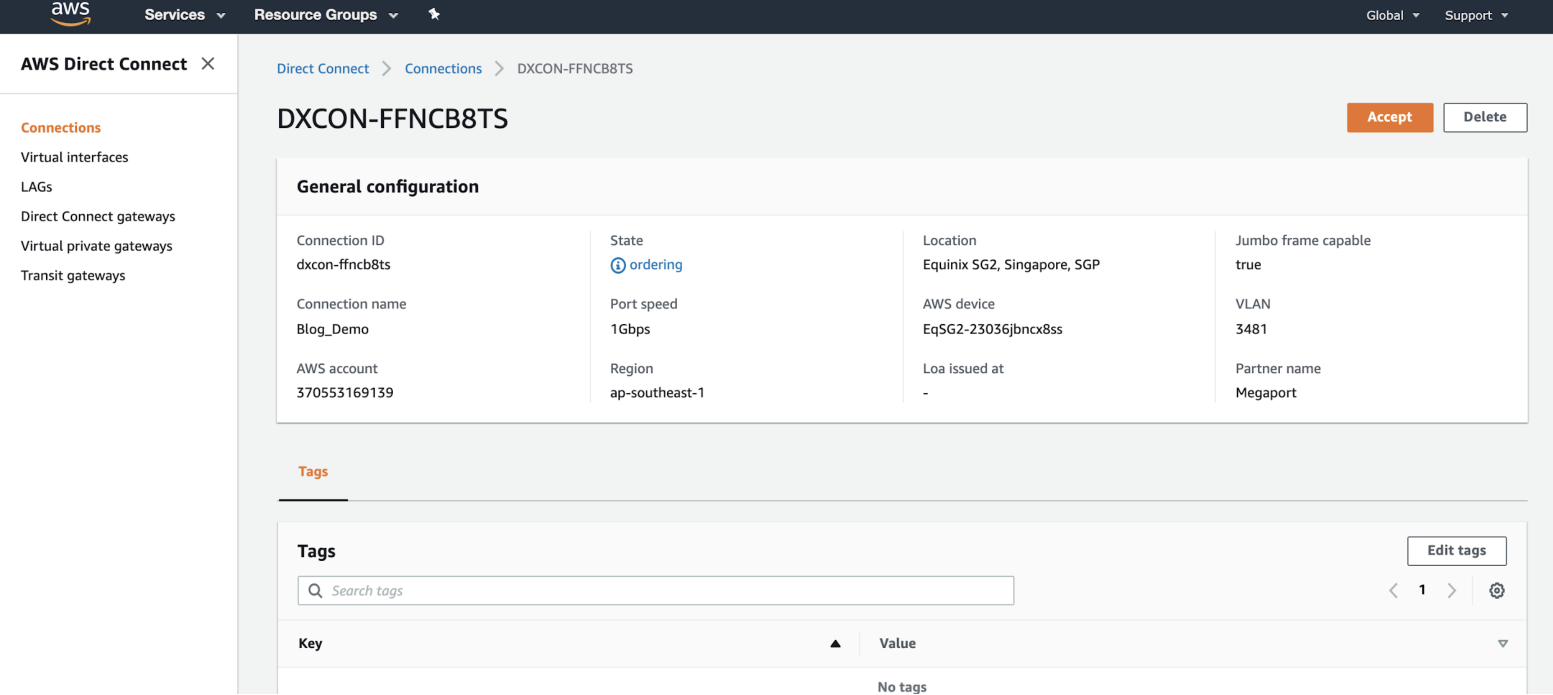
The state will be pending for a few minutes while AWS deploys the connection. After it is deployed, the state changes from “ordering” to “available.”
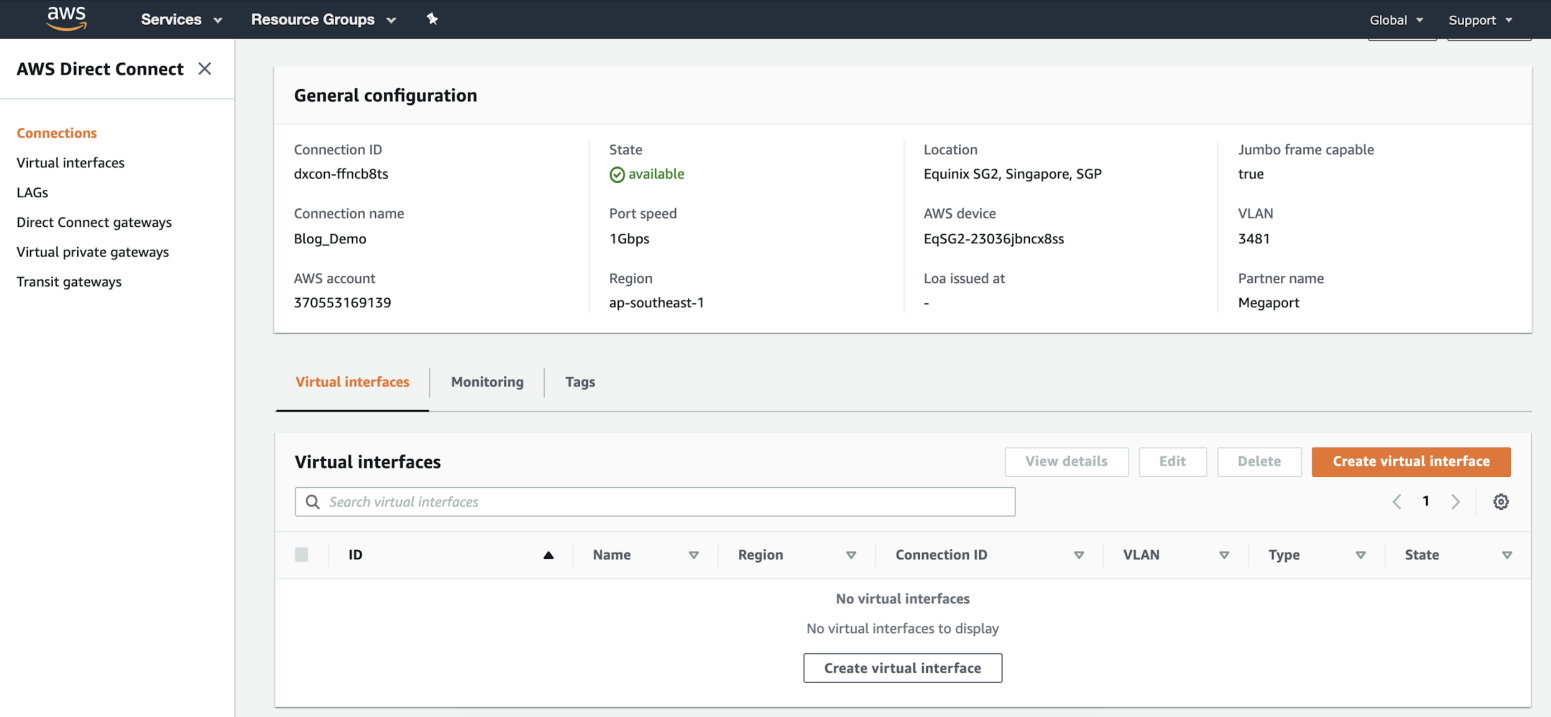
The connection is now available, however you need to create a VIF to connect to AWS services.
Note
For more information about accepting AWS connections, see the AWS documentation.
Creating a virtual interface
Once you have created and accepted a Hosted Connection, create a VIF and attach the Hosted Connection to a gateway.
Note
AWS provides detailed instructions for creating Public, Private, and Transit interfaces.
To create and attach a VIF
-
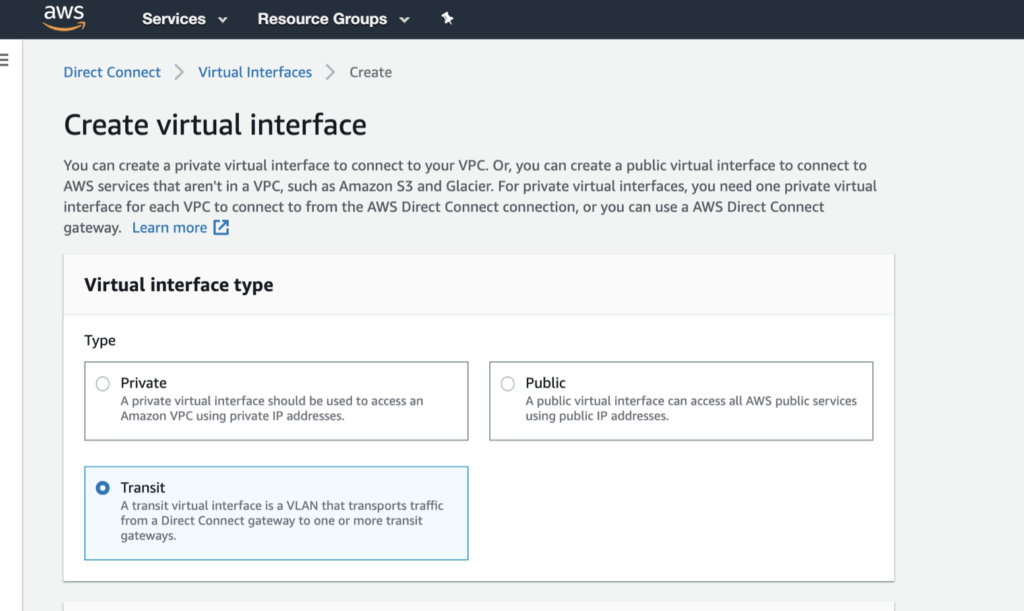
In the AWS console, click Create Virtual Interface.
-
Select the interface type.
The type will vary depending on the type of service you need to access.
- Private – Access resources running into a VPC using their private IP addresses. You can choose to terminate a private virtual interface on a private virtual gateway (to access a single VPC) or to a Direct Connect gateway (this will give you a 1 VIF to 10 VPCs mapping).
- Public – Access all AWS public endpoints, as well as all AWS resources that are reachable by a public IP address.
- Transit – Transport traffic from a Direct Connect gateway to one or more transit gateways.

-
Specify the configuration details:
- Virtual interface name – Enter a name for the virtual interface.
- Connection – The physical connection where you want this virtual interface to be provisioned. The name you provided for the Hosted Connection in the Megaport Portal appears here.
- Virtual interface owner – The account that will own the virtual interface. Select My AWS account.
- Direct Connect gateway – Select the Direct Connect gateway to attach this virtual interface to. A transit VIF is not directly attached to a Transit gateway, but to a Direct Connect gateway.
- VLAN – The VLAN assigned to the virtual interface. Leave this value as is. The VLAN address is populated and appears to be editable; however, you will get an error if you try to change it. VLANs cannot be extended from on-premises to AWS, and are used only for traffic separation between different virtual interfaces.
- BGP ASN – Enter the Border Gateway Protocol (BGP) autonomous system number (ASN) for the on-premises side of the BGP session.
The following BGP details can be filled out or left blank. When left blank, they are auto-populated by AWS.
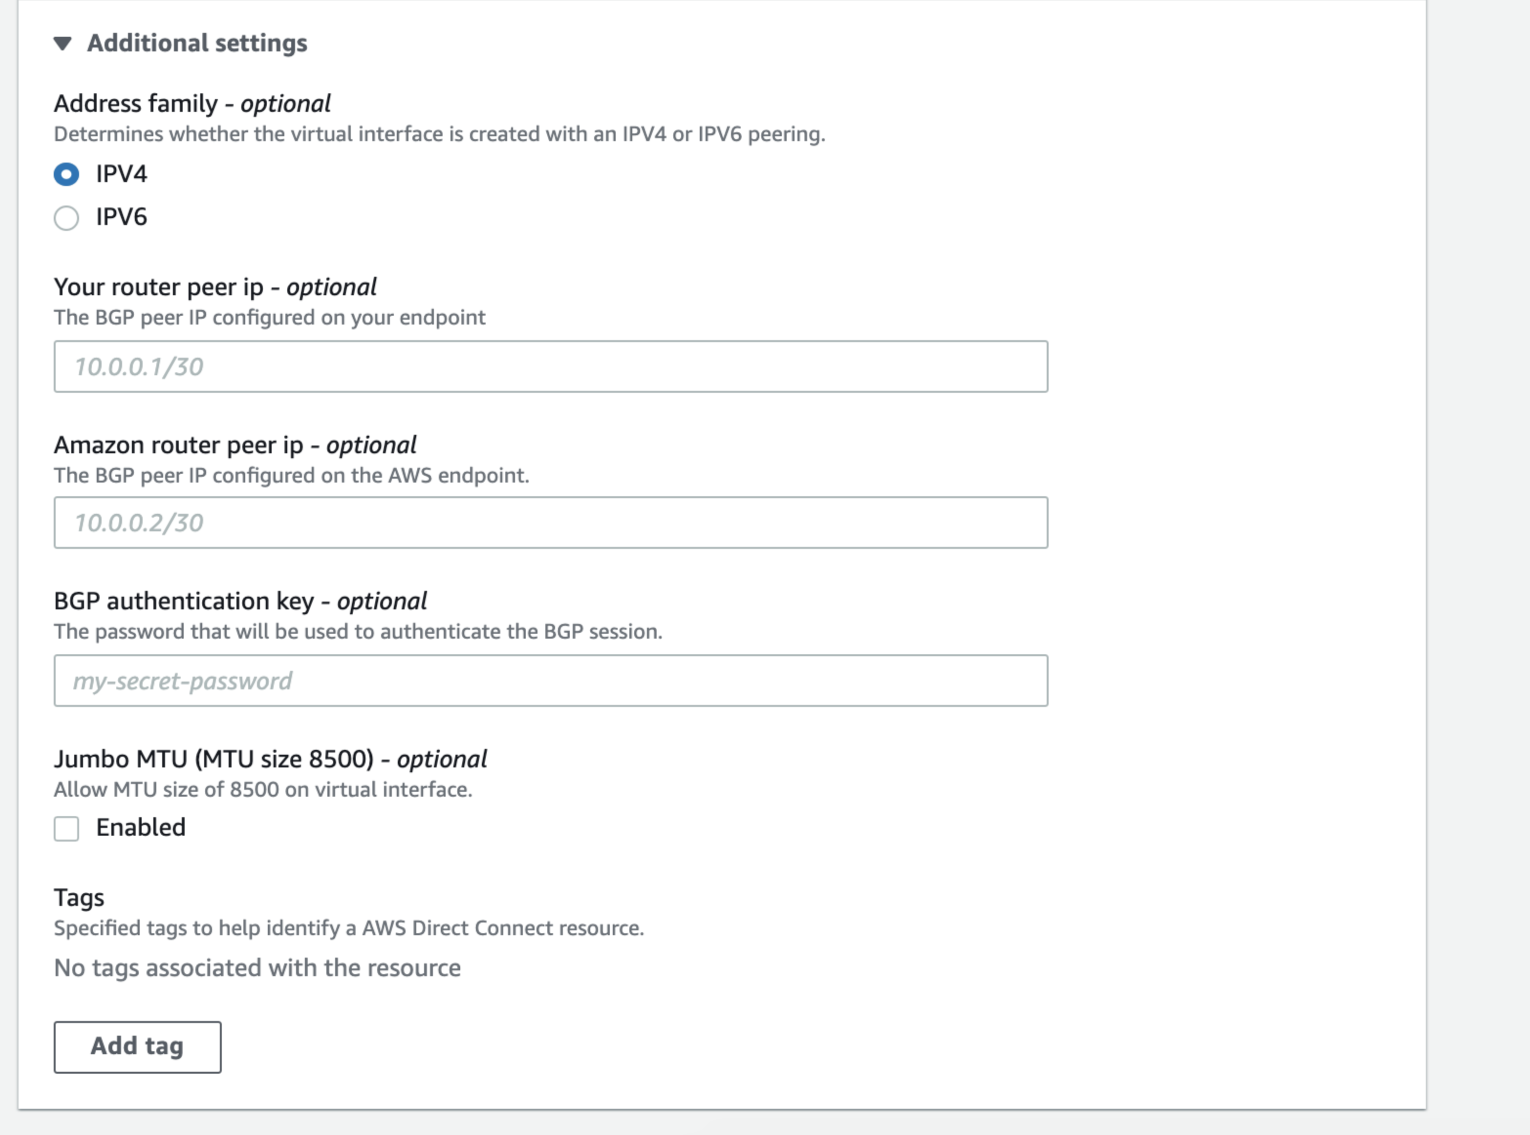
Note
If you are using this connection with an MCR, you need to populate the router peer IP addresses and BGP authentication key. (The fields are optional, so you can leave them blank for the initial creation and add the values later.) You also need to ensure you enter the same values for the MCR VXC in the Portal in the standard MCR A-End user interface. Without these values, you cannot establish BGP peering. For detailed information, see Creating MCR Connections to AWS.
You can also choose whether you want the virtual interface to support Jumbo frames. Enable Jumbo MTU to support an Ethernet packet of 8500 bytes.
-
Click Create virtual interface.
To view the VIF details and state, navigate to Services > AWS Direct Connect > Connections > Name of the Megaport-Created-Hosted Connection.

If BGP hasn’t been configured, the interface state will be shown as “down.”
The last step is to configure BGP on the on-premises network device. The AWS documentation provides details on how to download the router configuration as a unique feature of Hosted Connections. If you have a Megaport Cloud Router (MCR) instead of an on-premises device, see Creating MCR Connections to AWS.
Note
If you download the router configuration files, verify that the AWS and Megaport VXC VLAN numbers match. While in most cases Megaport uses the same VLAN number as AWS, the VLAN might be different in the Port configuration that is connected to your on-premises device given the automation of the platform.
Once you accept the connection and create the VIF in AWS, the VXC state changes to “configured” in the Megaport Portal.
To edit a Hosted Connection
-
Click the gear icon next to the connection in the Megaport Portal to make changes.
You cannot change the rate limit or the AWS connection name or account ID for Hosted Connections. You can modify the details on the Megaport side including the connection name, VLAN ID, and Service Level Reference.
If this is a termed connection, you cannot reduce the term.
Once submitted, those changes take effect in a few minutes.
To delete a Hosted Connection
- In AWS, open the AWS Direct Connect console.
- Delete the virtual interface and then delete the connection.
You can only delete a connection if there are no virtual interfaces attached to it. -
In the Megaport Portal, click the trash icon next to the VXC and confirm the deletion when prompted.

For more information, see Terminating a VXC.
Until you delete the virtual interface and connection in the AWS console, you cannot delete the VXC in the Megaport Portal.