Moving IXs
Once you have created and deployed an Internet Exchange (IX) on the Megaport network, you can move the A-End, effectively moving the IX. This is a useful function for reducing interruptions during maintenance and other tasks that would otherwise cause downtime.
Which IXs can be moved?
The following rules apply regarding which IXs you can move:
- The IX must at least be in a Configured state
- An IX locked by a Company Admin cannot be moved
- You can move an unlocked IX under a locked Port
- The source and destination Ports must be owned by the same customer account.
Conditions for moving an IX
There are conditions that must be met before moving an IX. The following criteria must be satisfied before you can move an IX.
- You can only move to a Port within the same metro as the current Port. For more information about metros, see Metro IDs.
- The destination Ports must have enough capacity for the selected connection.
- When a VLAN is specified, that VLAN must be available on the destination Port.
- The move must not cause a change to billing.
If a move is regarded as invalid, an error message is displayed and the IX is not moved.
If you cancel the move, the IX is not affected and it remains connected to its original Port.
Moving one or more IXs
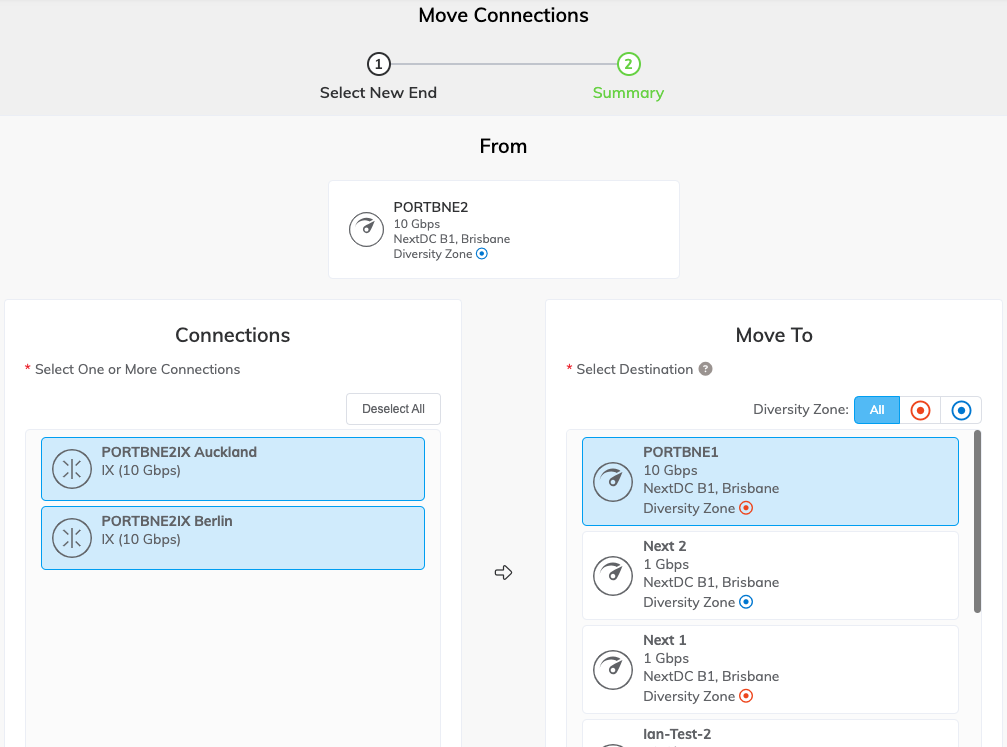
You can move one or more IXs at a time. Select the Port that the IXs are to be moved from, then select the IXs to be moved.
To move one or more IXs
-
In the Megaport Portal, go to the Services page and select the Port you want to use.
-
Click the Move Connections icon next to the Port or the IX.
Tip
The Move Connections icon is greyed out if the Port or IX is not valid. For more information, see rules and conditions above.

-
Select one or more connections to move. Each move is subject to the rules and conditions described above. If a connection is not valid, it will be displayed but will not be available to select.
Tip
You can select or deselect connections individually, or use the Select All button.
-
Select the destination Port in the Move To list.
The Port selection list is filtered by the rules described in the rules and conditions described above. If a connection is not valid, it will be displayed but will not be available to select.Tip
You can filter the Ports by selecting a diversity zone at the top of the Move To list.
-
Click Next.
-
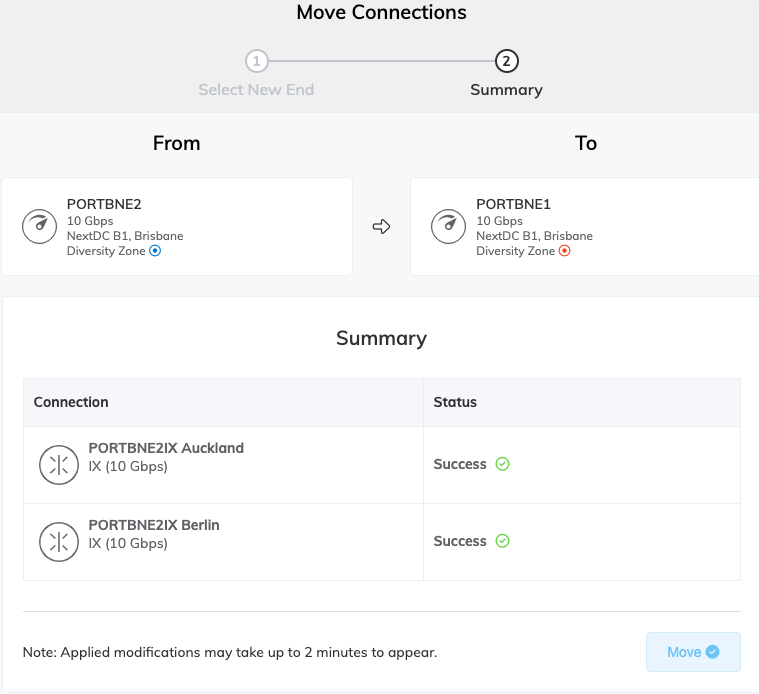
Review your selection and click Move.
-
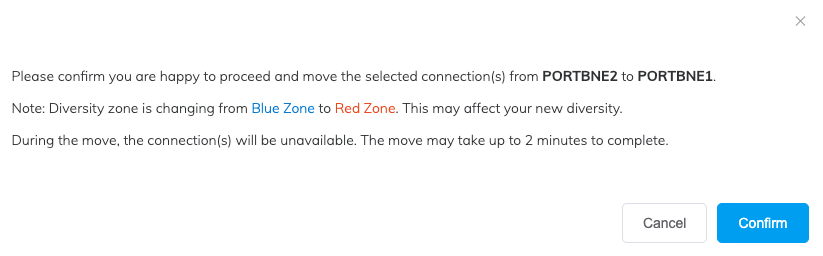
In the prompt that shows the intended move, review the details again and click Confirm.
The Summary table shows the status of the move. It will either show a working hourglass, a message saying success, or an error message.
The Success status means that the request was successfully submitted and the IX(s) have been moved. The change might take up to 2 minutes to appear in the Megaport Portal.
A Failure message shows that the move has failed. The IX(s) will not be moved.