Integrating Megaport with Salesforce Hyperforce on AWS
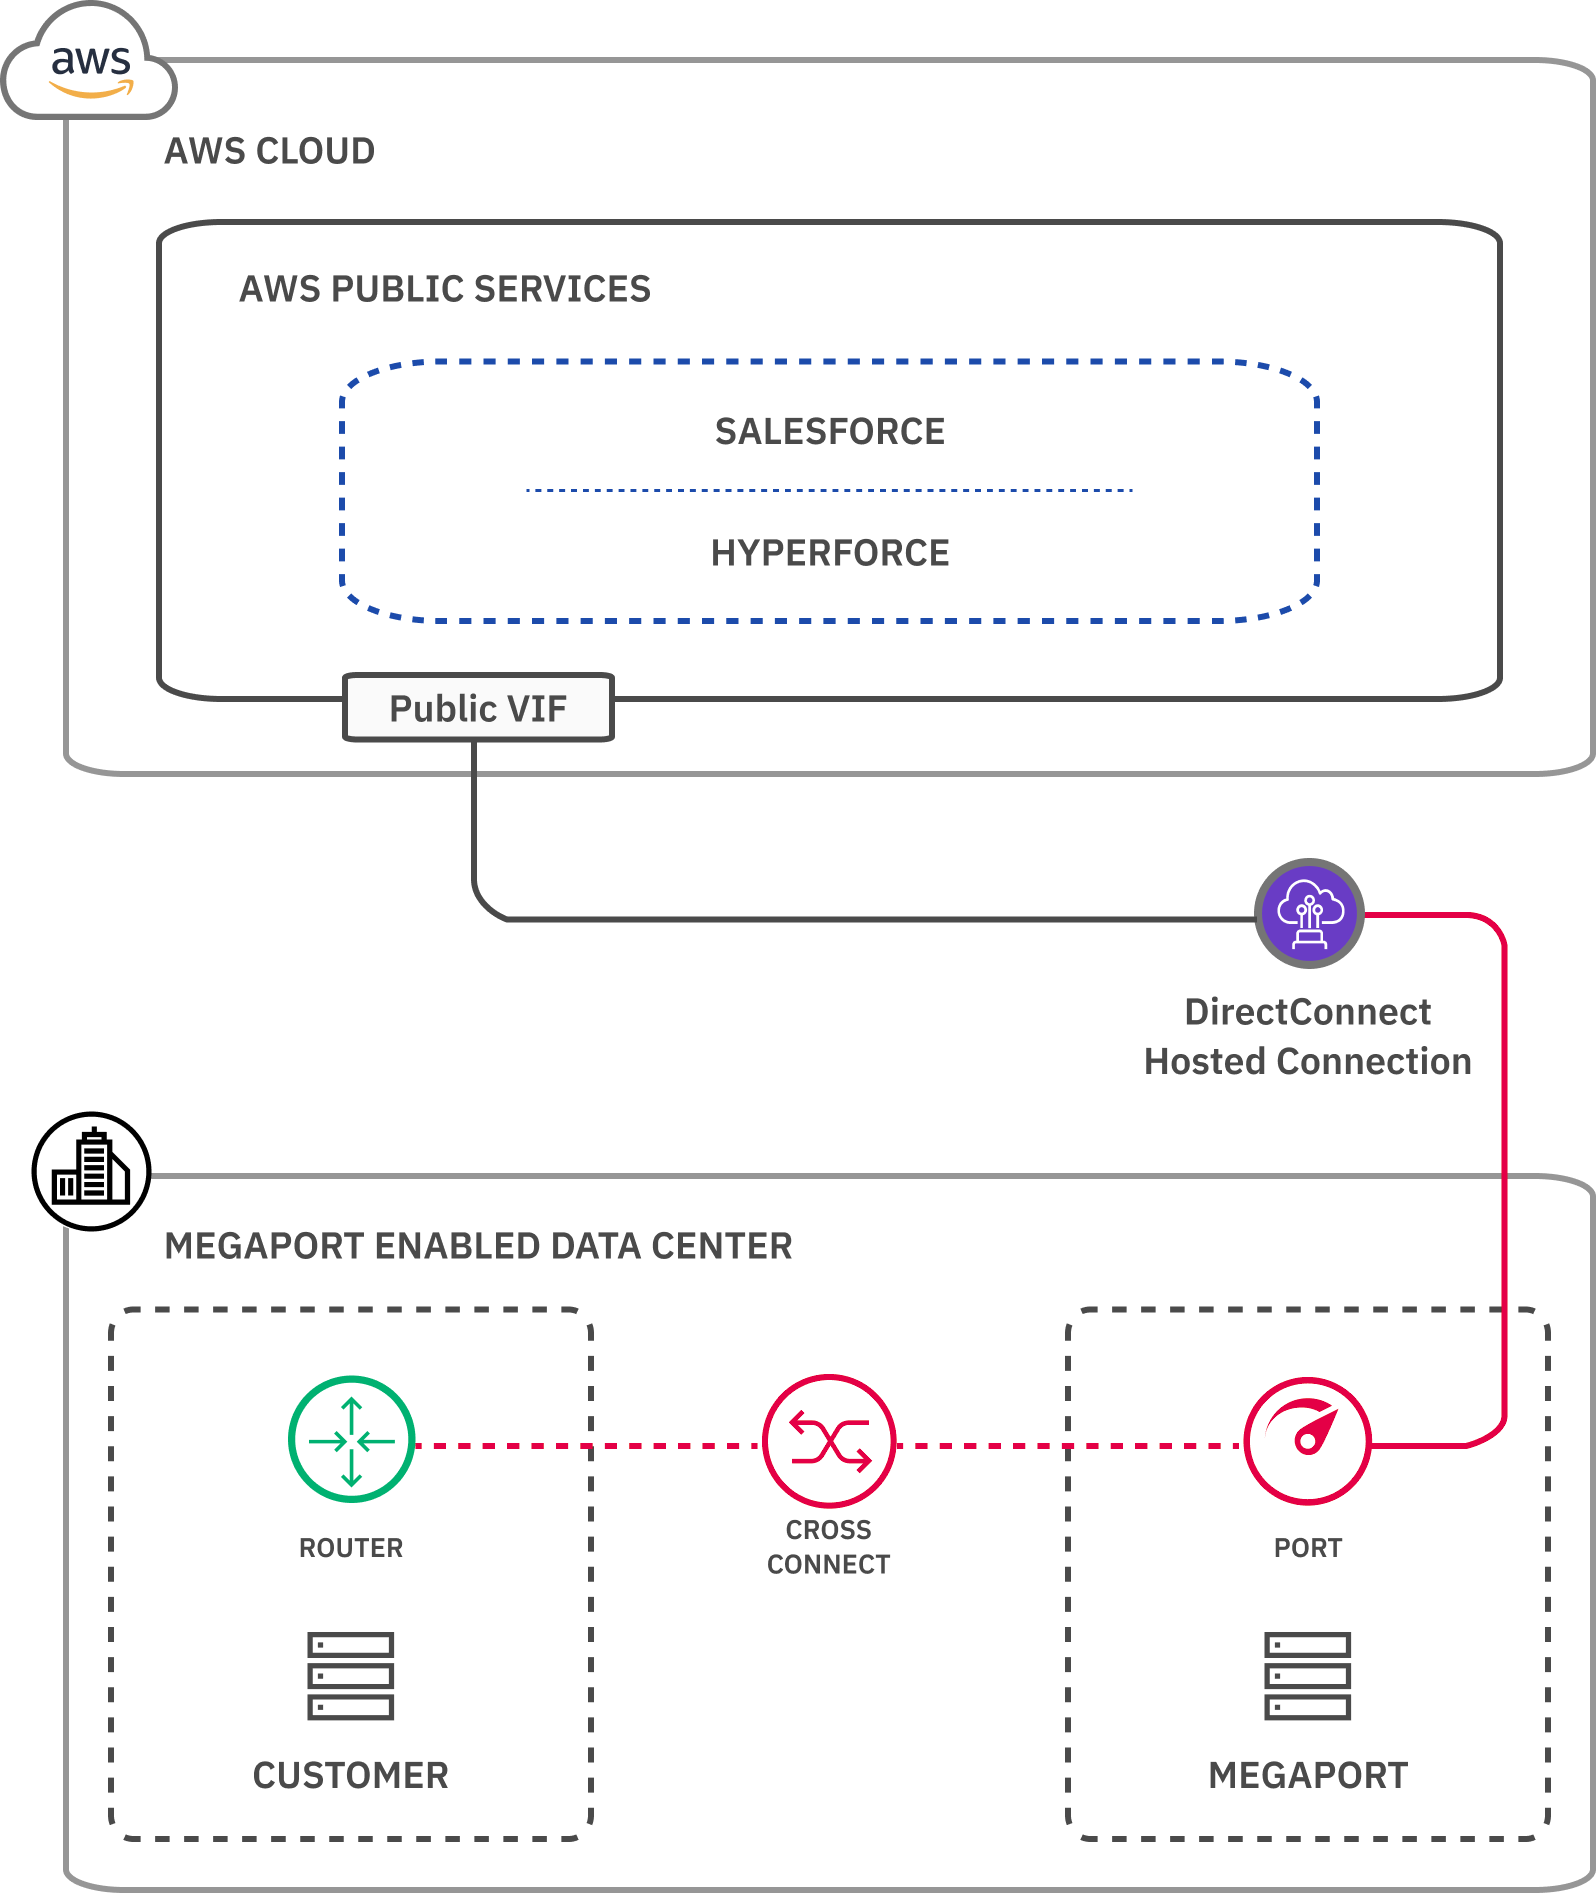
This topic describes how you can use Megaport to deploy the AWS Direct Connect (Hosted Connection) architecture for Hyperforce support using a public VIF.
You can use Megaport to create an AWS Direct Connect Layer 2 connection between your on-premises or colocation-based infrastructure and your Salesforce Hyperforce environment on AWS.
Before you begin, ensure that you have created a Port (You can also use MCR and MVE to access Hyperforce). After you create the Port, you can connect a Virtual Cross Connect (VXC) from the Port to the virtual interface associated with the AWS infrastructure. A VXC is a point-to-point Ethernet connection between an A-End (your Port) and a B-End (in this case, your AWS instance).
If you aren’t a Megaport customer, you can create a 1 Gbps, 10 Gbps, or 100 Gbps Port in one of our global data centers/Points of Presence. If your company isn’t located in one of our PoPs, you can procure a last mile circuit to one of the sites to connect to Megaport. Contact Megaport for more information.
Note
If you require a Port in a different location to physically separate this solution from other existing traffic traversing your Ports, we recommend that you create a new one before proceeding.
This image shows Port access to Hyperforce via Public Virtual Interface (VIF).
Salesforce Hyperforce overview
Hyperforce is the next-generation Salesforce infrastructure architecture, built for the public cloud. Hyperforce infrastructure is composed of code rather than hardware, so that the Salesforce platform and applications can be delivered rapidly and reliably to locations worldwide, giving customers more choice and control over data residency.
When customers require direct network connectivity from their on-premises environment to Hyperforce, AWS Direct Connect can be used. This enables access into the AWS cloud with guaranteed bandwidth, and is recommended for latency, performance sensitive situations, and architectures.
A public VIF is used for Hyperforce connectivity. Traffic is sent from the customer location, and after it arrives at the Direct Connect location, can be routed through the AWS network to either AWS public services or services deployed on the AWS cloud which are accessible via Elastic IP addresses (such as Hyperforce).
Note
To create a public VIF for AWS, you need to specify the public peer IP addresses. For more information, see Configuring Public AWS Connections with IP Addresses Provided by AWS.
If you do not have public IP addresses, you need to request them from AWS. The request requires approval from the AWS Direct Connect team and it can take up to 72 hours for AWS to review and approve your request.
Best practices and considerations
When connecting to Hyperforce on AWS, you should consider the following:
-
Failover – Routing information between the AWS network and your router is exchanged dynamically through Border Gateway Protocol (BGP). To improve failover times, we suggest that you implement Bidirectional Forwarding Detection (BFD).
-
Routing security – You must connect to AWS using public IP addresses in order to use a public VIF. Advertising a public IP address space to AWS that’s not advertised to the public internet will ensure traffic from AWS will only route to these IPs using the Direct Connect connections. To ensure your users access Hyperforce only through the Direct Connect connection, you can add IP prefixes selected for a Direct Connect connection to the trusted IP ranges for your organization.
-
Prioritizing Routing Over AWS Direct Connect - Public IP prefixes used by Hyperforce are advertised through public VIF on a Direct Connect connection and to the internet. Therefore, you might receive routing information about both through the Direct Connect connection and the ISP connection. In case they learn the same prefixes, it’s best to set proper routing policies in the on-premises environment (routers), so a Direct Connect connection is preferred.
Integrating Megaport with Hyperforce on AWS
You can use the Megaport Portal to create a VXC to the Hyperforce on AWS environment using a public VIF.
To integrate Megaport with Hyperforce on AWS
-
In the Megaport Portal, go to the Services page and select the Port you want to use.
If you haven’t already created a Port, see Creating a Port. -
Add an AWS connection for the Port.
If this is the first connection for the Port, click the AWS tile. The tile is a shortcut to the configuration page. Alternatively, click +Connection, click Cloud, and click AWS. -
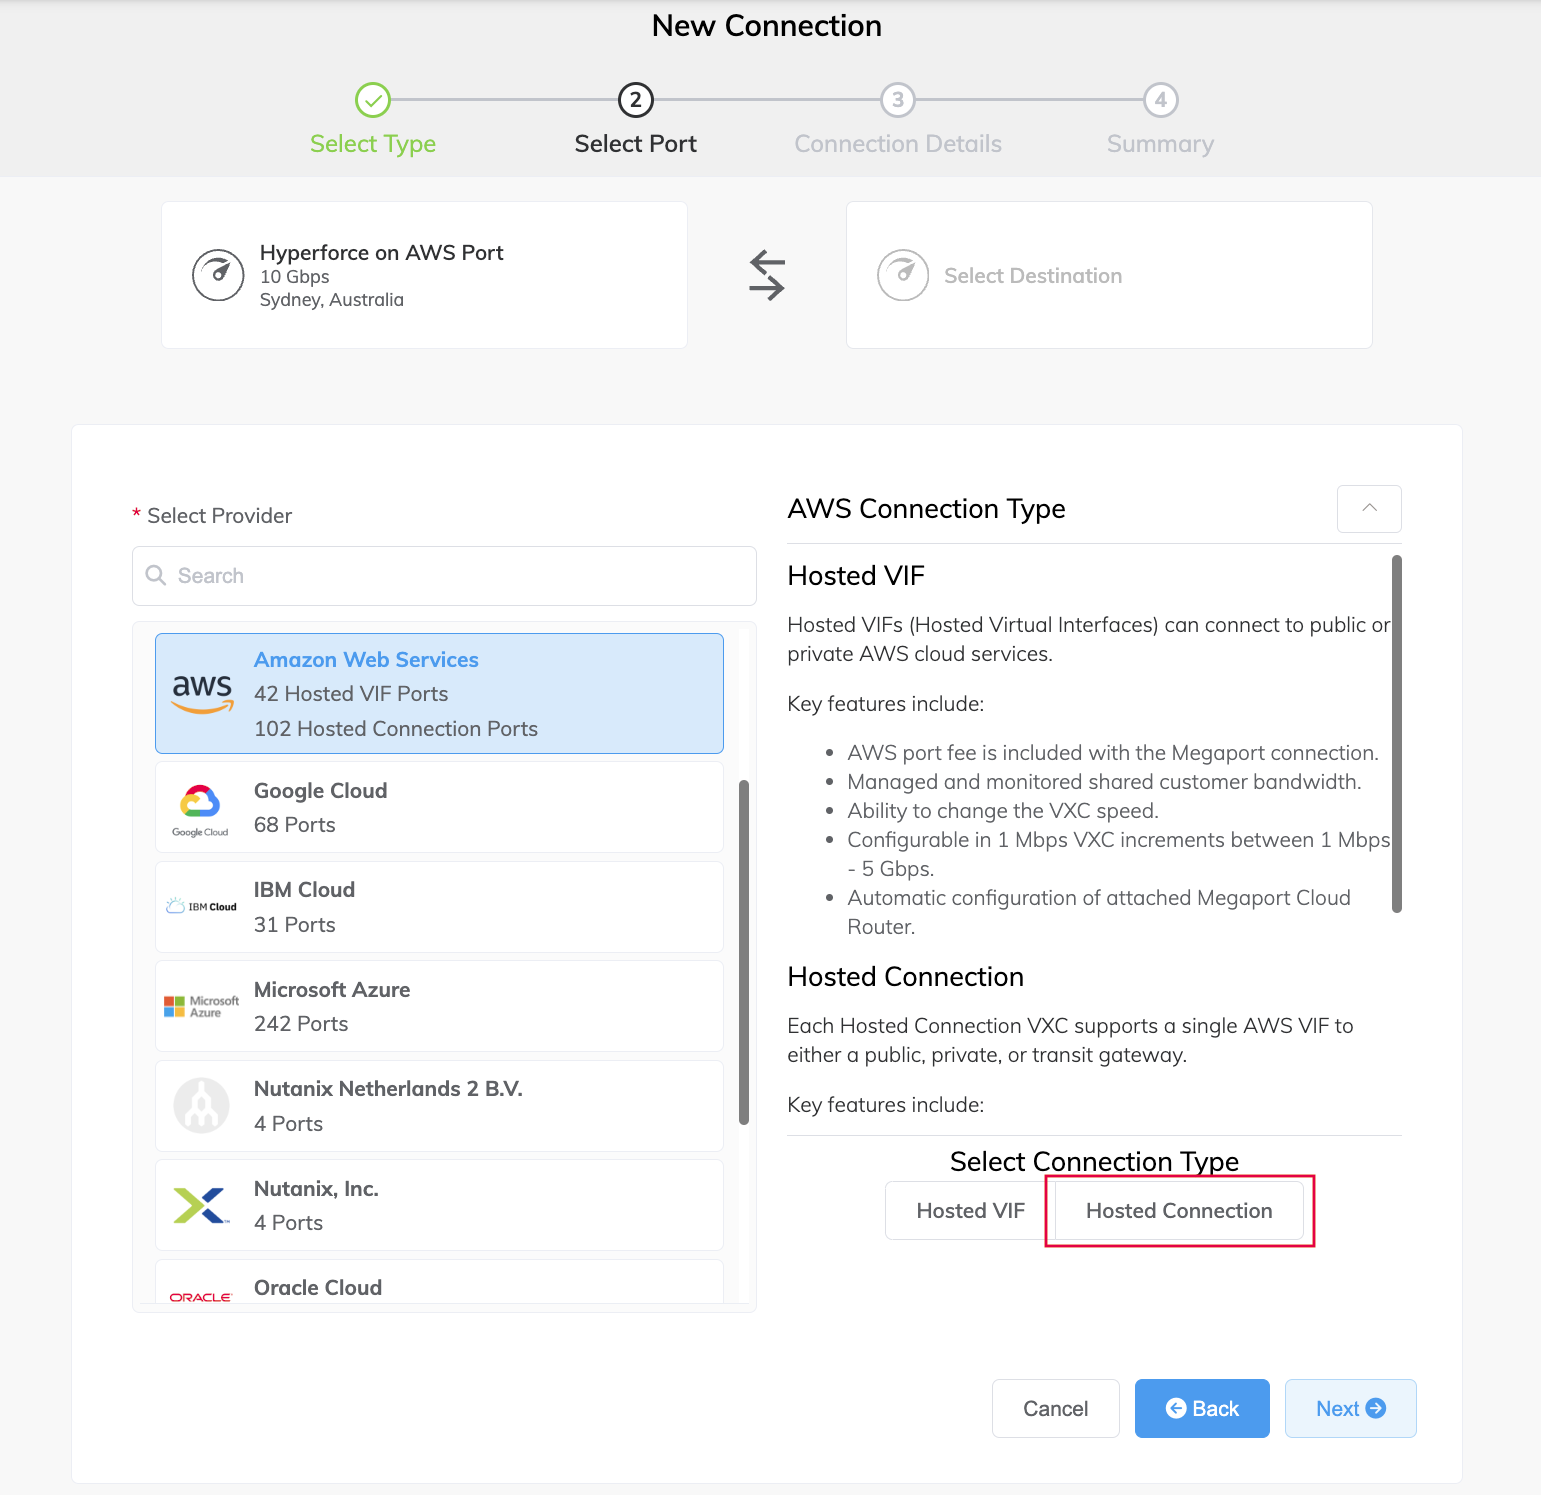
For AWS Connection Type, you have the options of Hosted VIF or Hosted Connection.
For this scenario, click Hosted Connection.
-
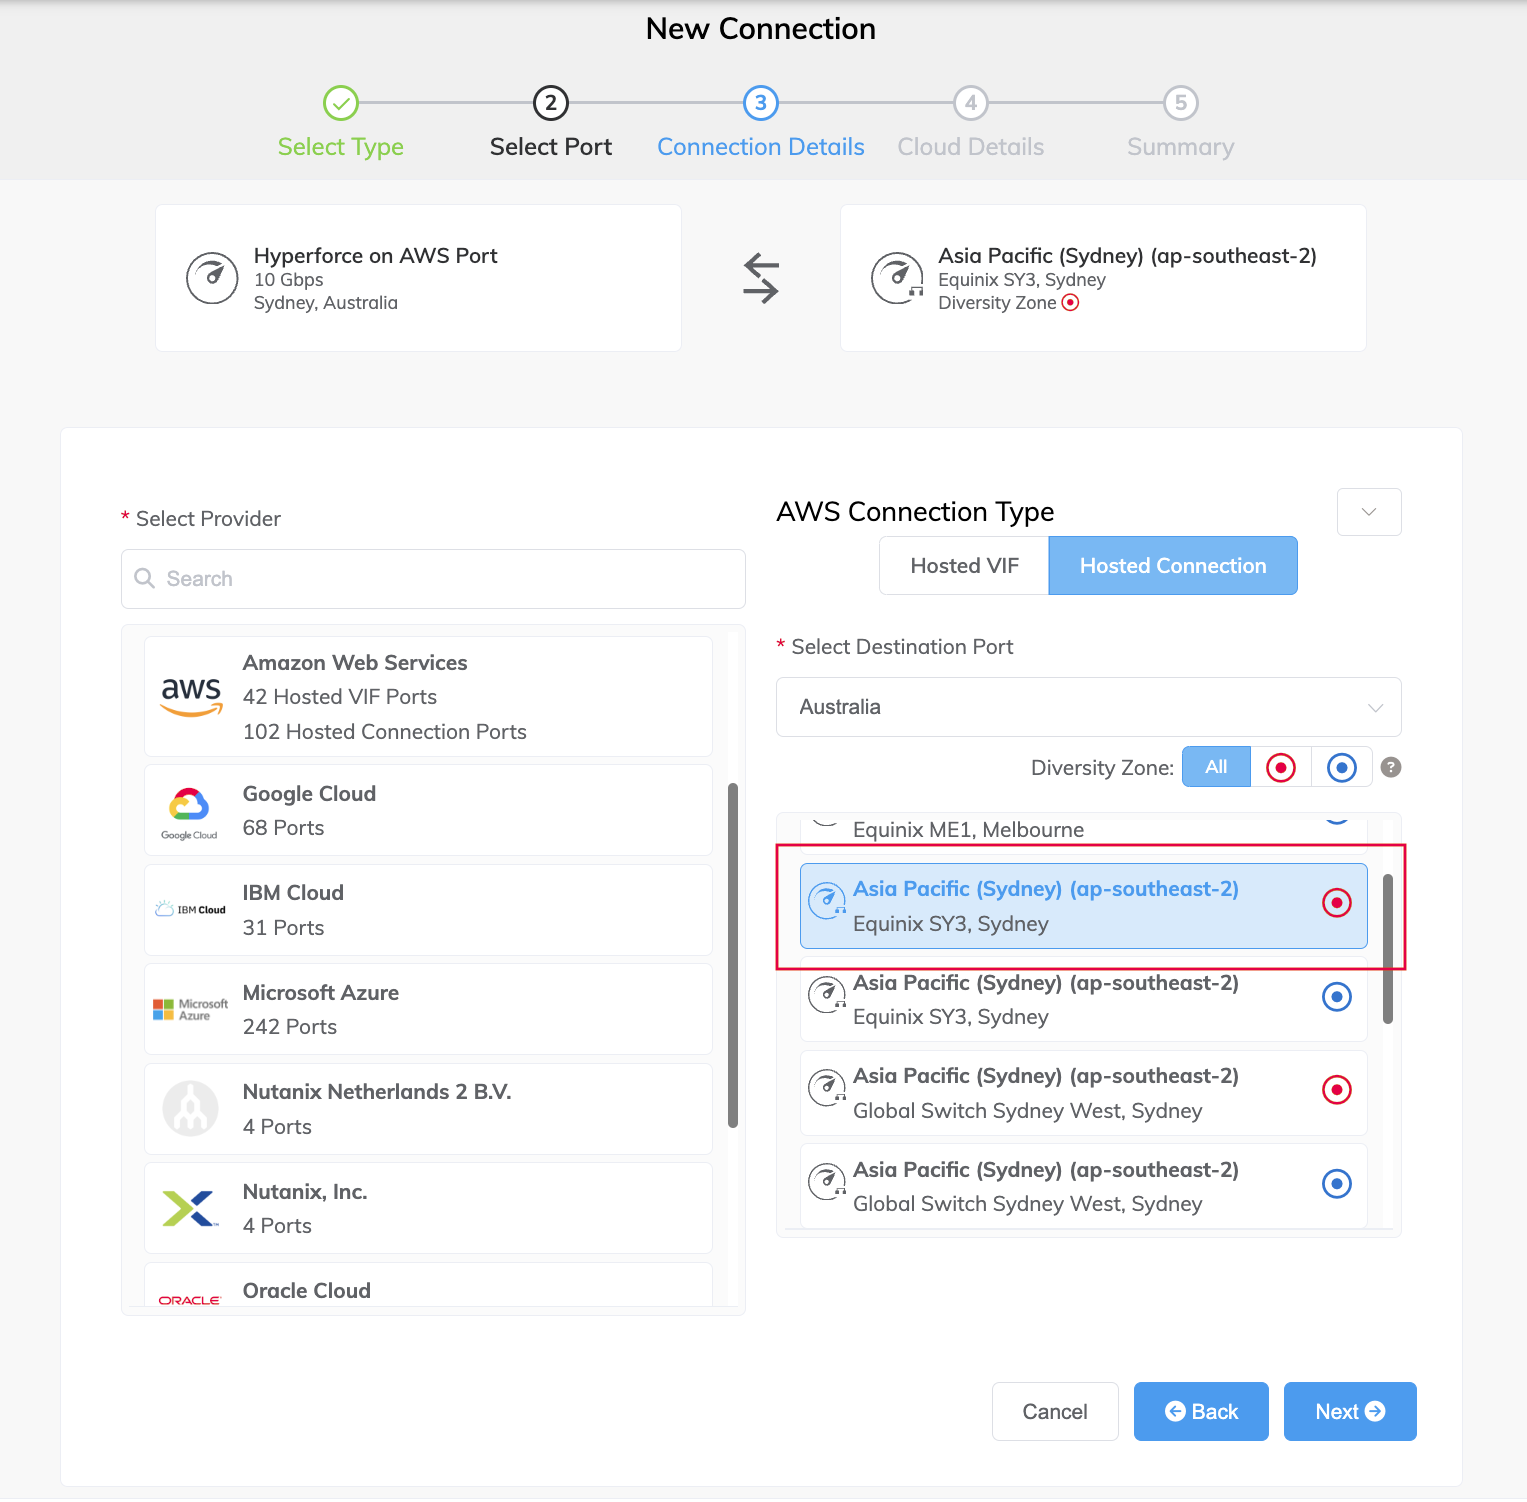
Next, create a new VXC. In the Select Destination Port list, select the AWS region and the interconnection point for your connection, then click Next.
You can use the Search field to find the Port name, Country, Metro City, or address of your destination Port.
-
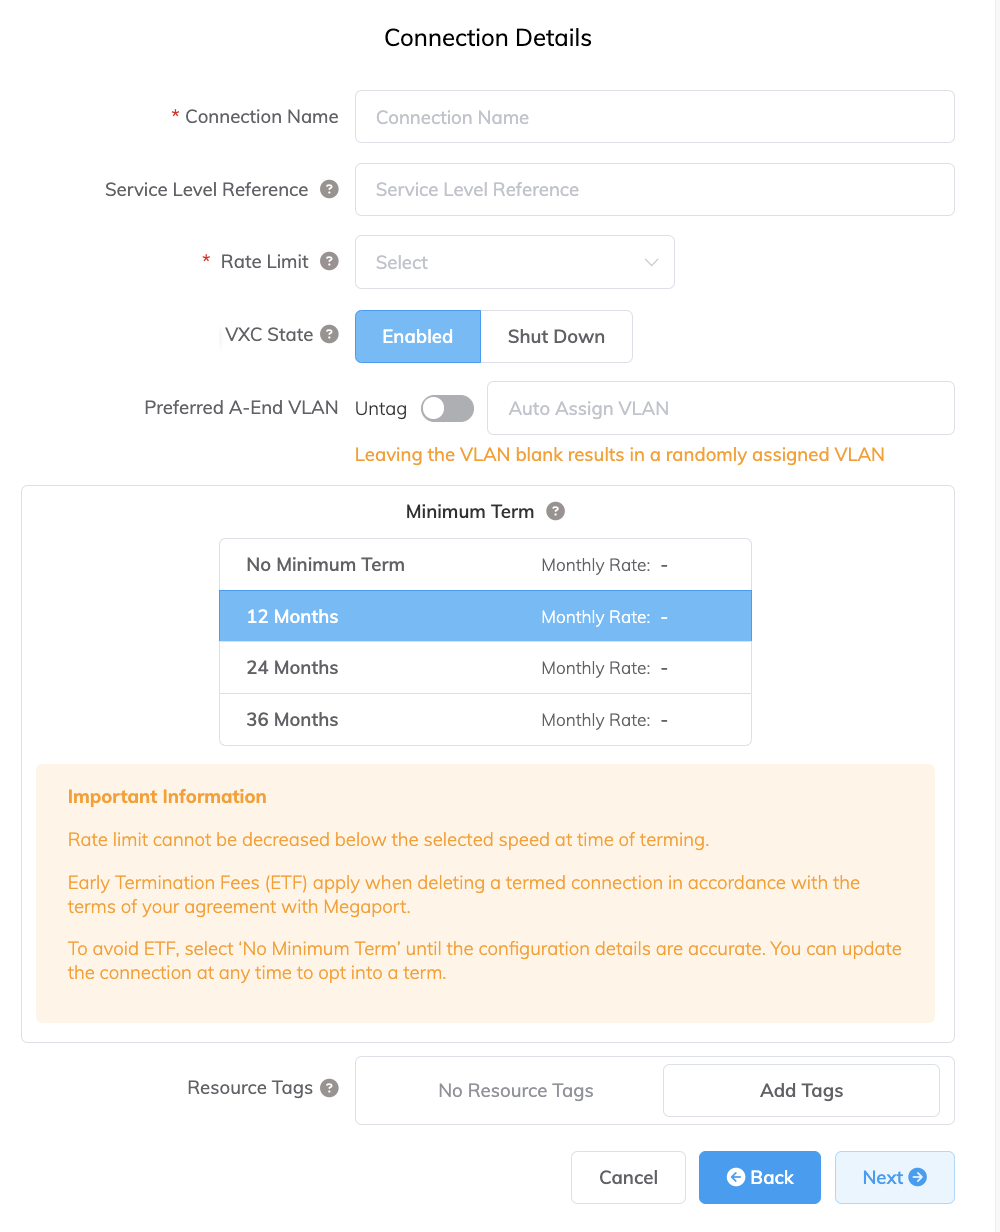
Specify the connection details:
-
Connection Name – The name of your VXC to be shown in the Megaport Portal.
-
Service Level Reference (optional) – Specify a unique identifying number for the VXC to be used for billing purposes, such as a cost center number or a unique customer ID. The service level reference number appears for each service under the Product section of the invoice. You can also edit this field for an existing service.
-
Rate Limit – The speed of your connection in Mbps. You must choose from the provided bandwidth options (50 Mbps to 25 Gbps). The sum of all hosted virtual VXCs to a service can exceed the Port capacity (1, 10, or 100 Gpbs), however the total aggregate will never burst beyond the Port capacity.
-
VXC State – Select Enabled or Shut Down to define the initial state of the connection. For more details, see Shutting Down a VXC for Failover Testing.
Note
If you select Shut Down, traffic will not flow through this service and it will behave as if it was down on the Megaport network. Billing for this service will remain active and you will still be charged for this connection.
-
Preferred A-End VLAN (optional) – Specify an unused VLAN ID for this connection.
This VLAN ID must be a unique ID on this Port and can range from 2 to 4093. If you specify a VLAN ID that is already in use, the system displays the next available VLAN number. The VLAN ID must be unique to proceed with the order. If you don’t specify a value, Megaport will assign one.Alternatively, you can click Untag to remove the VLAN tagging for this connection. The untagged option limits you to only one VXC deployed on this Port.
-
Minimum Term – Select No Minimum Term, 12 Months, 24 Months, or 36 Months. Longer terms result in a lower monthly rate. 12 Months is selected by default.
Take note of the information on the screen to avoid early termination fees (ETF). For more information, see VXC Pricing and Contract Terms and VXC, Megaport Internet, and IX Billing. -
Resource Tags – You can use resource tags to add your own reference metadata to a Megaport service.
To add a tag:- Click Add Tags.
- Click Add New Tag.
- Enter details into the fields:
- Key - string maximum length 128. Valid values are a-z 0-9 _ : . / \ -
- Value - string maximum length 256. Valid values are a-z A-Z 0-9 _ : . @ / + \ - (space)
- Click Save.
If you already have resource tags for that service, you can manage them by clicking Manage Tags.
Warning
Never include sensitive information in a resource tag. Sensitive information includes commands that return existing tag definitions and information that will identify a person or company.
-
-
Click Next.
-
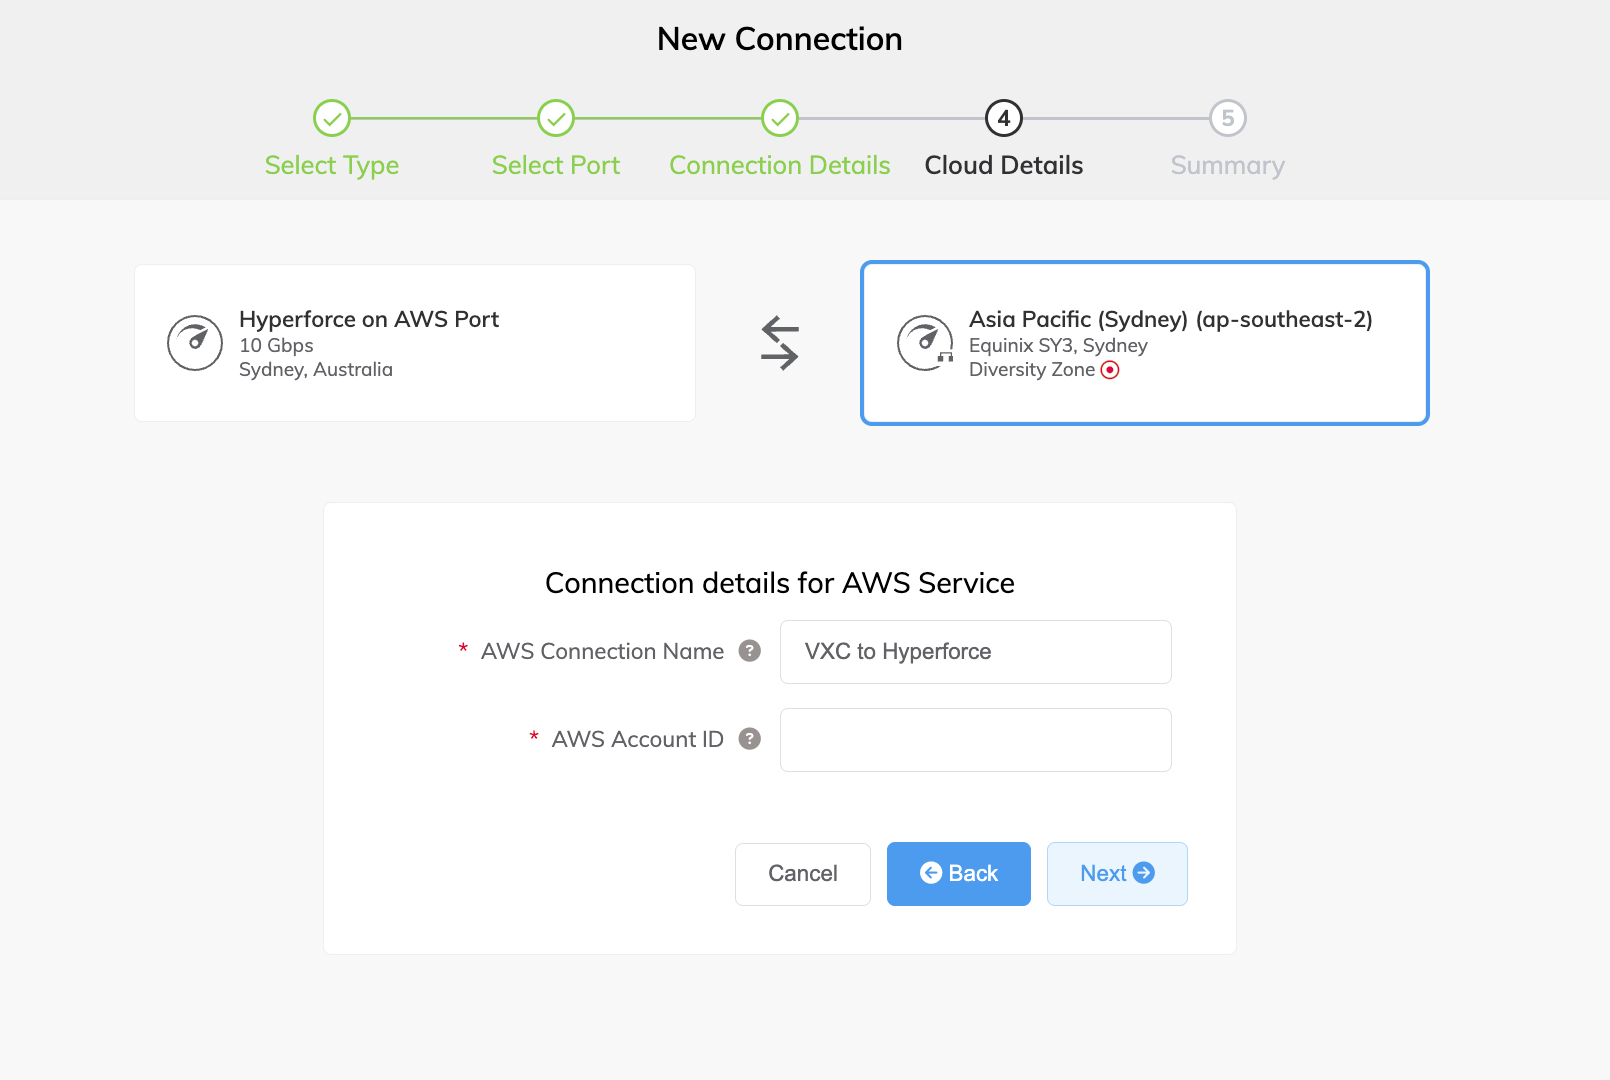
Specify the cloud details:
- AWS Connection Name – This is a text field and will be the name of your virtual interface that appears in the AWS console. For easy mapping, use the same name for this field as you did for the VXC name on the previous screen.
- AWS Account ID – This is the ID of the account you want to connect. You can find this value in the Account Settings section of your AWS console.
-
Click Next.
-
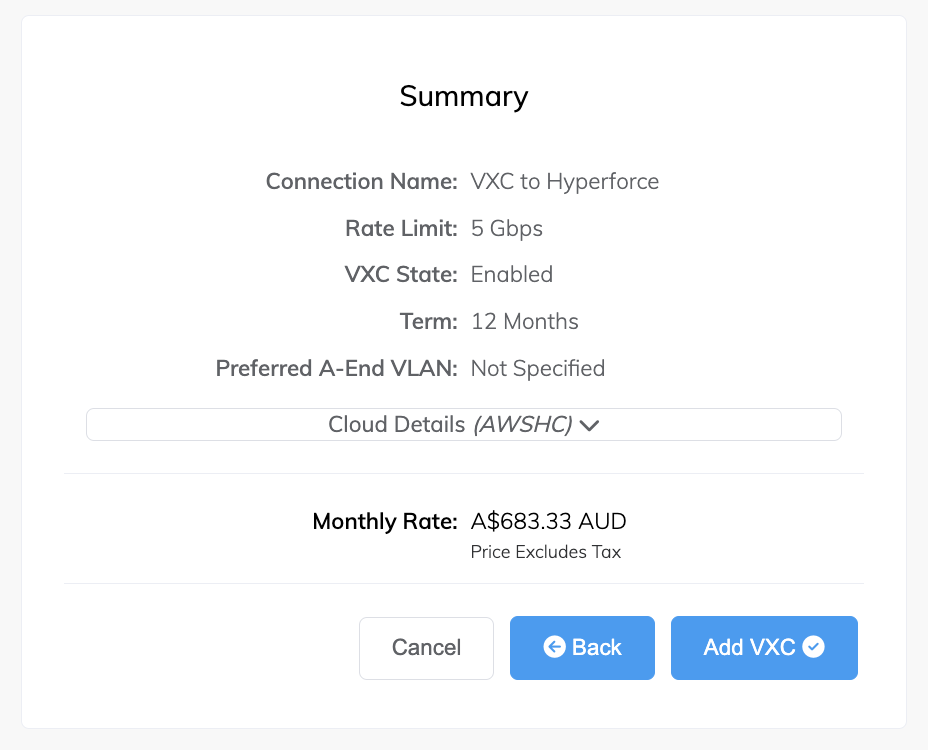
Review the connection details and click Add VXC.
-
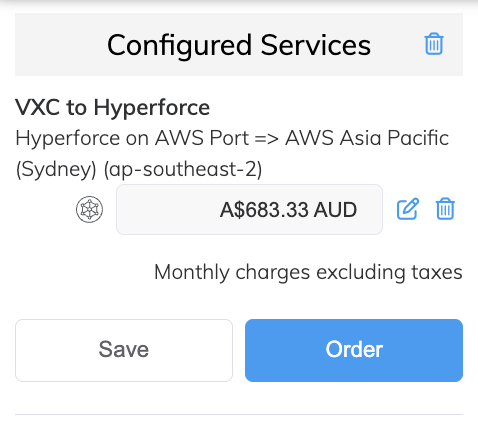
Click Order.
-
Click Order Now.
Your work in the Megaport Portal is complete. Next, you will connect the new VXC to your AWS environment.

-
In approximately 2 minutes, log in to your AWS account.
The VXC you implemented will appear in your Direct Connect under Connections. -
Click Create connection.
You will then need to connect to a Direct Connect Gateway. For details on connecting to various types of gateways, see Working with Direct Connect gateways - AWS Direct Connect.