Creating a Private VXC
This topic describes how to connect a private Virtual Cross Connect (VXC) to a Port in the Megaport network.
With a Port configured, you can deploy a private VXC to connect to another Port local to the current company account. A private VXC is essentially a point-to-point Ethernet connection between an A-End (your Port) and a B-End (the Private VXC destination type). For example, you could create an interconnect within a data center to extend your private network backbone capability, or connect a production data center to a redundant data center for disaster recovery.
For more information on creating a private VXC for Megaport Cloud Router (MCR), see Creating an MCR VXC.
To deploy a private VXC
-
In the Megaport Portal, go to the Services page and select the Port you want to use.
If you haven’t already created a Port, see Creating a Port.
-
Select the originating Port (the A-End).
-
Click +Connection.

Port details including the speed, location, and diversity zone are displayed.
The diversity zone for an A-End service is visible after the service is deployed and available. The A-End diversity zone is also visible when ordering a diverse pair of Ports. When creating an order with multiple VXCs and diverse Ports, the Port diversity zone will be visible before deploying, preventing you from accidentally crossing zones. When ordering a single Port, you will not see the diversity zone until it is deployed, and not at all if the location does not support diversity.
-
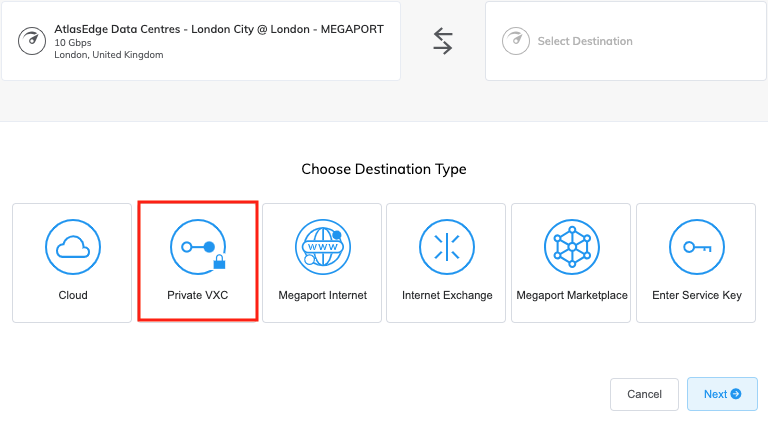
Click Private VXC.
Note
The Private VXC tile is disabled in the following scenarios:
- You only own one Port, MCR, or MVE. You cannot create a private connection with the same port at both ends.
- You have more than one Port but no MCRs or MVEs, and the other owned Ports have untagged connections.
-
Select the target Port (the B-End) then click Next.
For the B-End, the Port details including the speed, location, and diversity zone are displayed.
The diversity zone for a B-End service is visible after the service is deployed and available. The B-End diversity zone is also visible when ordering a diverse pair of Ports. When creating an order with multiple VXCs and diverse Ports, the Port diversity zone will be visible before deploying, preventing you from accidentally crossing zones. When ordering a single Port, you will not see the diversity zone until it is deployed, and not at all if the location does not support diversity.
-
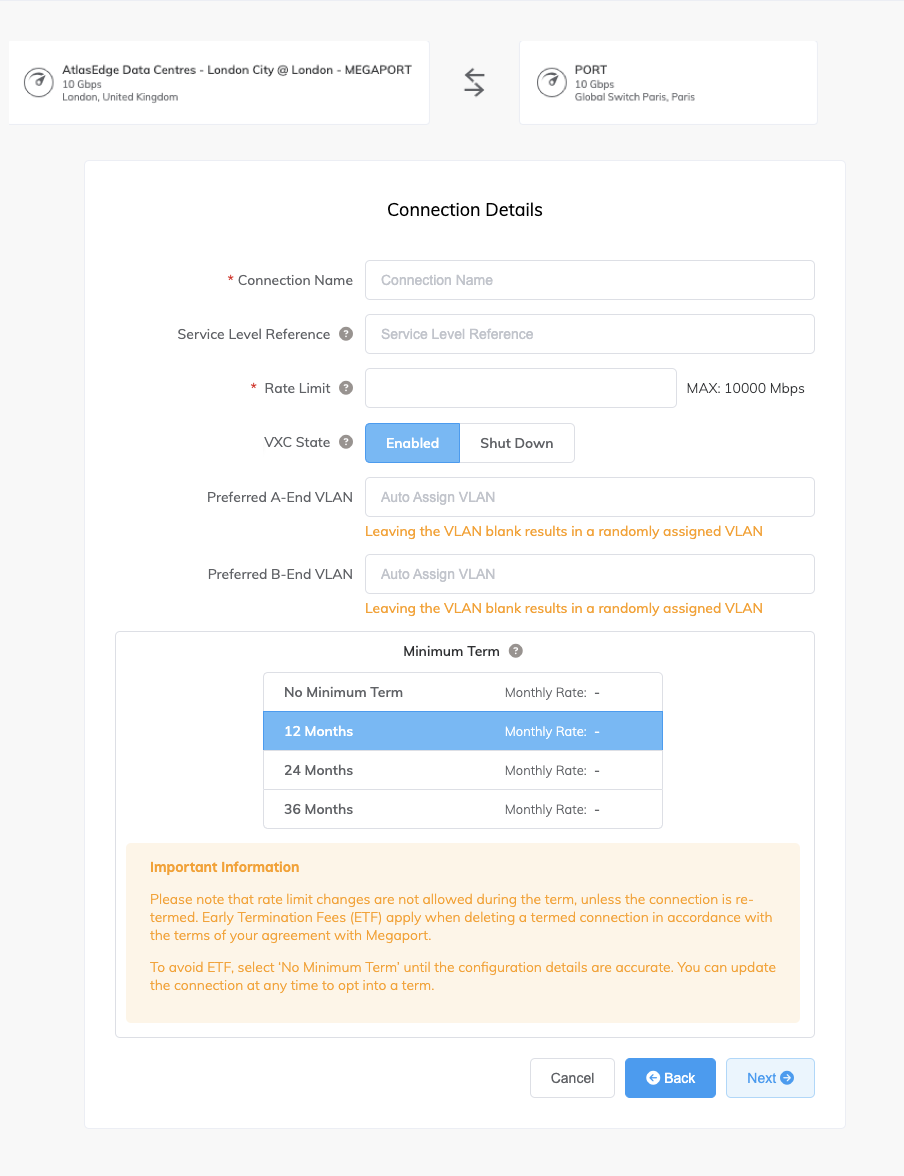
Specify the connection details:
-
Connection Name – The name of your VXC to be shown in the Megaport Portal.
-
Service Level Reference (optional) – Specify a unique identifying number for the VXC to use for billing purposes, such as a cost center number or a unique customer ID. The service level reference number appears for each service under the Product section of the invoice. You can also edit this field for an existing service.
Note
Partner-managed accounts can apply a Partner Deal to a service. For more information, see Associating a Deal With a Service.
-
Rate Limit – The speed of your connection in Mbps. The maximum VXC size is dynamically calculated based on network routes used to deliver the service. The calculation uses the Ports at each end of the VXC and bases calculations on the lowest rate.
Note
The whole path must be able to support the VXC speed. An error will appear if you try to specify a rate limit that is too high for the path to support.
-
VXC State – Select Enabled or Shut Down to define the initial state of the connection. For more information, see Shutting Down a VXC for Failover Testing.
Note
If you select Shut Down, traffic will not flow through this service and it will behave as if it was down on the Megaport network. Billing for this service will remain active and you will still be charged for this connection.
-
Preferred A-End VLAN – Specify the 802.1q VLAN tag for this connection for the A-End.
Each VXC is delivered as a separate VLAN on your Port. This must be a unique VLAN ID on this Port and can range from 2 to 4093. If you specify a VLAN ID that is already in use, the system displays the next available VLAN number. The VLAN ID must be unique to proceed with the order. If you don’t specify a value, Megaport will assign one.Note
You can select Untag to deliver an untagged VLAN; however, this consumes the entire Port and prevents any other VXCs from being deployed on this Port.
-
Preferred B-End VLAN – Specify the 802.1q VLAN tag for this connection that you will receive through the B-End VLAN.
Note
Selecting the A-End and B-End as Untag provides point-to-point Ethernet connectivity between a pair of dedicated Ports, supporting the forwarding of both untagged and tagged frames (IEEE 802.1q and 802.1ad). Additionally, other protocols like MACsec (802.1ae) will also be forwarded. For supported protocols, frame types, and behaviors, see Technical Specifications.
-
Minimum Term – Select No Minimum Term, 12 Months, 24 Months, or 36 Months. Longer terms result in a lower monthly rate. 12 Months is selected by default.
Take note of the information on the screen to avoid early termination fees (ETF). For more information, see VXC Pricing and Contract Terms and VXC, Megaport Internet, and IX Billing.

-
-
Click Next to review the VXC connection summary, including price.
-
Click Add VXC to save the VXC.
Repeat these steps to configure more VXCs. -
Click Order to proceed through the checkout process.
When the VXCs are deployed, you can view them in the Portal Services page. Note that the service identifier number is the same for the VXCs at both ends of the connection.
Note
You can change the rate limit when a VXC is on a 12, 24, or 36-month term. For more information, see Changing the Speed of a Termed VXC.