Creating a Cisco SD-WAN MVE in vManage
Cisco SD-WAN MVE is integrated with Megaport. Once you have a Megaport account, all further interactions are done through the Cisco centralized management console called vManage NMS.
The vManage NMS console is where you create, configure, administer, maintain, monitor, and terminate MVE.
To create an MVE integrated with Cisco
-
Create a Megaport account.
-
New Megaport customers – Log in to the Megaport Portal, create your account, and proceed to your Cisco vManage account. For more information, see Creating an Account.
-
Existing Megaport customers – Proceed to step 2.
Keep your Megaport account credentials handy, they will be required when creating the Cisco OnRamp for Multi-Cloud solution through vManage.
Note
The Cisco vManage console uses Megaport API calls to synchronize and authenticate the MVE. If you are using a vManage console that does not allow this API call communication, for example, an on-premises vManage, you might need to open one or more ports on the customer firewall protecting the on-premises vManage. For more information, see Firewall Ports for Cisco SD-WAN Deployments.
-
-
Log in to Cisco vManage to create and configure a Megaport MVE.
Note
In vManage, a Megaport MVE is called a Cisco interconnect gateway. The terms interconnect gateway and MVE are used interchangeably in this topic.
Basic steps to create an MVE in vManage
This section provides an overview of the configuration steps in vManage. It uses your Megaport Portal account information to automatically make an API call to Megaport for MVE creation.
For more information about Cisco SD-WAN, see the Cisco SD-WAN Cloud OnRamp Configuration Guide.
The basic steps are:
- Attach a device to a template
- Configure the device template
- Configure the device
- Provision the Megaport account details
- Configure the MVE global settings
- Create the MVE (interconnect gateway)
The MVE with Cisco integration requires vManage platform version 20.5 or later. Before you begin, verify the vManage platform version.
To view the vManage platform version
- In the vManage console, click the question mark icon, choose About, and verify the version number.
If your version is earlier than 20.5, upgrade to 20.5 or later.
To attach a device to a Megaport template
-
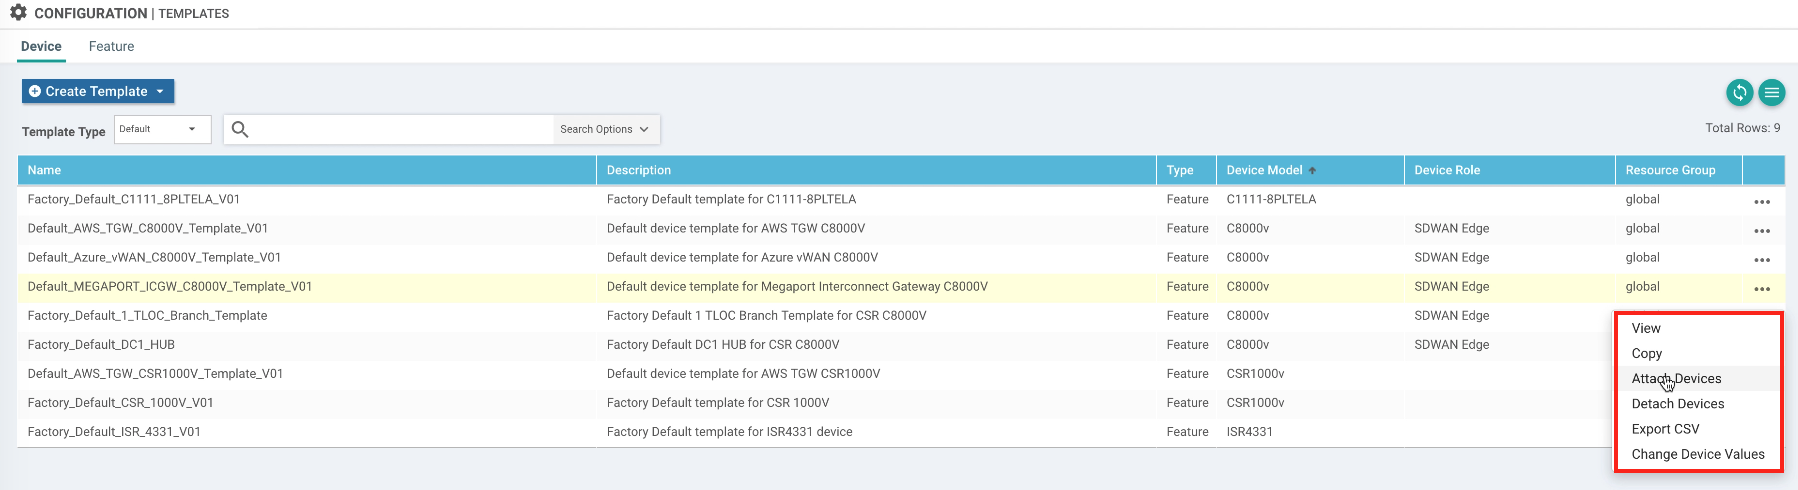
From the Configuration menu, choose Templates.

-
Select Default from the Template Type drop-down menu.
- Select a template.
This example uses the Default_MEGAPORT_ICGW_C8000V_template_V01 template, but you can also clone a default template and add to or modify the clone, as required. - Click the ellipsis (…).
-
Select Attach Devices.
-
Select a device from the list of available devices.
If no devices are available, use your vSmart account to access the certificates for the devices. - Click the right arrow to move the device to the Selected Devices list and click Attach.
To configure the device template
-
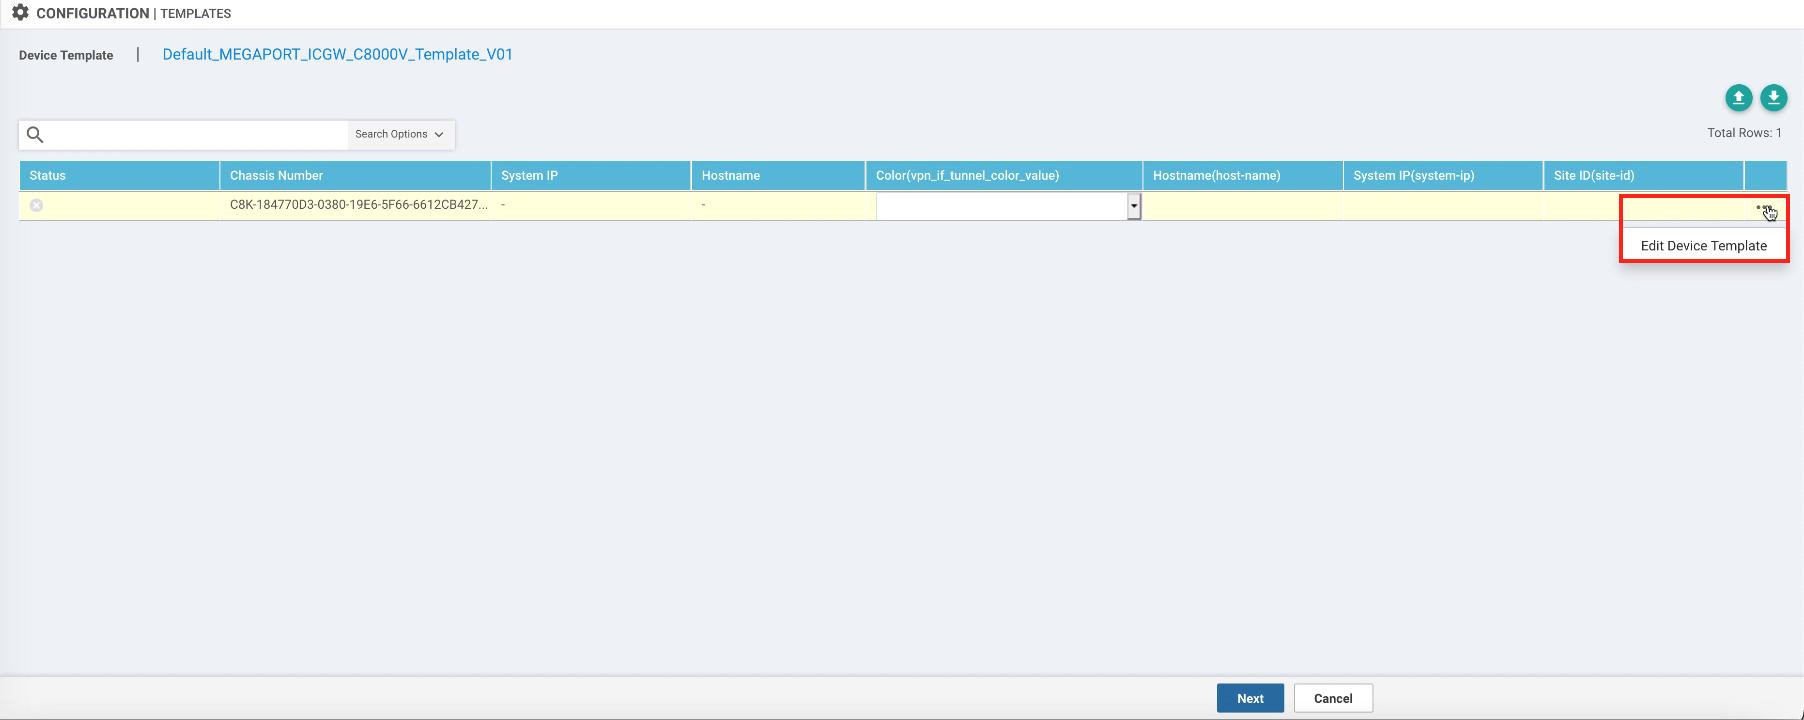
Once the device is attached, click the ellipsis (…) and select Edit Device Template.
-
Select a color from the drop-down list.
A color is a Cisco SD-WAN attribute that identifies the individual WAN transport tunnel. The color can provide restrictions such as VPN and assigns how other branches address the connection. - Enter a System IP address.
Each interconnect gateway/MVE needs a unique System IP within the SD-WAN fabric. For example, 1.1.1.32. The system IP is not a routable IP address, but it must be unique among your edge devices. - Enter a site ID.
Each interconnect gateway/MVE needs a site ID within the SD-WAN fabric. For example, 123132. - Enter a hostname.
Each interconnect gateway/MVE needs a unique hostname within the SD-WAN fabric. For example, mve-atl-eq2. - Click Update.
To configure the device
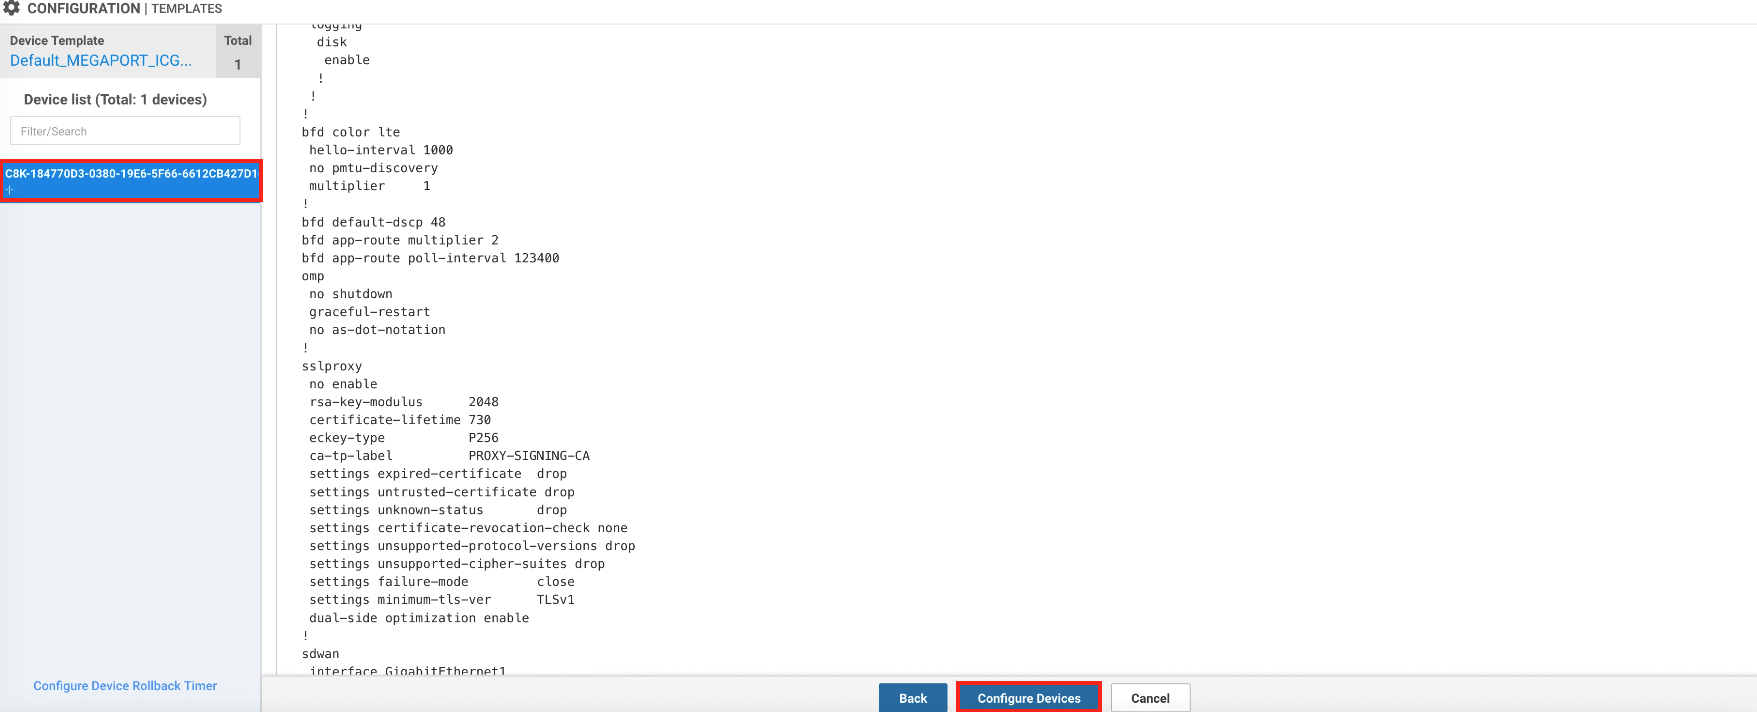
- Click the device name in the Device List.
-
Click Configure Devices.
To provision the Megaport account details
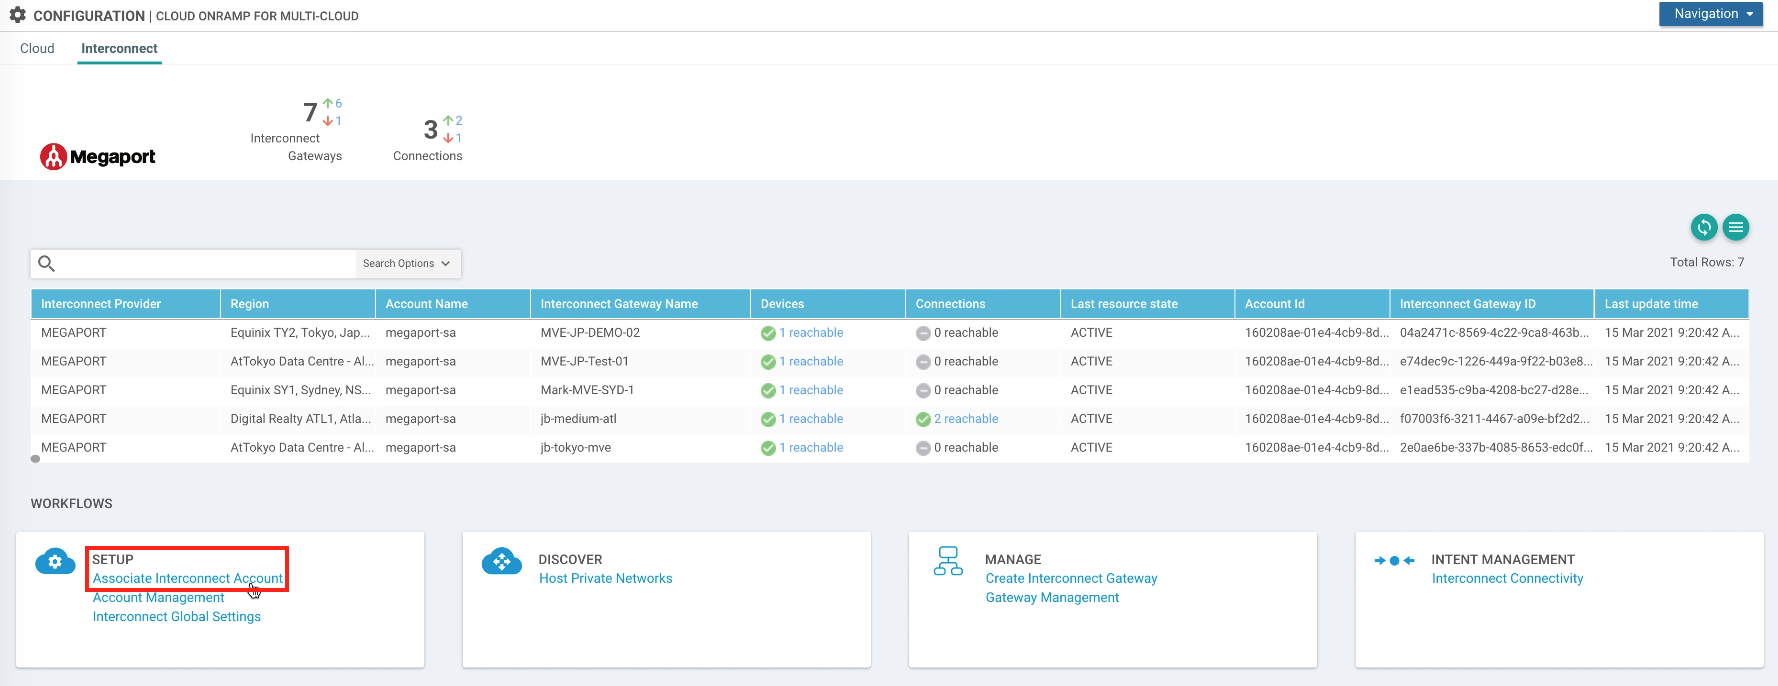
- Select Configuration > Cloud OnRamp for Multi-Cloud.
- Select the Interconnect tab.
-
Click Associate Interconnect Account.
-
Select Megaport as the interconnect provider.
- Enter an account name.
This name will appear in your vManage console. - (Optional) Enter an account description.
- Enter your Megaport account credentials and click Add.
vManage authenticates the account and saves the account details for later use.
To configure global settings for an interconnect gateway (MVE)
- Select Configuration > Cloud OnRamp for Multi-Cloud.
-
Select the Interconnect tab.
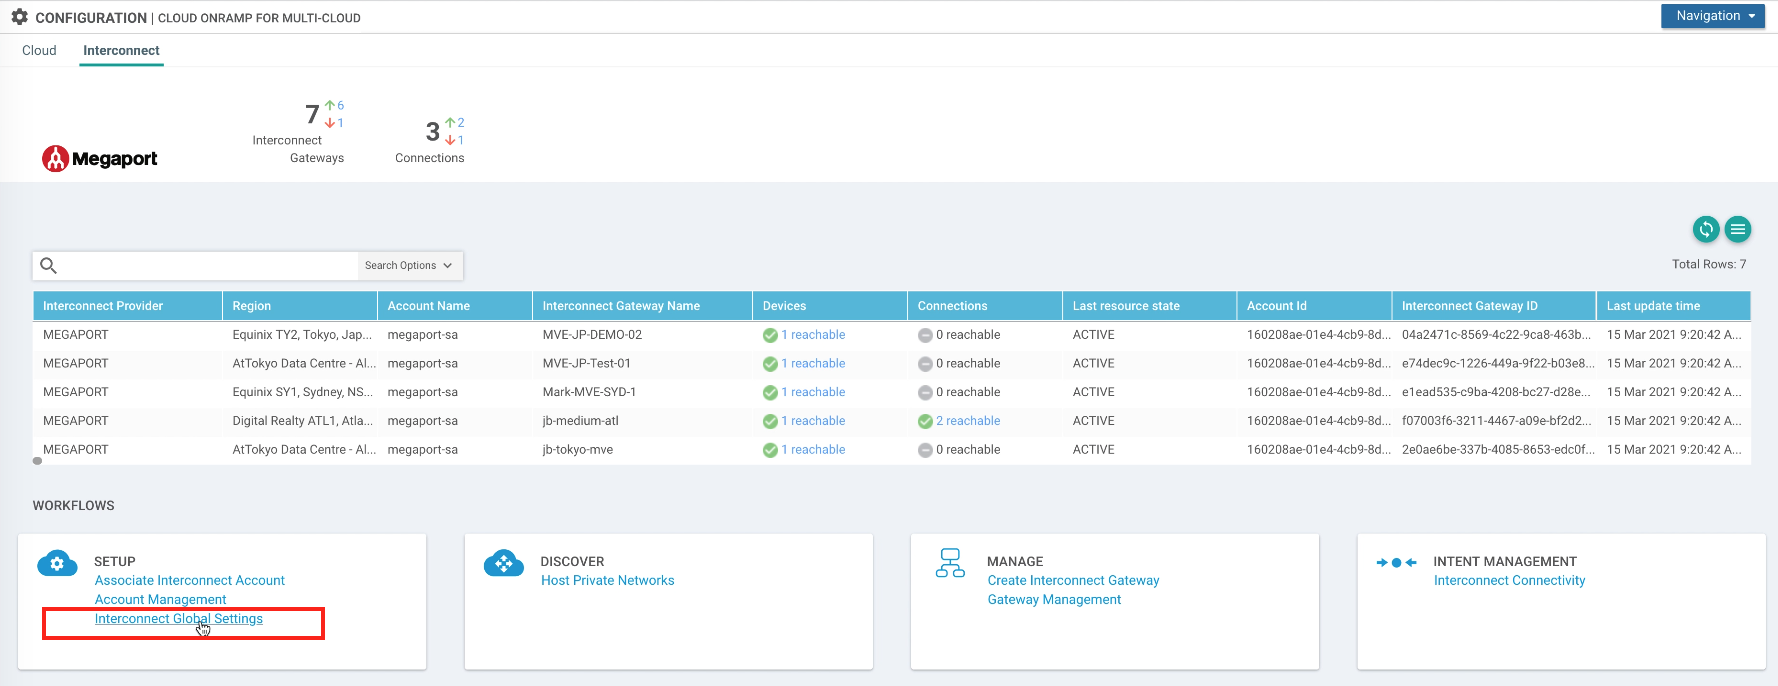
-
Select Interconnect Global Settings and click Edit.
-
Provide these details:
-
Interconnect Provider – Select Megaport.
-
Software Image – Select the correct desired C8000 software version. For example, “C8000v 17.5 0_20210121”.
-
Instance Size – Select a size from the drop-down list: MVE 2/4/500 (aka Small), MVE 4/8/1000 (aka Medium), or MVE 8/16/5000 (aka Large). Three sizes are available to support varying numbers of concurrent connections. Individual partner product metrics vary slightly. For more information, see Planning your Cisco MVE Deployment.
-
Interconnect Transit Color – Select a unique color for your links between the interconnect gateways. A color is a Cisco SD-WAN attribute that identifies the individual WAN transport tunnel. The color can provide restrictions such as VPN and assigns how other branches address the connection.
-
BGP ASN – Enter a BGP autonomous system number (ASN) for cloud peering of your choice. Or, reuse an existing ASN used by your organization.
-
-
Click Update.
The global settings are used as global default settings; however, you can modify global settings during MVE creation.
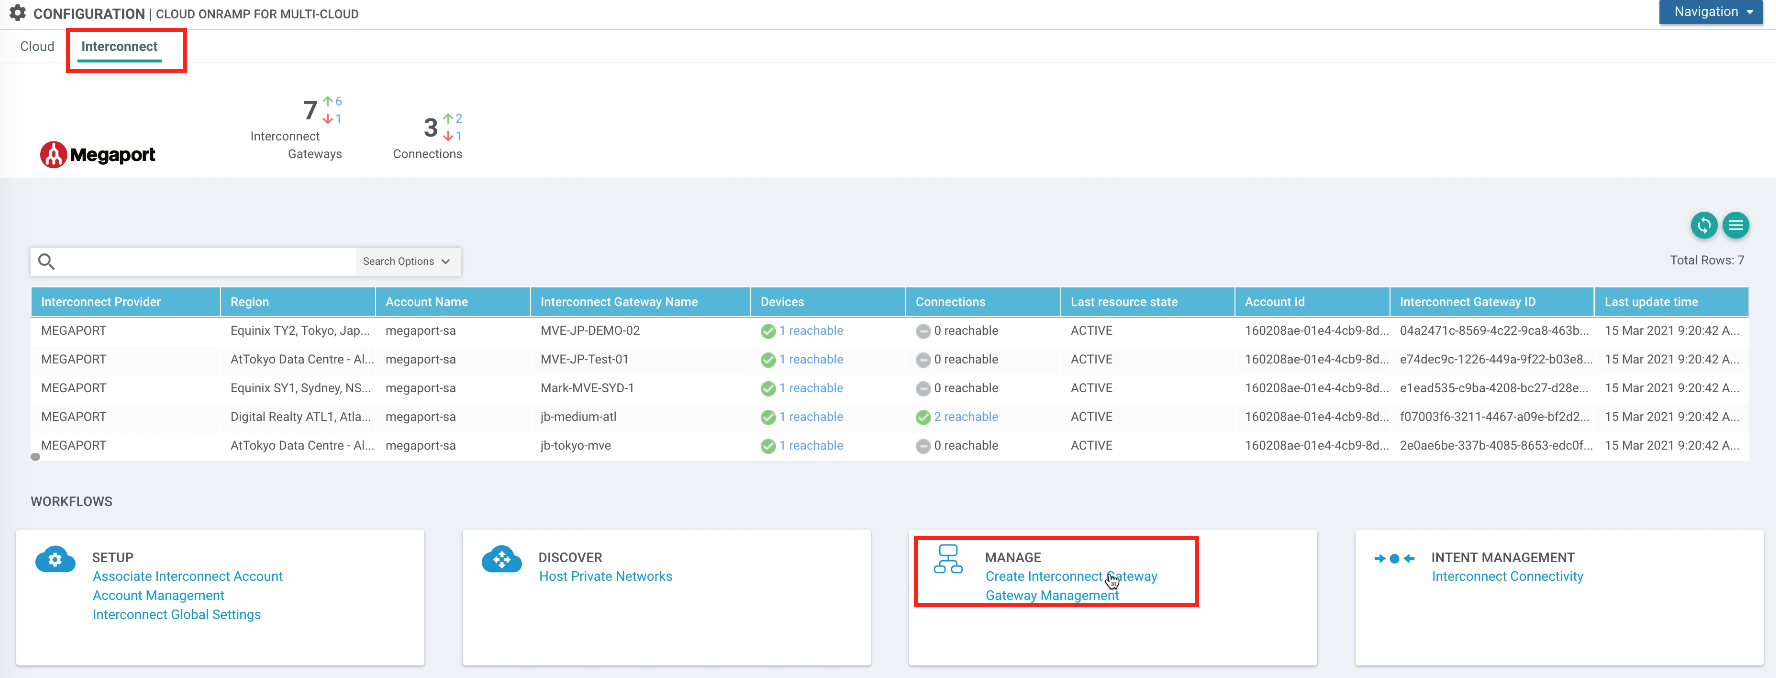
To create the MVE
-
Select Configuration > Cloud OnRamp for Multi-Cloud.
-
Choose Interconnect > Create Interconnect Gateway.
-
Provide these details:
-
Interconnect Provider – Select Megaport.
-
Gateway Name – Enter a unique name for the interconnect gateway (MVE).
-
Description (optional) – Enter a description.
-
Account Name – Select the Megaport account associated with vManage.
-
Location – Select a regionally appropriate location for the interconnect gateway (MVE). For more information, see Planning your Cisco MVE Deployment.
-
UUID – Select the UUID to associate with the interconnect gateway (MVE). This is the device attached to the template. The UUID allocates a license for MVE. If no UUIDs exist, you must first supply a license from your Cisco Smart Licensing account to purchase and attach appropriately sized device instance licenses to your Cisco instance.
-
Setting – Select default to configure the interconnect gateway (MVE) with the default global gateway settings. You can choose custom to adjust the size of the gateway instance.
-
-
Click Add.
Cisco creates the interconnect gateway (MVE). It can take from one to two minutes for the MVE instance to boot up and start the phone-home operation, and another two to five minutes to push the configuration and establish the BGP peering and tunnels. Once the process is complete, the status shows Success.
Viewing the MVE in the Megaport Portal
After creating the MVE in vManage, you can view it in the Megaport Portal.
To view an MVE in the Megaport Portal
- Go to the Services page.
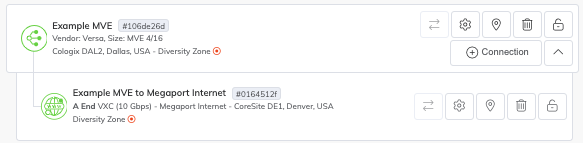
Important
As part of the MVE provisioning, Cisco creates a Megaport Internet connection to provide connectivity and to allow MVE to register and communicate with the SD-WAN overlay network. The overlay network is created and maintained by Cisco SD-WAN to provide secure tunnels from the branch locations. The Megaport Internet size is based on the size of the MVE. The Megaport Internet icon differs from a standard VXC icon in the Megaport Portal, as shown in the image.
Viewing the interconnect gateway in vManage
After creating the interconnect gateway, you can monitor the status in vManage.
To view an interconnect gateway in vManage
- Go to vManage > Monitor > Network.
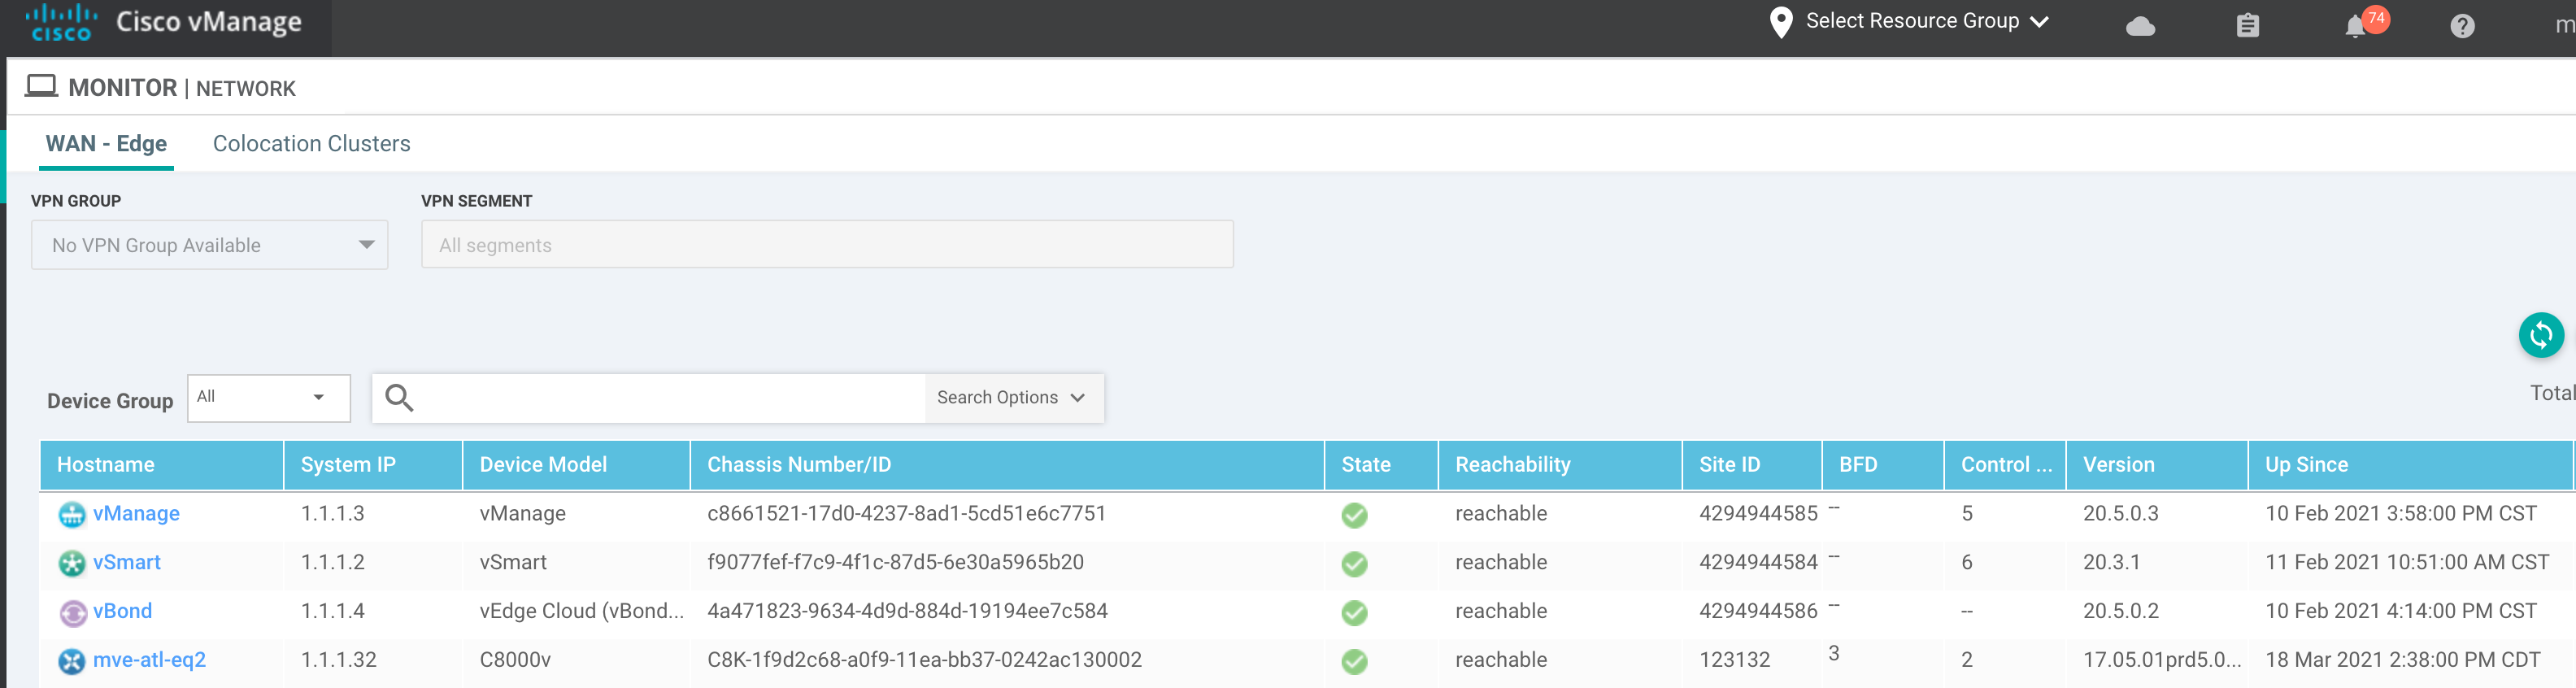
Once the MVE is provisioned with an Active status, the next step is to create VXCs to connect the Megaport network to other MVEs or cloud service providers.
For more information, see Creating a VXC to an MVE Integrated with Cisco.
Deleting an MVE
You can terminate an MVE directly from vManage.
To delete an interconnect gateway (MVE)
-
Select Configuration > Cloud OnRamp for Multi-Cloud.
-
Choose Interconnect.
-
Select Gateway Management.
-
Select the interconnect gateway and click the ellipsis (…).
-
Select Delete.