Creating MVE Connections to Any Endpoint with Aruba EdgeConnect SD-WAN
This topic describes the general steps to configure and deploy a Megaport VXC connection in the Megaport Portal and integrate it with an MVE in Aruba EdgeConnect SD-WAN. The VXC can connect to a Cloud Service Provider, a Port, or an MCR.
Step 1 – Create an MVE
- Create an MVE in the Megaport Portal.
For more information, see Creating an MVE. The MVE needs to be in the active state.
Step 2 – Create a VXC from the MVE
- In the Megaport Portal, select the MVE created in Step 1.
- Create a VXC to another MVE, a Port, or Cloud Service Provider.
For more information, see Creating a VXC. Ensure both ends of the connection are active and have BGP configured. - In the connection details, note the A-End VLAN.
Step 3 – Collect these values for the connection
- MVE IP address
- MVE VLAN (A-End)
- MVE ASN
- Cloud/B-End IP address
- B-End ASN
- MD5 Password
Step 4 – Create an interface in Aruba Orchestrator
-
Log in to Aruba Orchestrator.
-
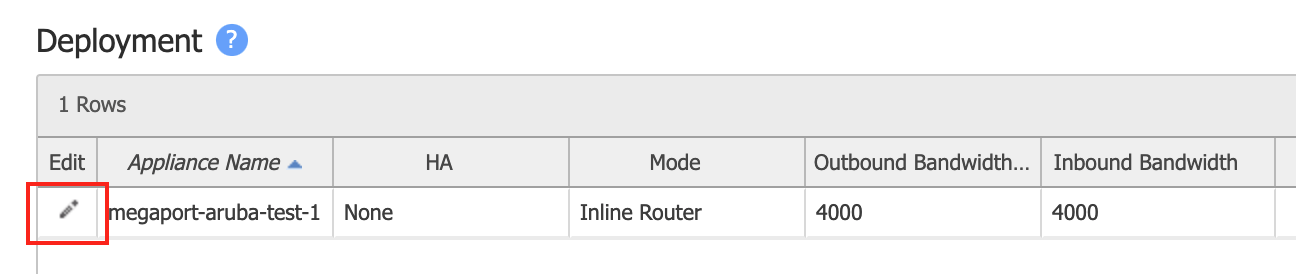
Go to Configuration > Networking | Deployment.
-
Locate the appliance by the hostname and click the Edit (pencil) icon.
-
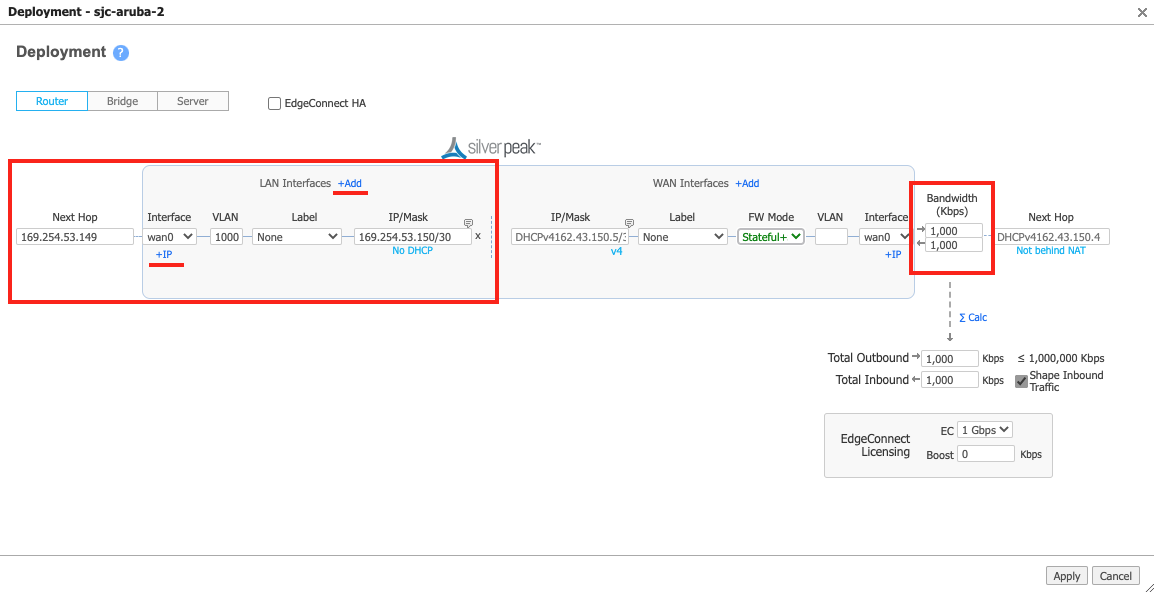
If you do not have a wan0 LAN side interface: Click +Add next to LAN Interfaces and in the Interface drop-down menu, choose wan0.
If you already have a wan0 LAN interface, click +IP to add a new configuration.
-
In the VLAN field, enter the A-End VLAN for the connection.
- (Optional) Select a preconfigured Label or select None.
- In the IP/Mask field, enter the IP address and mask for the MVE side of the connection.
-
For the Next Hop, enter the IP address for the B-End side of the connection.
-
Specify in and out bandwidth values.
The bandwidth must be equal to or less than the MVE bandwidth limit.
This image shows sample configuration values.
-
Click Apply.
-
If prompted, reboot the appliance.
A reboot is required only when adding the first LAN interface, as the system switches the appliance from server mode to router mode.
Once the device is reachable from Orchestrator, you can configure a BGP session.
- In Orchestrator, go to Configuration > Networking | Routing | BGP.
- Click the Edit (pencil) icon for the appliance.
- Move the slider to Enable BGP.
-
Provide the local AS number.
This is the MVE ASN.
-
In the Router ID field, enter the loopback 0 IP specified during the initial acceptance of the appliance or another system IP, as required by your network.
You can use any IP address on the appliance, such as the interface IP on the MVE side of the VXC or the transit IP address.
-
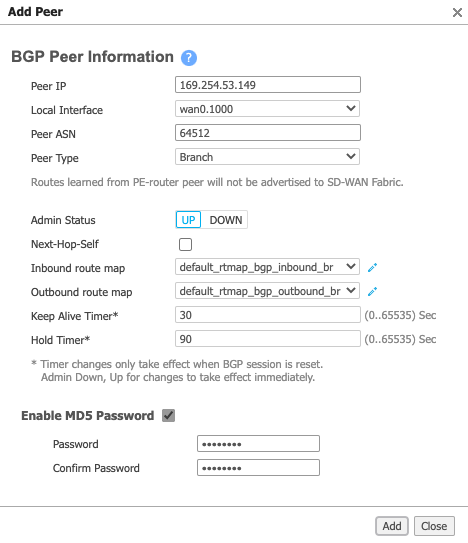
In the BGP Peers section, click Add and provide the following information:
- Peer IP – The IP address of the B-End of the connection (cloud provider, port, or other MVE).
- Local Interface – Choose the newly created LAN interface (the interface is in the format wan0+VLAN).
- Peer ASN – The AS value for the B-End of the connection.
- Peer Type – Choose Branch.
- Enable MD5 Password – If required, select this and then enter and confirm your MD5 password.
-
Click Add.
- Click Apply.
It takes several seconds for the configuration to be pushed to the appliance.
Step 5 – Validating your connection
You can review appliance status, including the connection state, from the Monitoring tab in Orchestrator.
When successful, the Peer State indicates Established:

You can review connection details, including the connection state, from the Aruba (Silver Peak) CLI with these commands:
show interface wan0.<subinterface id>– Displays configuration details and current status for the appliances.show bgp neighborsorshow bgp summary– Displays configuration details and current status for the BGP neighbors.
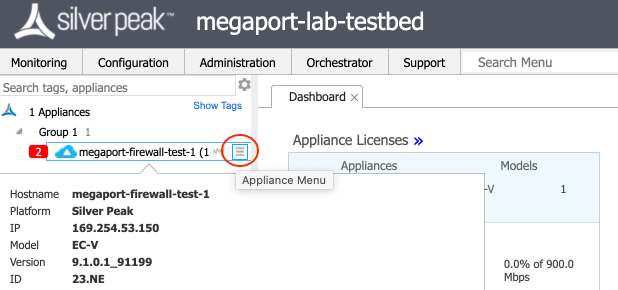
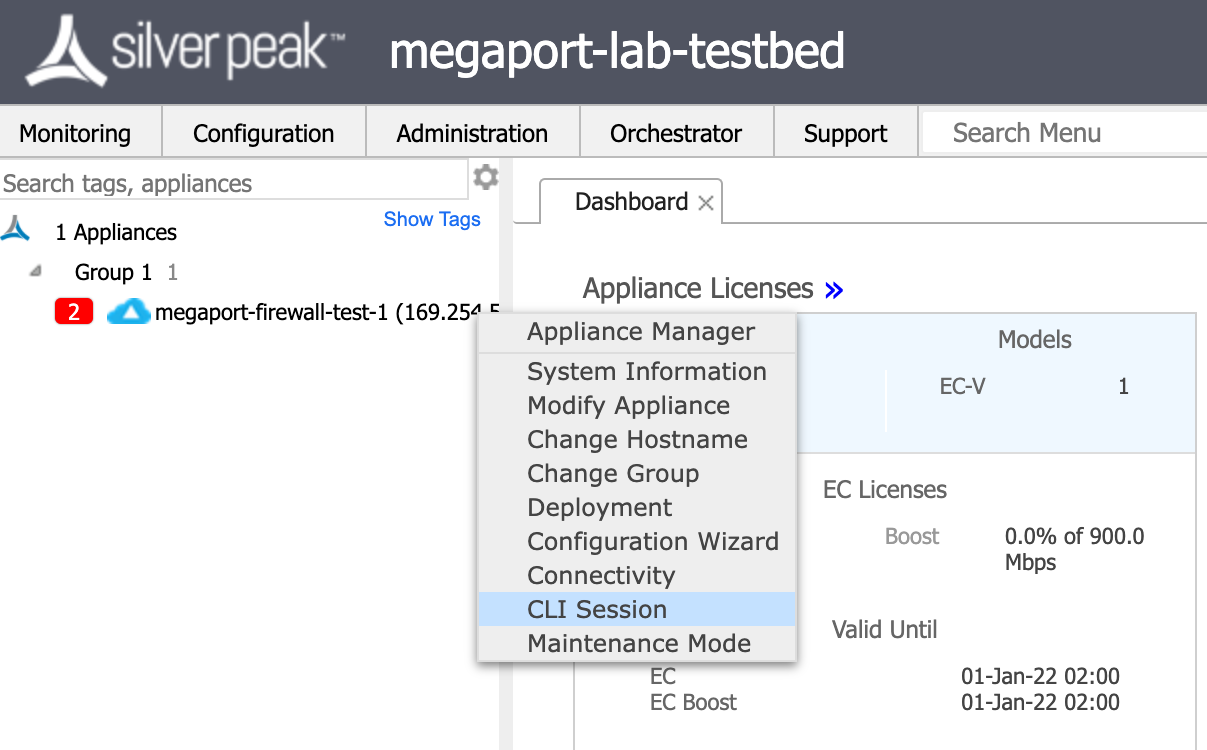
To start a CLI session from Orchestrator
-
In Orchestrator, use the mouse to hover over the appliance and click the Appliance Menu icon to the right of the appliance name.
-
Choose CLI Session from the menu.
-
Enter enable mode to use the recommended CLI commands to display configuration details.