Creating a Megaport Object Storage Connection
This topic describes how to create a Megaport Object Storage connection from a Port, MCR, MVE, or NAT Gateway in the Megaport Portal.
Before you begin
Before creating a connection you need:
- Object Storage provisioned in the Latitude.sh Portal.
For more information, see Latitude.sh Object Storage. - A Port, MCR, MVE, or NAT Gateway provisioned in the Megaport Portal.
For more information, see the Quick Start Guide.
Creating a Megaport Object Storage connection
You can create a Megaport Object Storage connection from an existing Port, MCR, MVE, or NAT Gateway at any time.
There are two ways to start:
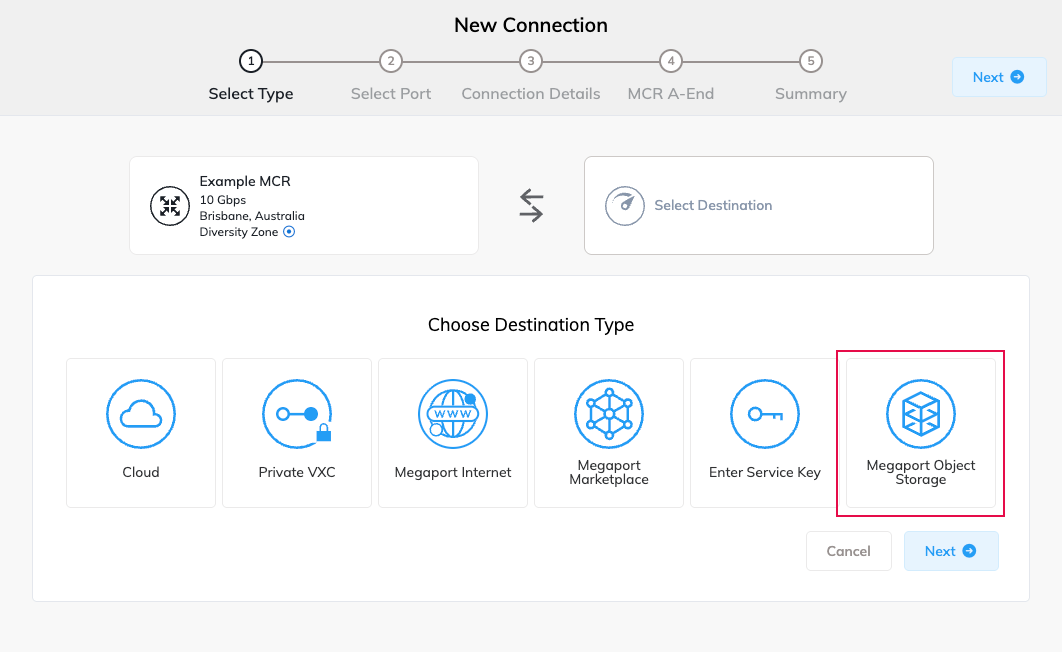
- If this is the first connection for the service, click the Megaport Object Storage tile on the service on the Services page.
- Click +Connection on any Port, MCR, MVE, or NAT Gateway, then select Megaport Object Storage.
To create a Megaport Object Storage connection
-
In the Megaport Portal, go to the Services page and select the Port, MCR, MVE, or NAT Gateway you want to use.
-
Click the Megaport Object Storage tile, or click +Connection and select Megaport Object Storage.
-
Select the storage location.
Select the location where you provisioned your storage in the Latitude.sh Portal. Connecting to a different location will not provide access to your buckets.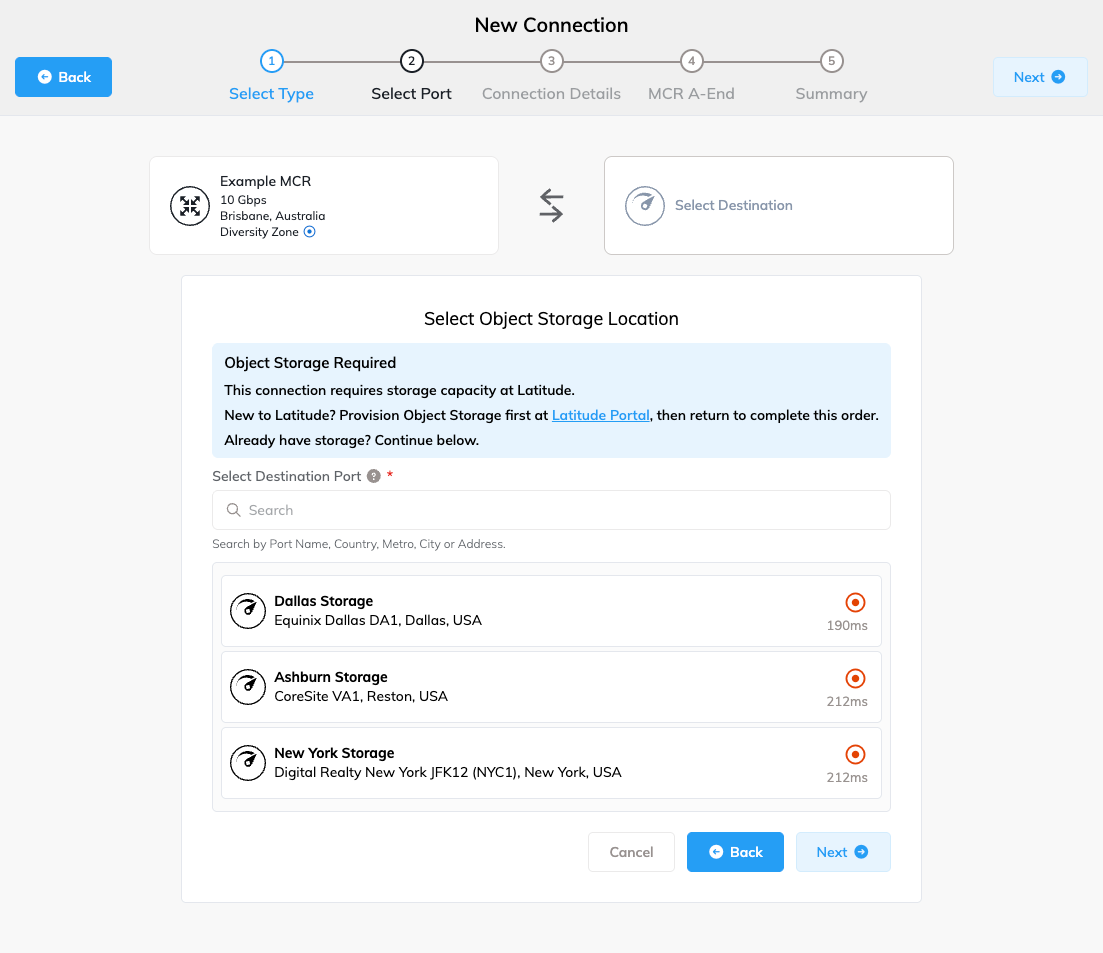
-
Click Next.
-
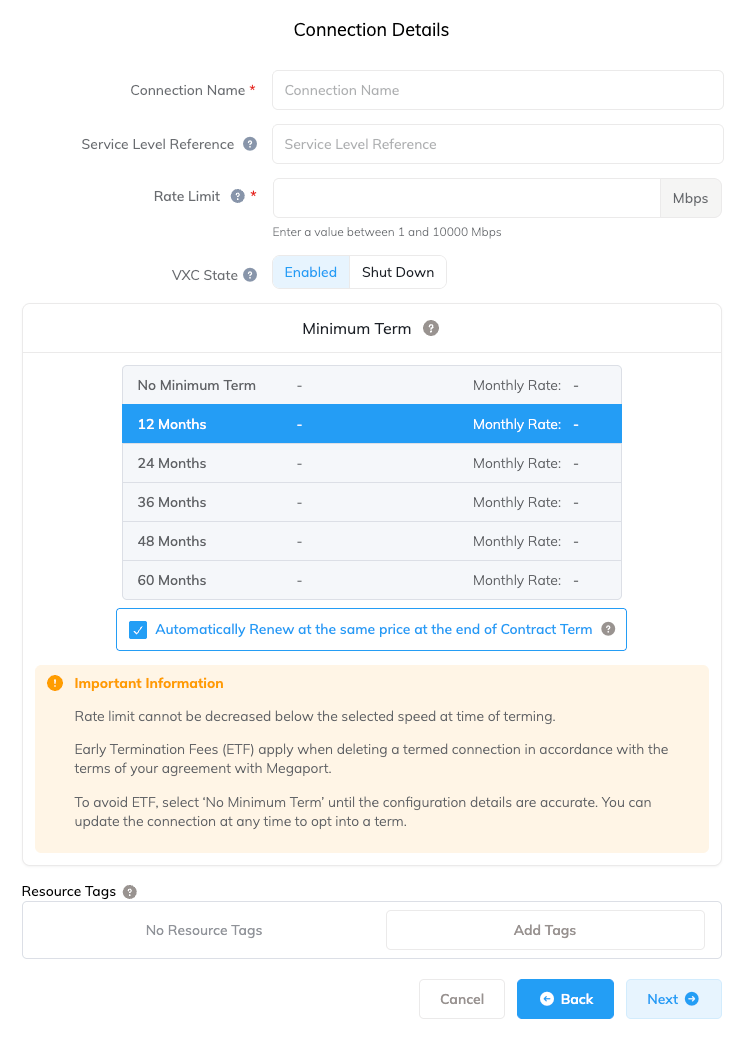
Specify the connection details:
-
Connection Name – The name of your Megaport Object Storage connection to be shown in the Megaport Portal.
-
Service Level Reference (optional) – Specify a unique identifying number for your Megaport service to be used for billing purposes, such as a cost center number, unique customer ID, or purchase order number. The service level reference number appears for each service under the Product section of the invoice. You can also edit this field for an existing service.
-
Rate Limit – The speed of your connection in Mbps. You can adjust this after the connection is created.
-
VXC State – Select Enabled or Shut Down to define the initial state of the connection. For more information, see Shutting Down a VXC for Failover Testing.
Note
If you select Shut Down, traffic will not flow through this service and it will behave as if it was down on the Megaport network. Billing for this service remains active while shut down.
-
Minimum Term – Select No Minimum Term, 12 Months, 24 Months, 36 Months, 48 Months, or 60 Months. Longer terms result in a lower monthly rate. 12 Months is selected by default. Take note of the information on the screen to avoid early termination fees (ETF).
Enable the Minimum Term Renewal option for services with a 12, 24, 36, 48 or 60-month term to automatically renew the contract at the same discounted price and term length at the end of the contract. If you don’t renew the contract, at the end of the term, the contract will automatically roll over to month-to-month contract for the following billing period, at the same price, without term discounts.
For more information, see Megaport Object Storage Pricing and Contract Terms.
-
Resource Tags – You can use resource tags to add your own reference metadata to a Megaport service.
To add a tag:- Click Add Tags.
- Click Add New Tag.
- Enter details into the fields:
- Key – string maximum length 128. Valid values are a-z 0-9 _ : . / \ -
- Value – string maximum length 256. Valid values are a-z A-Z 0-9 _ : . @ / + \ - (space)
- Click Save.
If you already have resource tags for that service, you can manage them by clicking Manage Tags.
Warning
Never include sensitive information in a resource tag. Sensitive information includes commands that return existing tag definitions and information that will identify a person or company.
-
-
Click Next.
-
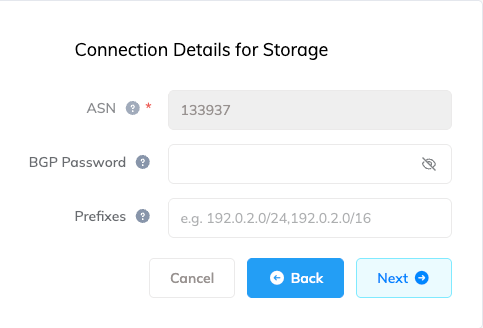
Specify the connection details for the storage:
-
ASN – Specify a private or public ASN. You can also use the default Megaport ASN: 133937.
-
BGP Password (optional) – The shared key to authenticate the BGP peer. A shared key is optional when creating the VXC, but is required to set up the BGP peering. You can add it after you create the VXC. The shared key length is from 1 to 25 characters. The key can include any of these characters:
- a-z
- A-Z
- 0-9
- Special characters: ! @ # . $ % ^ & * + = - _
Tip
Click the eye icon to see the password as you type. The view persists until you click the eye icon again to hide the password.
-
Prefixes (optional) – Specify prefixes to announce to Latitude.sh. You can add up to 20 public IPv4 prefixes. Regional Internet Registry (RIR) assigned IPv4 address ranges only, RFC 1918 addresses are not allowed. Once configured, you cannot add new prefixes to the VXC.
If you do not have public IP ranges, leave the field blank and you can source NAT to the /31 IPs provided by Megaport.
-
-
Click Next.
-
If an A-End Connection Details page appears, click Next.
You can configure the A-End connection details after the service is live.- For more information about configuring the A-End for MCRs, see Configuring an MCR.
- For more information about configuring the A-End for NAT Gateways, see Configuring a NAT Gateway VXC.
-
Confirm the configuration and price, then click Add VXC.
-
Click Review Order.
- Click Order Now to complete the order.
After ordering
Use the endpoint URL and access credentials from the Latitude.sh Portal to connect to your storage using S3-compatible tools.
For more information, see the Latitude.sh Object Storage documentation.