Creating a Google Cloud Services Connection for an MVE with Palo Alto VM-Series
You can create a network connection from an MVE (a Palo Alto VM-Series) to Google Cloud through Partner Interconnect.
When connecting to Google Cloud Platform (GCP) through Partner Interconnect with Megaport, the Virtual Cross Connect (VXC) forms the Layer 2 component of the connection and Layer 3 BGP is established directly between the customer and GCP.
Important
Before you begin, create an MVE (VM-Series firewall). For more information, see Creating an MVE. The MVE needs to be in the active state.
There are three parts to adding a Google Cloud connection to your MVE and VM-Series.
-
Create a Partner Interconnect attachment in Google Cloud Console or gcloud CLI. Copy the pairing key that is provided as part of the attachment creation. For additional details, see the Google documentation on Google Partner Interconnects.
-
In the Megaport Portal, create a VXC from your MVE to connect to your Google Cloud attachment.
-
In VM-Series, create a new interface and add the details of the Google Cloud connection.
These instructions step through the second and third parts.
Note
MVE for Palo Alto VM-Series requires configuration steps in both VM-Series and the Megaport Portal for all cloud connections.
Adding the Google Cloud connection in the Megaport Portal
To set up the GCP connection, you need to create the connection in the Megaport Portal.
To deploy a VXC to Google Cloud Platform from the Megaport Portal
-
In the Megaport Portal, go to the Services page and select the MVE for the connection.
-
Click +Connection and click the Cloud tile.
-
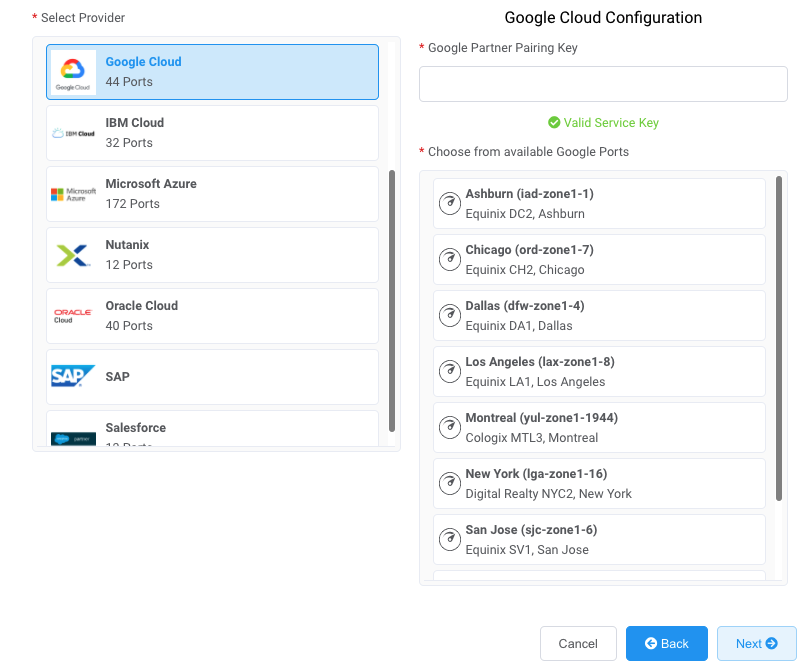
Select Google as the provider.
-
Copy and paste the pairing key from the Google Cloud console into the field in the right-hand pane.
The relevant Google targets appear based on the region of your GCI Partner connection. - Select the target location for your connection and click Next.
-
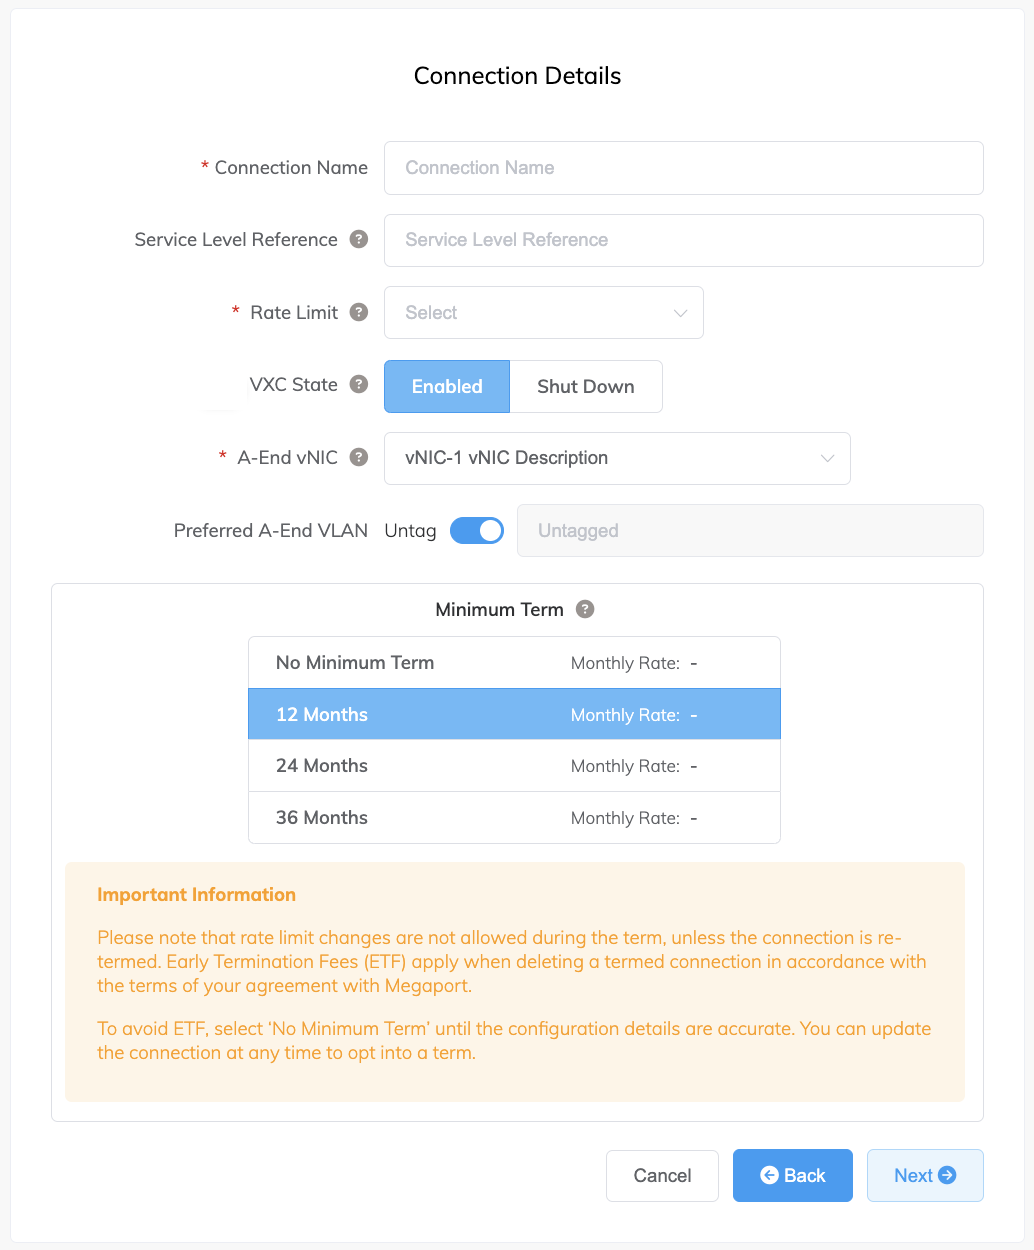
Provide these connection details:
-
Connection Name – The name of your VXC to be shown in the Megaport Portal.
-
Service Level Reference (optional) – Specify a unique identifying number for the VXC to be used for billing purposes, such as a cost center number or a unique customer ID. The service level reference number appears for each service under the Product section of the invoice. You can also edit this field for an existing service.
Note
Partner-managed accounts can apply a Partner Deal to a service. For more information, see Associating a Deal With a Service.
-
Rate Limit – The speed of your connection in Mbps. Enter the same rate you selected for your Google port speed.
-
VXC State – Select Enabled or Shut Down to define the initial state of the connection. For more information, see Shutting Down a VXC for Failover Testing.
Note
If you select Shut Down, traffic will not flow through this service and it will behave as if it was down on the Megaport network. Billing for this service will remain active and you will still be charged for this connection.
-
A-End vNIC – Select an A-End vNIC from the drop-down list. See Creating an MVE in the Megaport Portal for more information about vNICs.
-
Preferred A-End VLAN – The VLAN for this connection that you will receive through the MVE. This must be a unique VLAN ID on this MVE and can range from 2 to 4093. If you specify a VLAN ID that is already in use, the system displays the next available VLAN number. The VLAN ID must be unique to proceed with the order. If you don’t specify a value, Megaport will assign one.
-
Minimum Term – Select No Minimum Term, 12 Months, 24 Months, or 36 Months. Longer terms result in a lower monthly rate. 12 Months is selected by default.
Take note of the information on the screen to avoid early termination fees (ETF). See VXC Pricing and Contract Terms and VXC, Megaport Internet, and IX Billing for more information.
-
-
Add the VXC to your order and complete the checkout process.
-
Once you have deployed the VXC, go back to your attachment in the Google Cloud Console and accept the attachment.
You will be provided your private IP address from Google to configure BGP.
Ensure that you pre-activate the attachment or mark the attachment as active after configuring the VXC. Otherwise, you cannot set up BGP with your SD-WAN instance.
Note
The Google ASN will always be 16550.
Adding the Google Cloud connection to VM-Series
After you create the connection from your MVE to Google Cloud and set up the connection in the Google console, you need to configure it in VM-Series. This involves configuring BGP settings, ASNs, and VLANs.
To add the Google Cloud connection in VM-Series
-
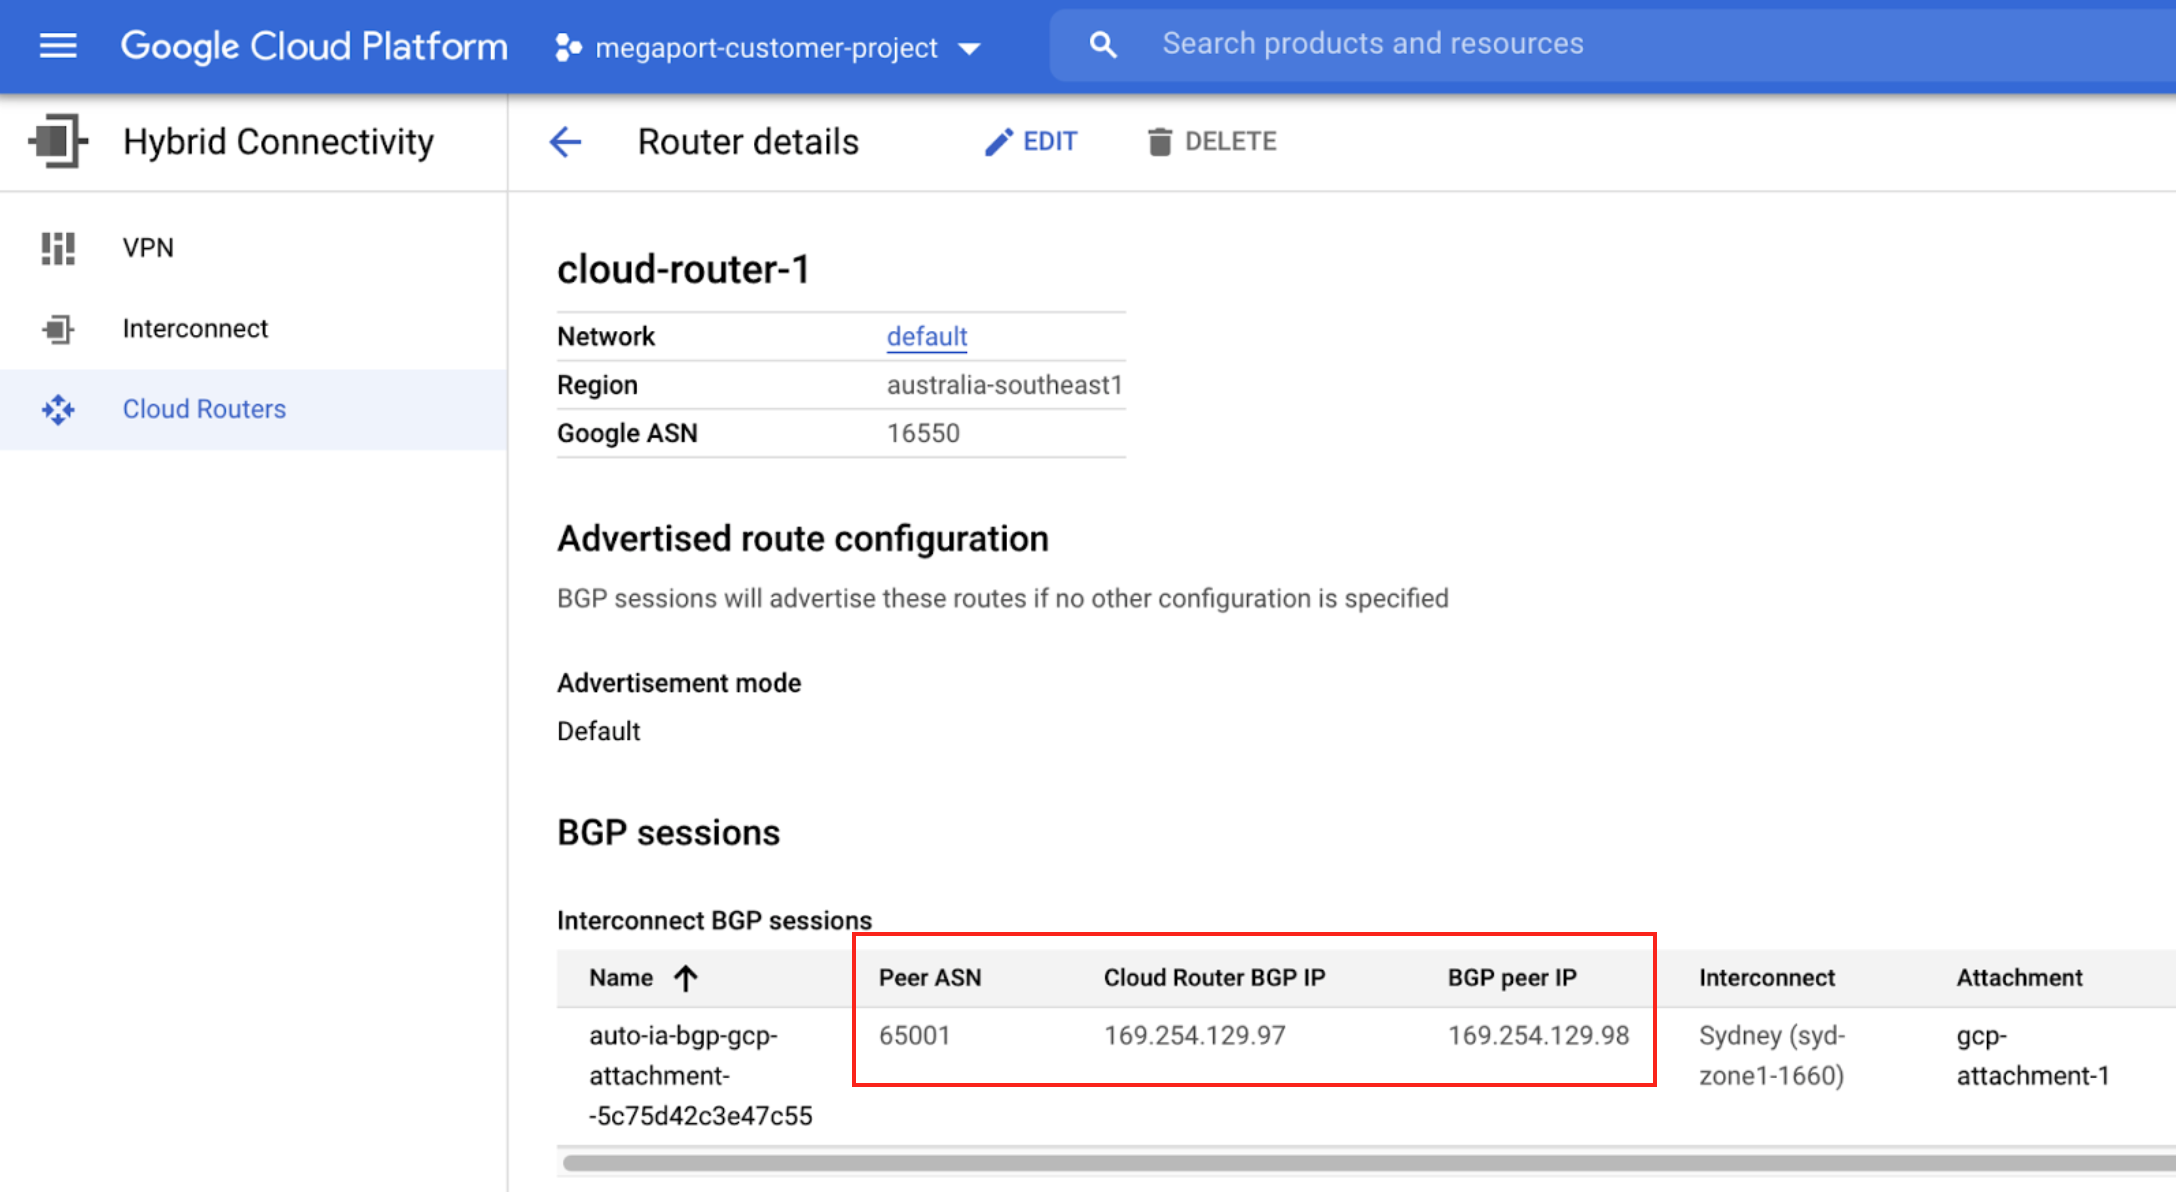
Collect the connection details from the Google console.
Display the details of the connection you created in Google Cloud for this connection. Note the values for the Peer ASN, Cloud Router BGP IP, and BGP Peer ID.
-
Collect the connection details from the Megaport Portal.
Click the gear icon for the Google connection from your MVE and click the Details view. Note the value for the A-End VLAN. -
Log in to the VM-Series.
-
Choose Network > Interfaces.
-
Select the A-End MVE (
ethernet1/1). -
Click Add Subinterface.
-
Provide these details:
-
Interface Name – Enter a name for the subinterface. In the adjacent field, enter a number to identify the subinterface.
-
Comment – Enter an alternate name.
-
Tag – Specify the A-End VLAN associated with this Google Connection in the Megaport Portal.
-
Virtual Router – Select a virtual router to the interface, as required by your network.
-
-
Select the IPv4 tab.
- Select Static as the Type.
- Click +Add to add a new IP address.
- Enter the IPv4 address and netmask.
These values are available in the VLAN attachment details in the Google Cloud console. The IP address appears in the BGP Peer IP field. - Click OK.
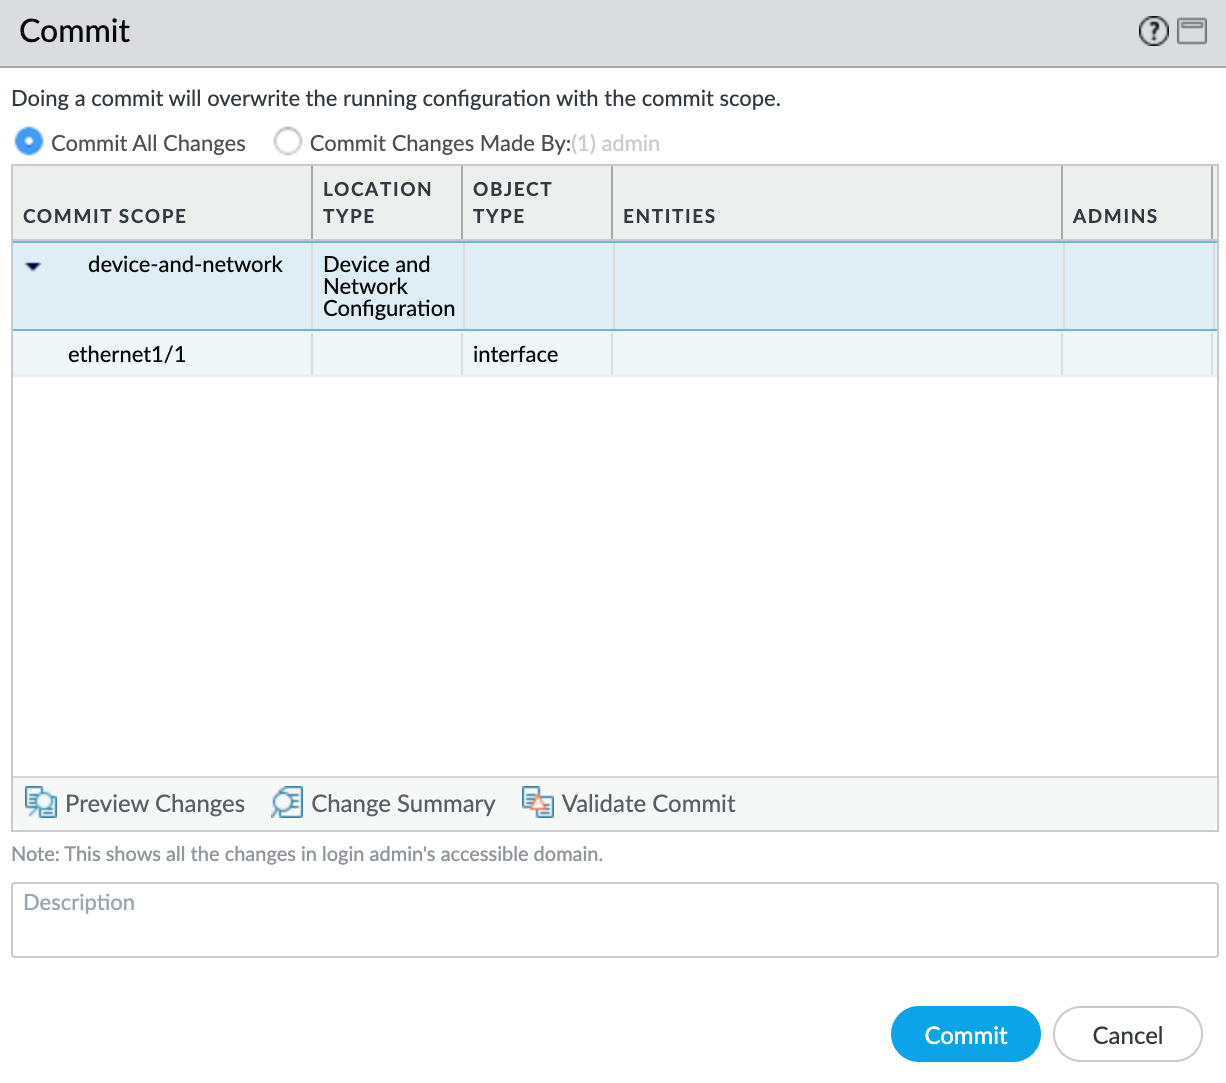
- Click Commit in the top right corner.
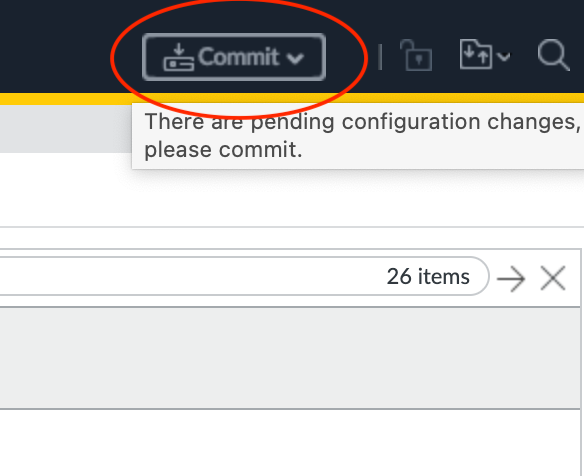
- Review the changes and click Commit.
The new VLAN interface appears with your ethernet1/1 physical interface.
Next, you will create a security zone so the interface can route traffic.
To create a security zone
- Select the
ethernet1/1.1010subinterface. - Select New Zone from the Security Zone drop-down list.
- Specify a name for the security zone.
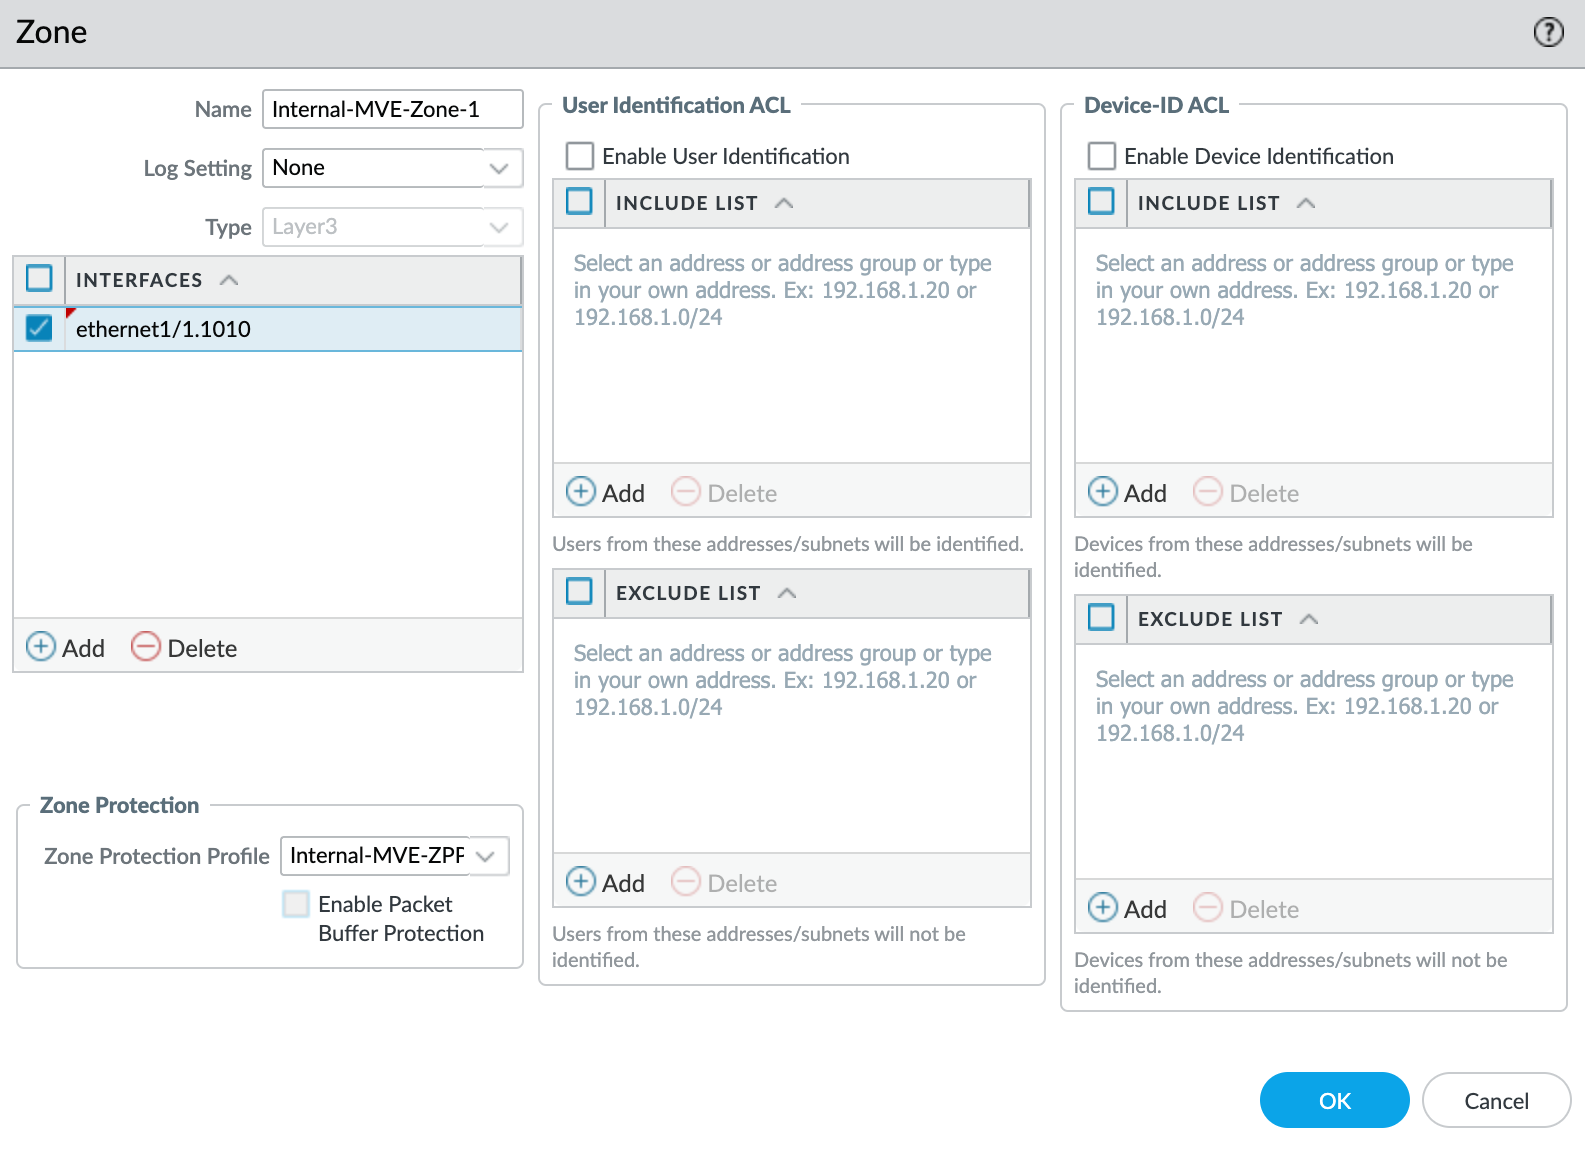
- Click +Add under Interfaces and add
ethernet1/1.1010to the security zone. - Specify any additional details as required for your network security.
- Select New Zone Protection Profile from the Zone Protection Profile drop-down list.
- Specify any details as required for your network security. This example uses all the defaults.

- Click OK.
- Click OK in the Layer3 Subinterface screen.
- Click Commit in the top right corner.
- Review the changes and click Commit.
At this point, you have created the interface. Next, you will create the BGP session.
To create the BGP session
- In VM-Series, choose Network > Virtual Routers.
- Select the virtual router.
- In the left pane, select BGP.
-
Provide the following BGP details:
- Enable – Select this check box to start the BGP session after committing these changes.
- Router ID – Specify the Cloud Router BGP IP from the VLAN attachment details in the Google Cloud console.
- AS Number – Provide the ASN for the MVE connection. Specify the Peer ASN that you defined in the BGP configuration for the VLAN attachment in the Google Cloud console.

-
Click +Add under Auth Profiles.
- Specify a Profile Name.
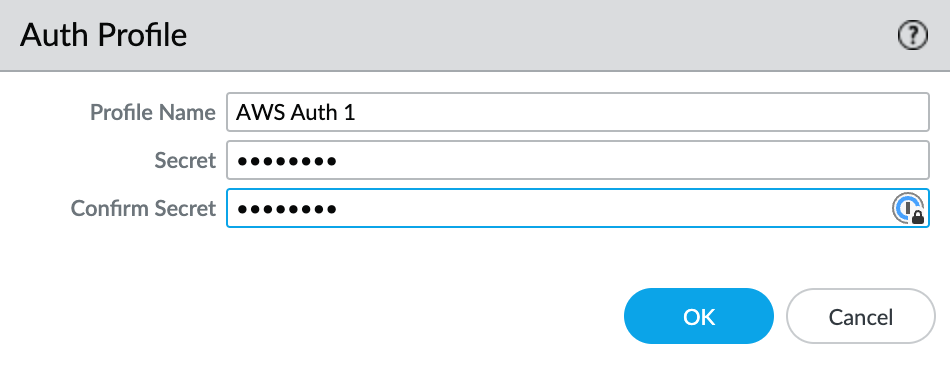
- Enter and confirm the auth password.
- Click OK.
- Select the Peer Group tab.
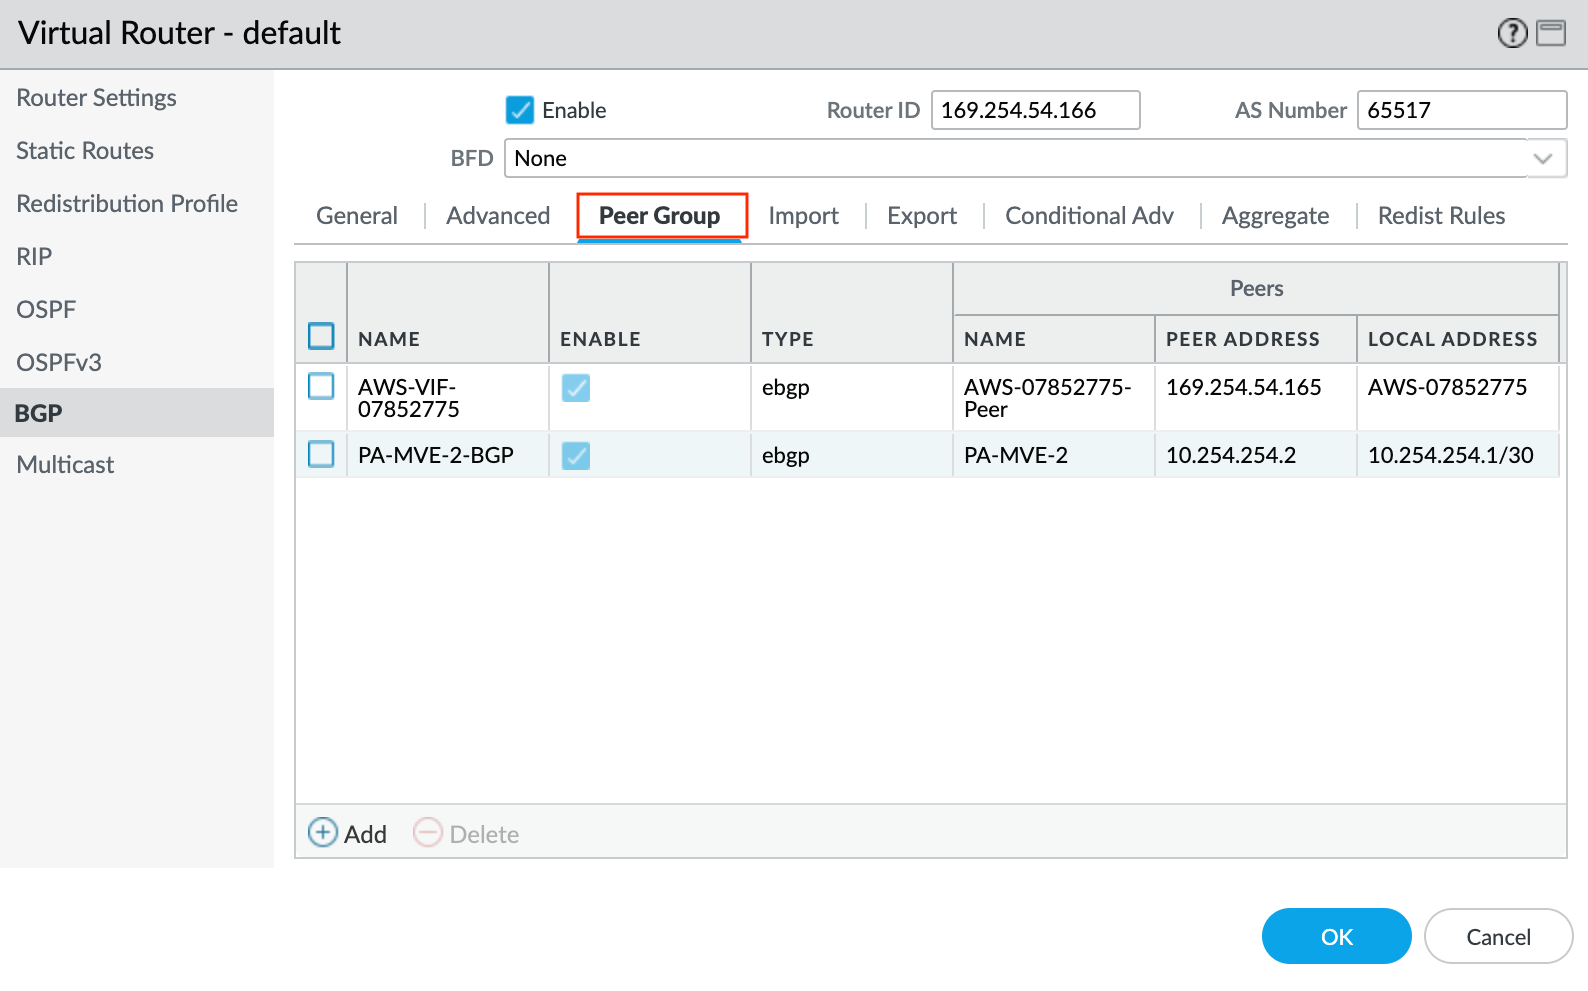
- Click +Add to add a peer group.
- Specify a name for the peer group. For example, AWS-xxxx.
- Specify eBGP as the session type.
- Specify any additional details as required for your network.
- Click +Add to add a new peer.
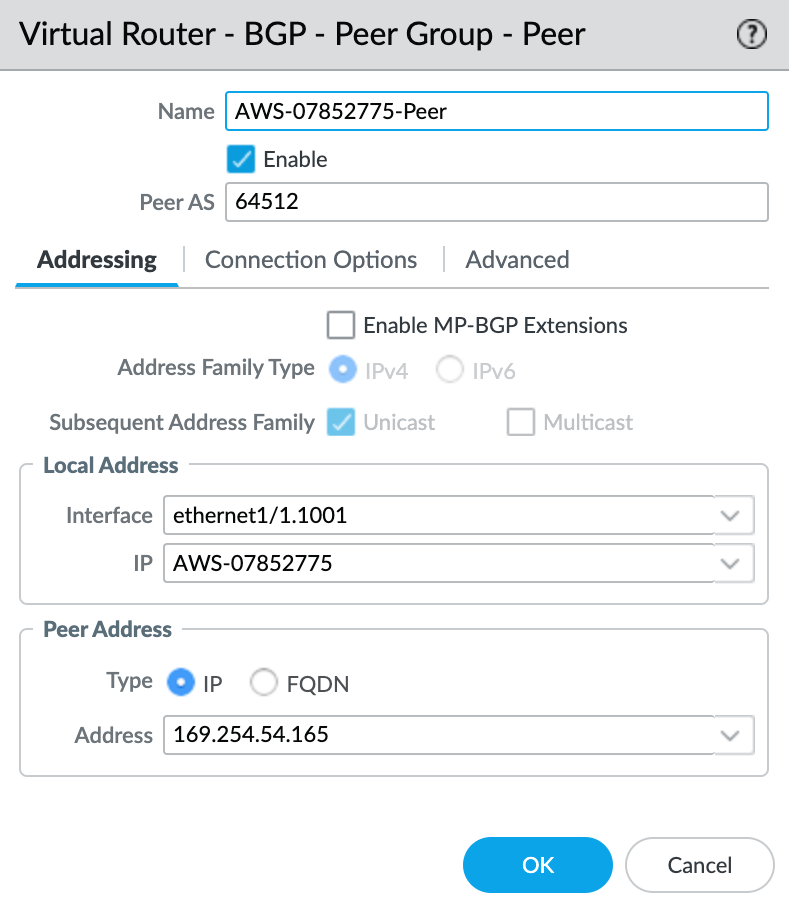
- Specify the details for the peer:
- Name – Specify a name for the peer.
- Peer AS – Specify the Google-side Autonomous System Number (ASN) of 16550. This is a fixed value, and appears in the connection details on the Google console.
- Local Address – Select the proper subinterface and IP address from the drop-down list.
- Peer Address – Enter the Cloud Router BGP IP from the VLAN attachment details in the Google Cloud console.
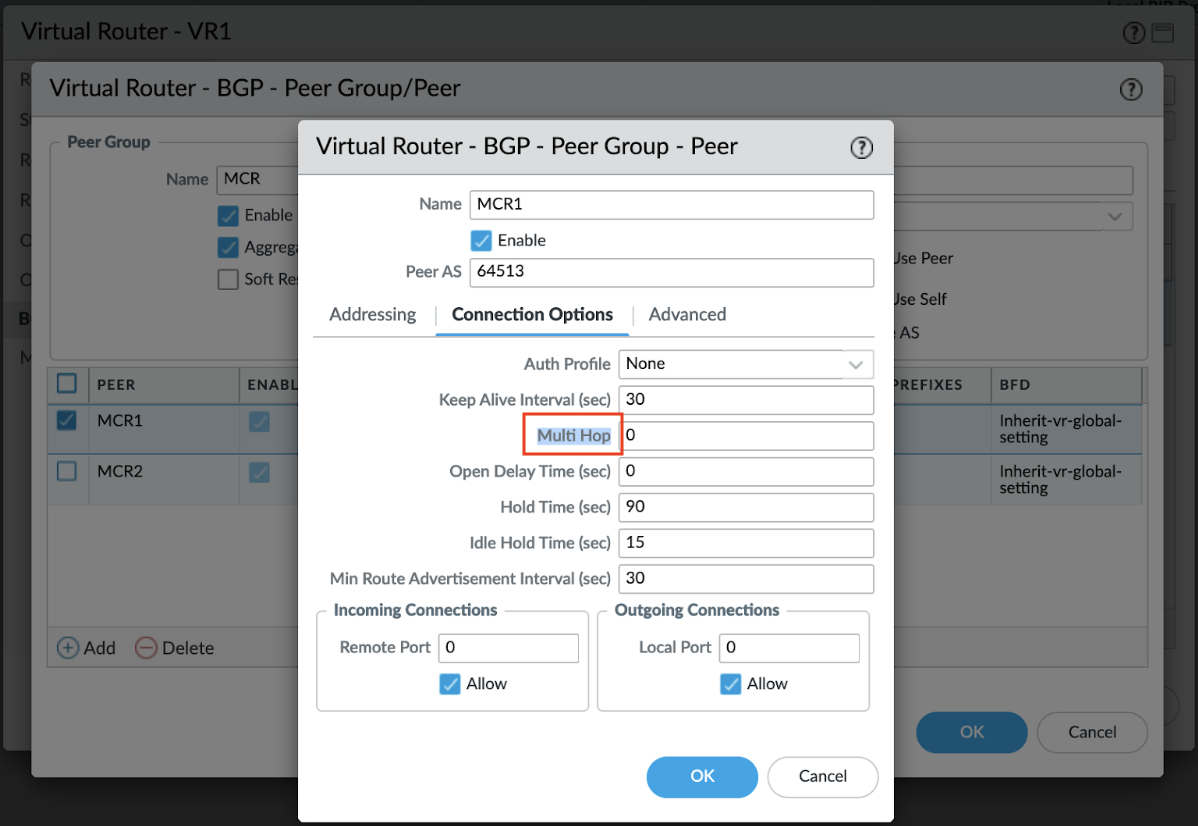
Google Cloud requires BGP multihop support. You can configure multihop support from VM-Series, in the Connection Options tab of the BGP peer:
Validating your Google Cloud connection
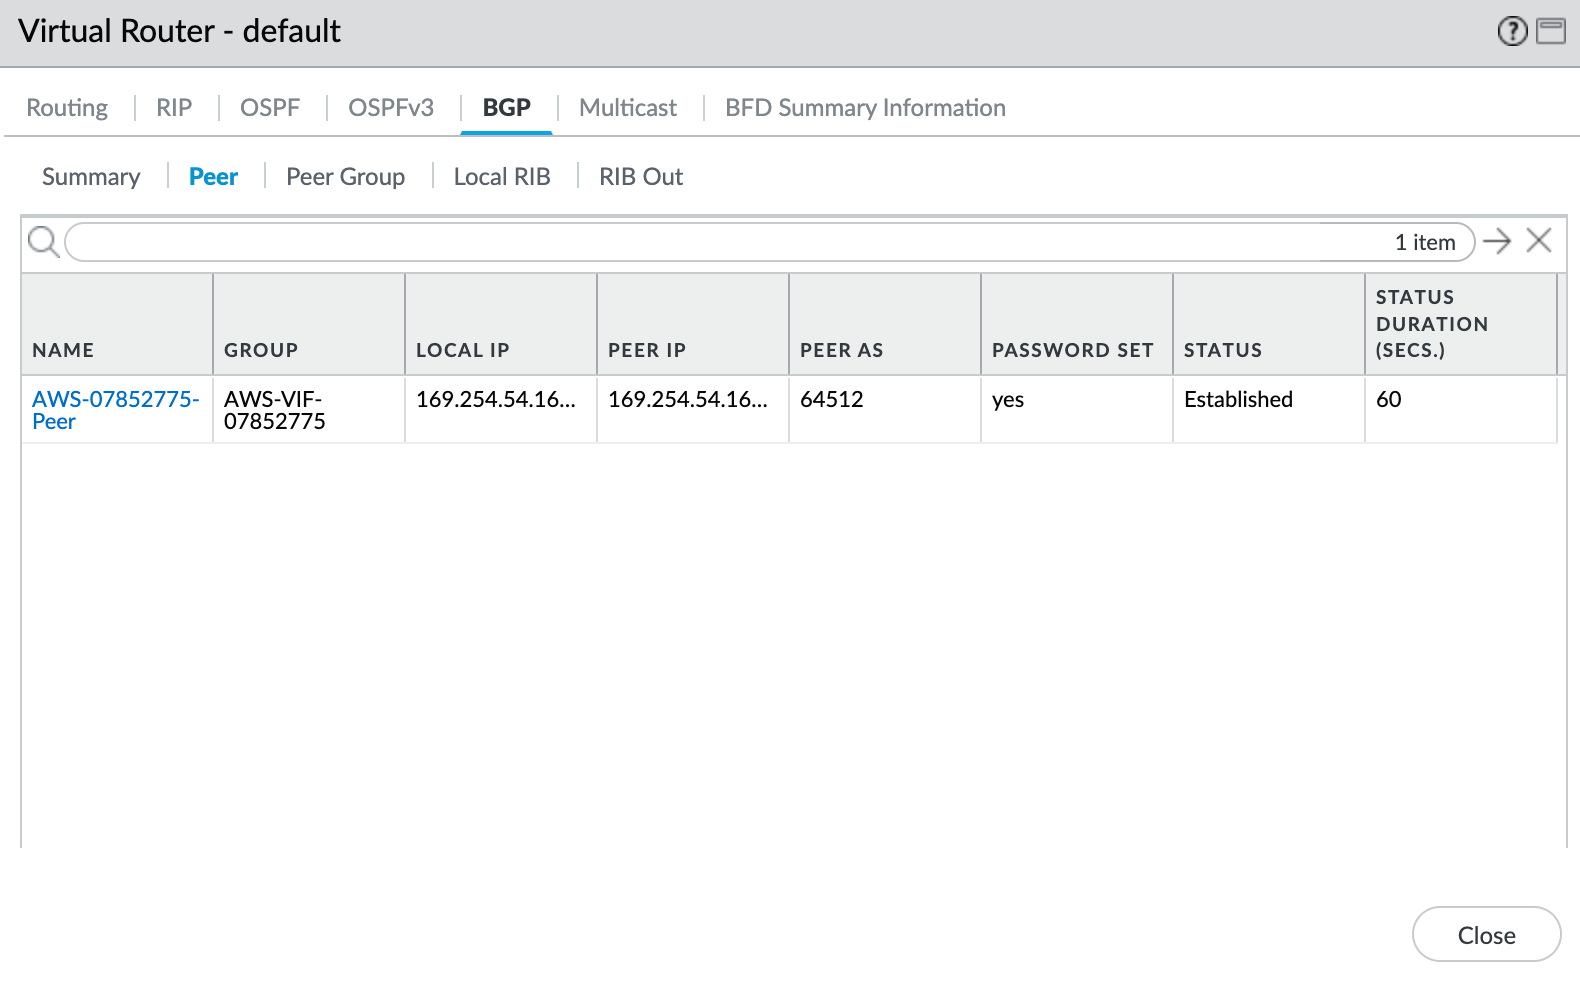
To check the status of the BGP peer
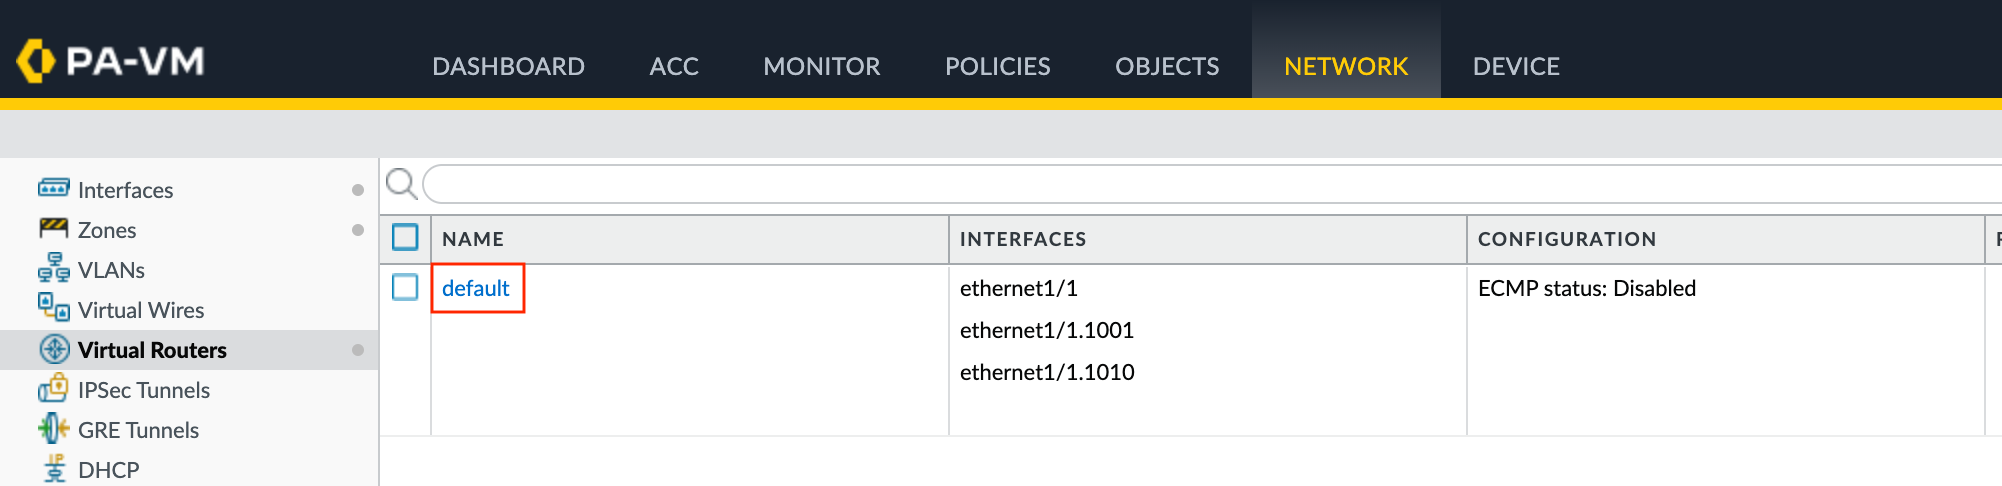
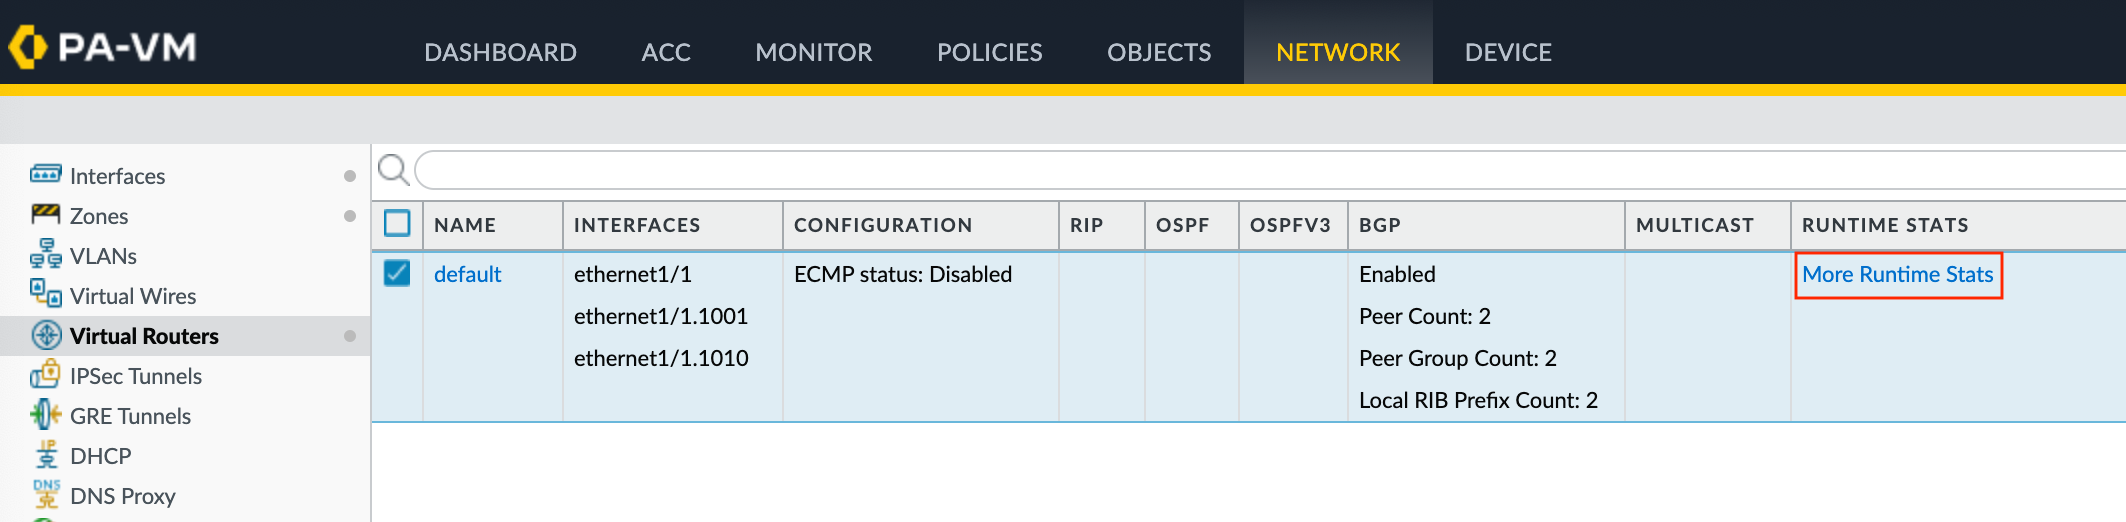
- Choose Network > Virtual Routers.
- Locate your virtual router (default).
- Click More Runtime Stats in the Runtime Stats column on the right.
- Select the BGP tab, and then select the Peer tab.
- Verify that the peer status is Established.